Junno is a Opencart Responsive Theme with advanced admin modules, extremely customizable and fully responsive. It is suitable for every type of store. It is a standalone design package so you can easily create your own sub-themes.
Thank you for purchasing my theme!
If you have any questions that are beyond the scope of this
documentation, please feel free to contact us: PlazaThemes Support.
Thanks so much!
Compatible with Opencart:
Junno Opencart Theme is fully compatible with Opencart 3
Opencart HELP
Junno is theme for Opencart ecommerce platform. Before you start working with theme you should be familiar with Opencart. Please read following links:
Install the demo Quickstart
There are two ways to install an Opencart Theme:
-
Install quickstart : By using this package, you will set the theme exactly as our Demo with sample data.
-
Install only theme : If you exist a opencart website you can install only theme.
Warning! Before uploading theme files on a production environment, make sure you have tested it before on a development environment. Make sure to create a backup of your original files and database before uploading theme files.

Your website front-end with clear image sizes after the QuickStart installation
To install QuickStart package, please follow these guides below:
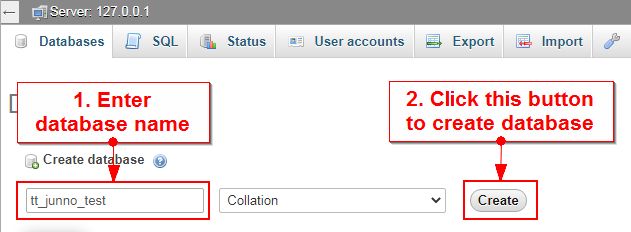
Create new database:
Open your Browser and type : localhost/phpmyadmin or yourdomain/phpmyadmin
-
Then create database
-
Extract and Upload the whole quickstart package (admin, catalog, image … in tt_junno_quickstart folder... ) to your server.
-
Open browser and navigate to your site (where the quickstart uploaded) to load default Opencart installer with the database you just created.
As an example, name of opencart is tt_junno_test.
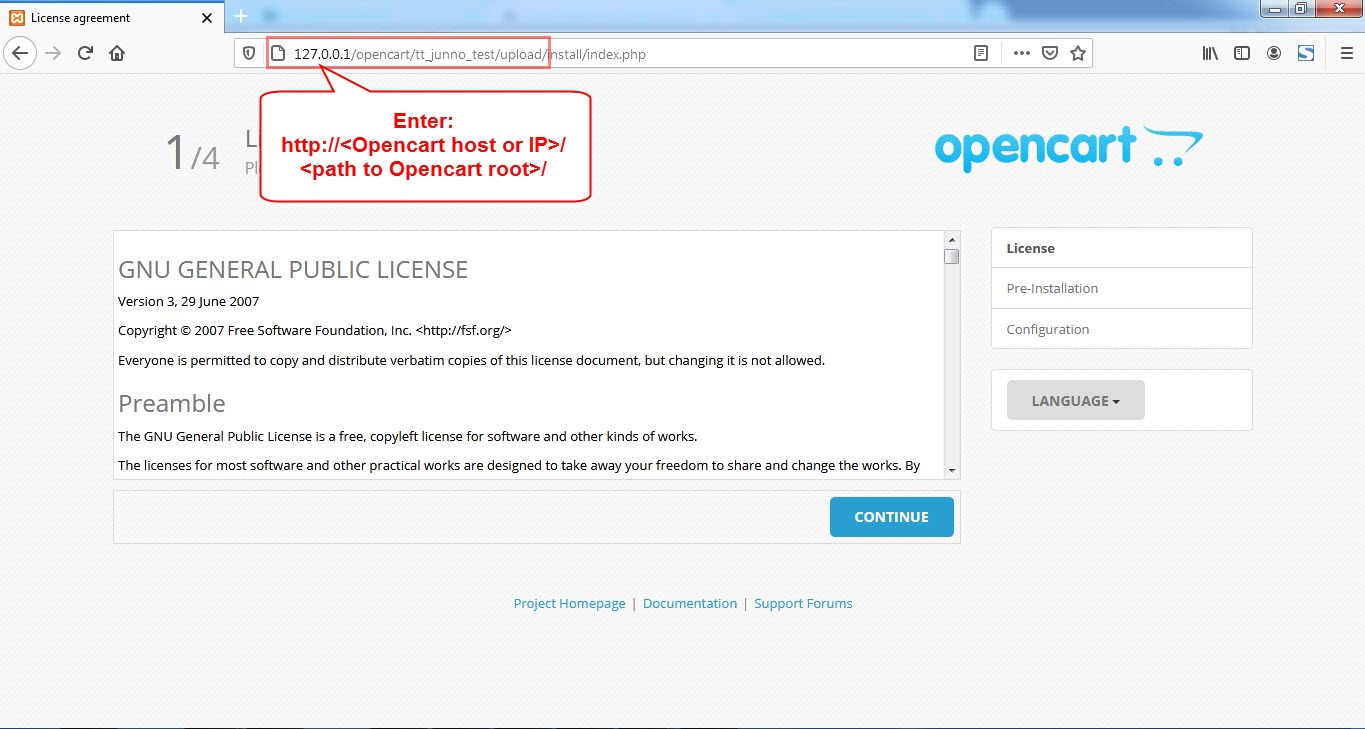
Click Continue button.
-
We got:
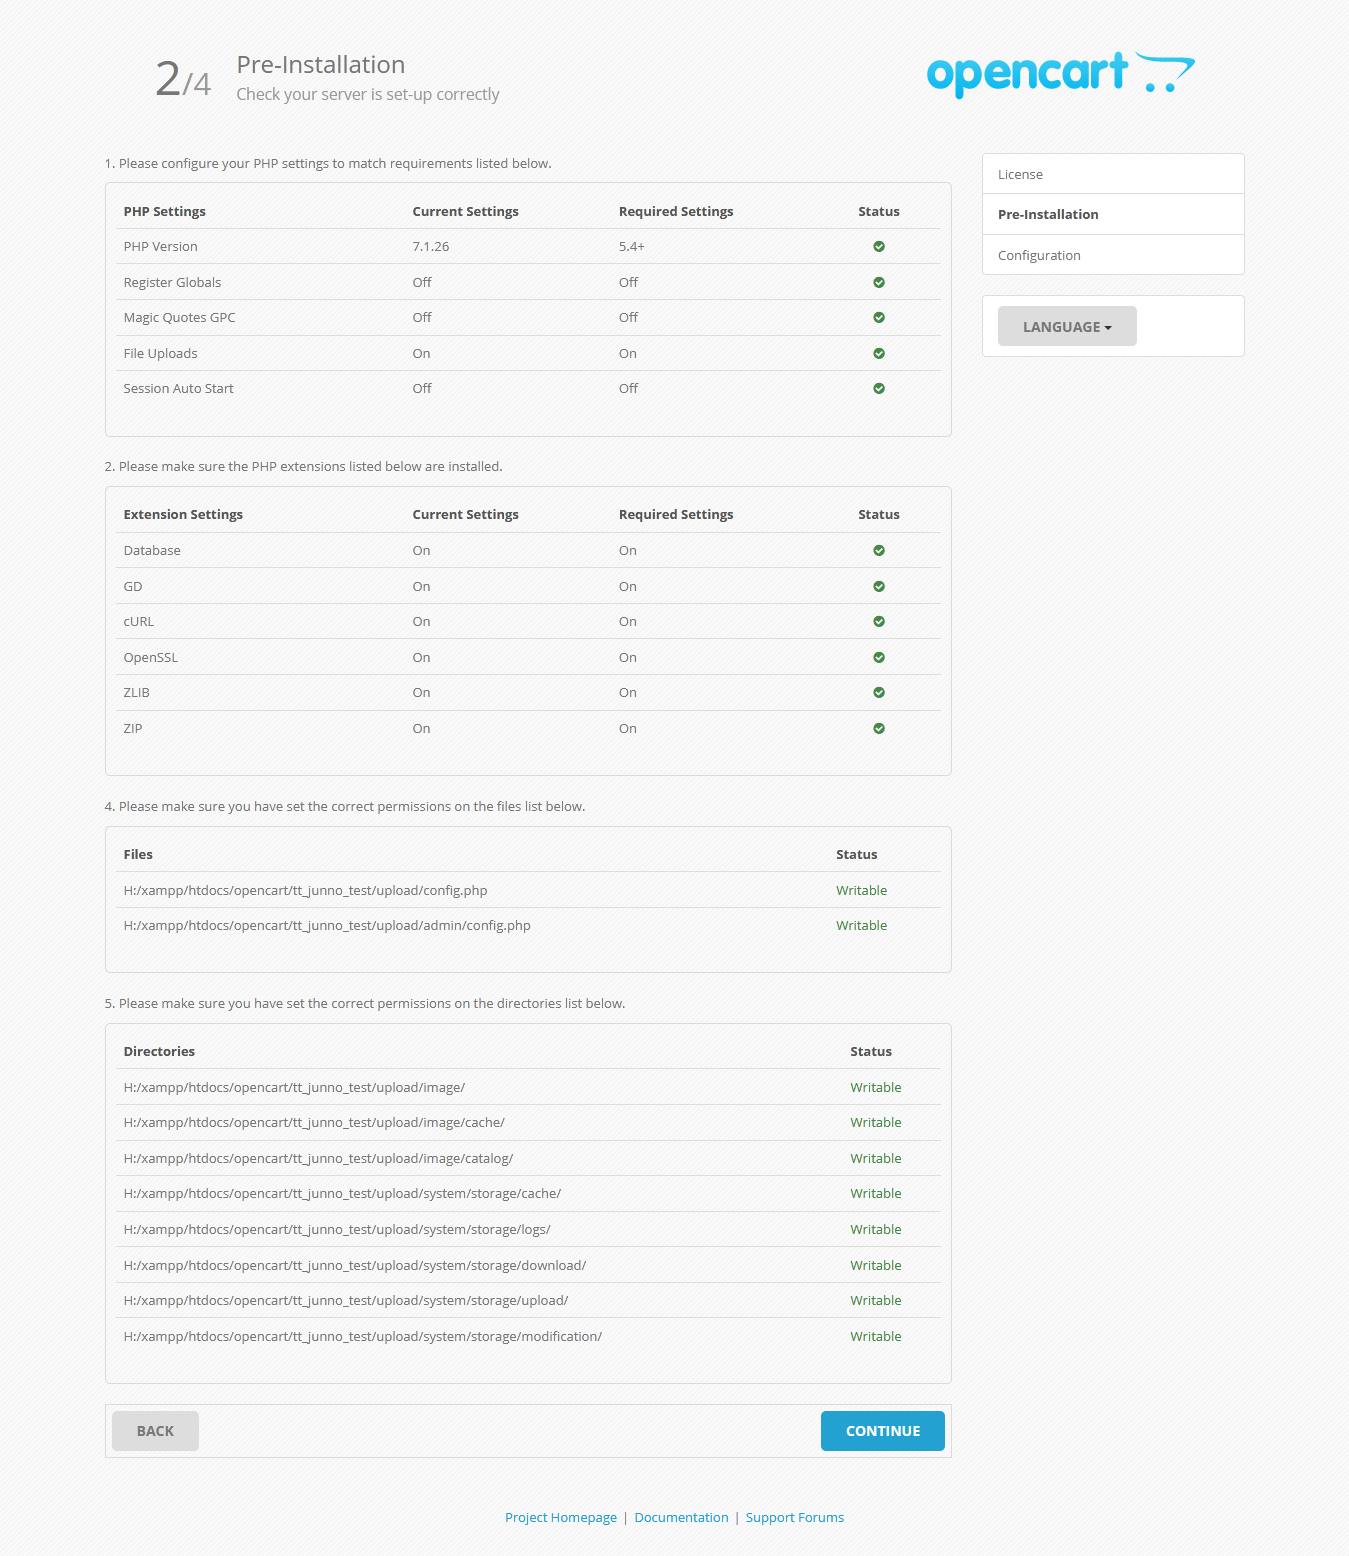
Click Continue.
-
We got:
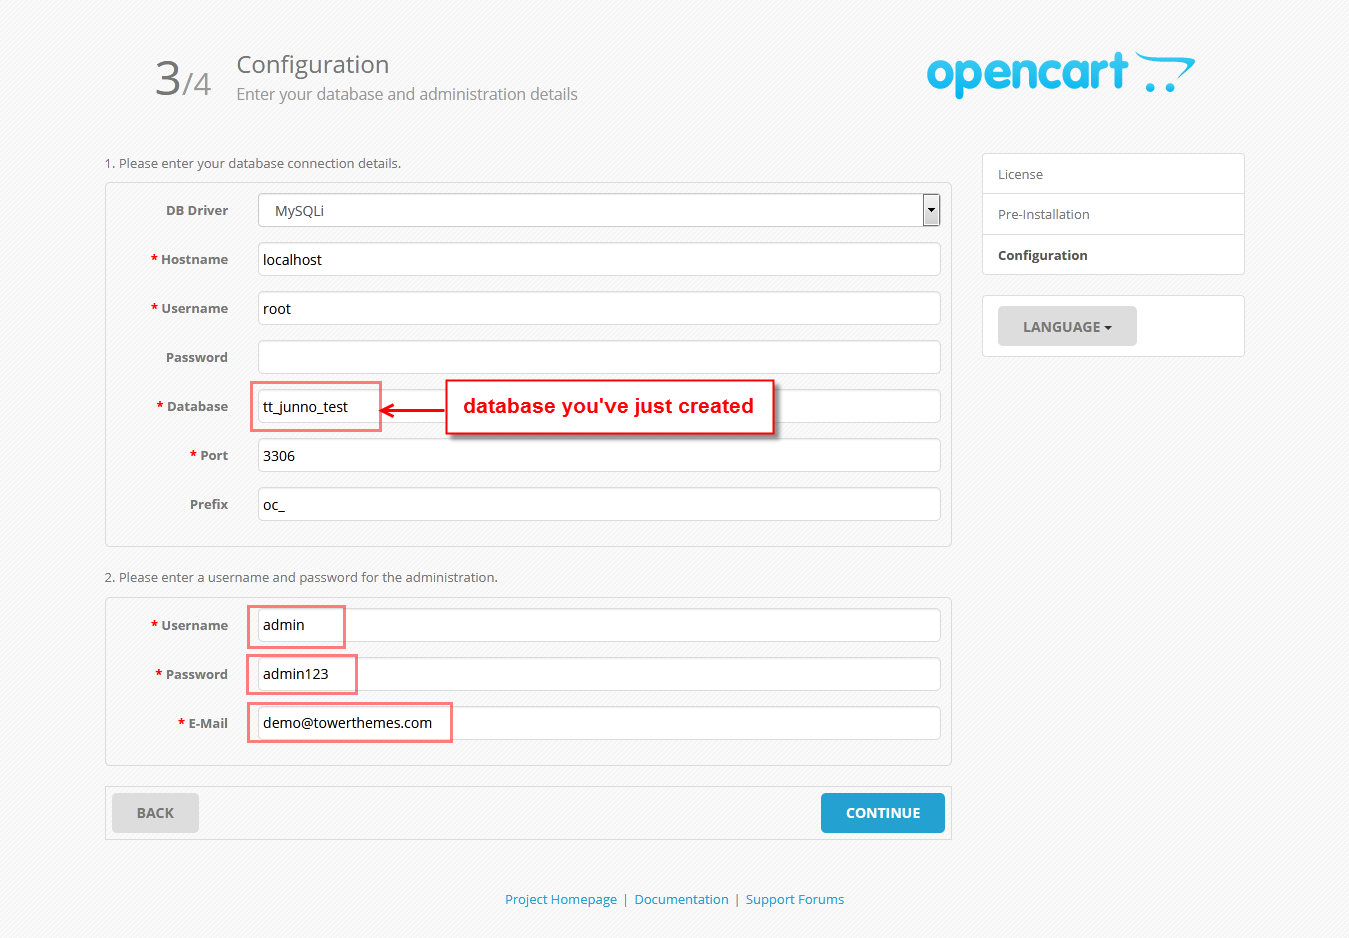
Click Continue.
-
We got:

You need to delete install folder.
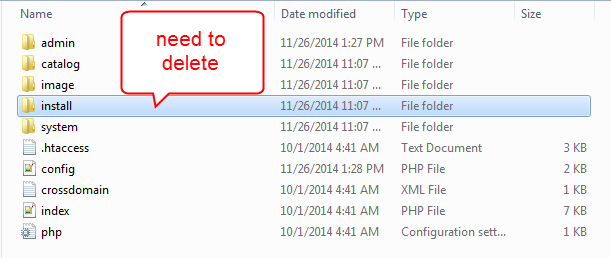
-
Click Go to your online shop to go to frontend
Click Login to your administration to go to backend
Change default home page in the Demo QuickStart
***To change default home page when finish install the Demo QuickStart, please:
- Login your opencart admin and set domain for each store.
- Go to System -> Settings
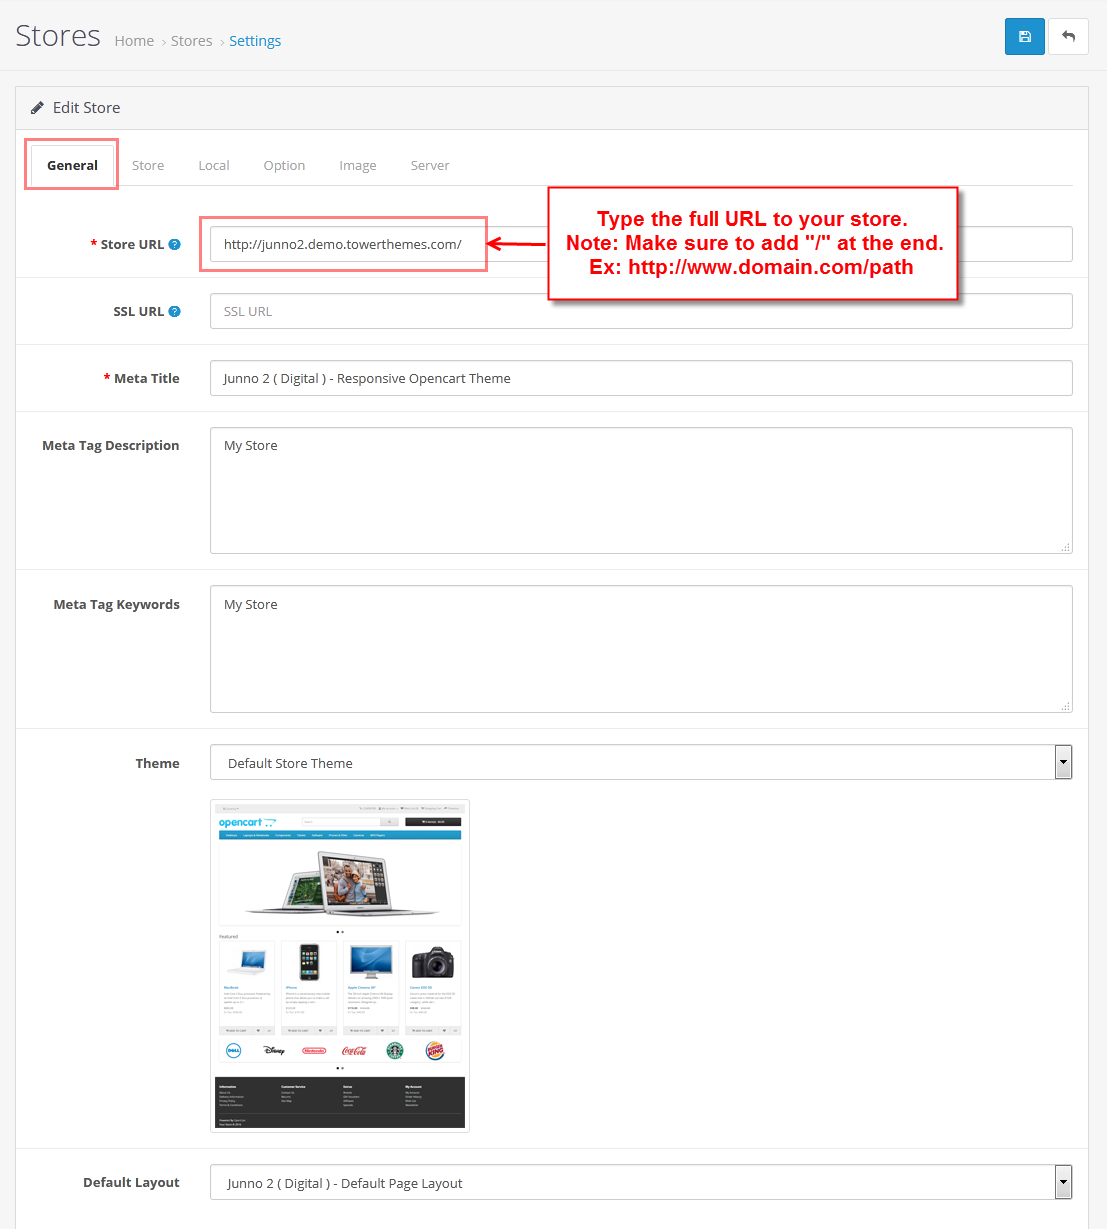
- At tab Store Name , choose your store that you want to use, click Edit button.
- Choose tab General
- Choose tab Store
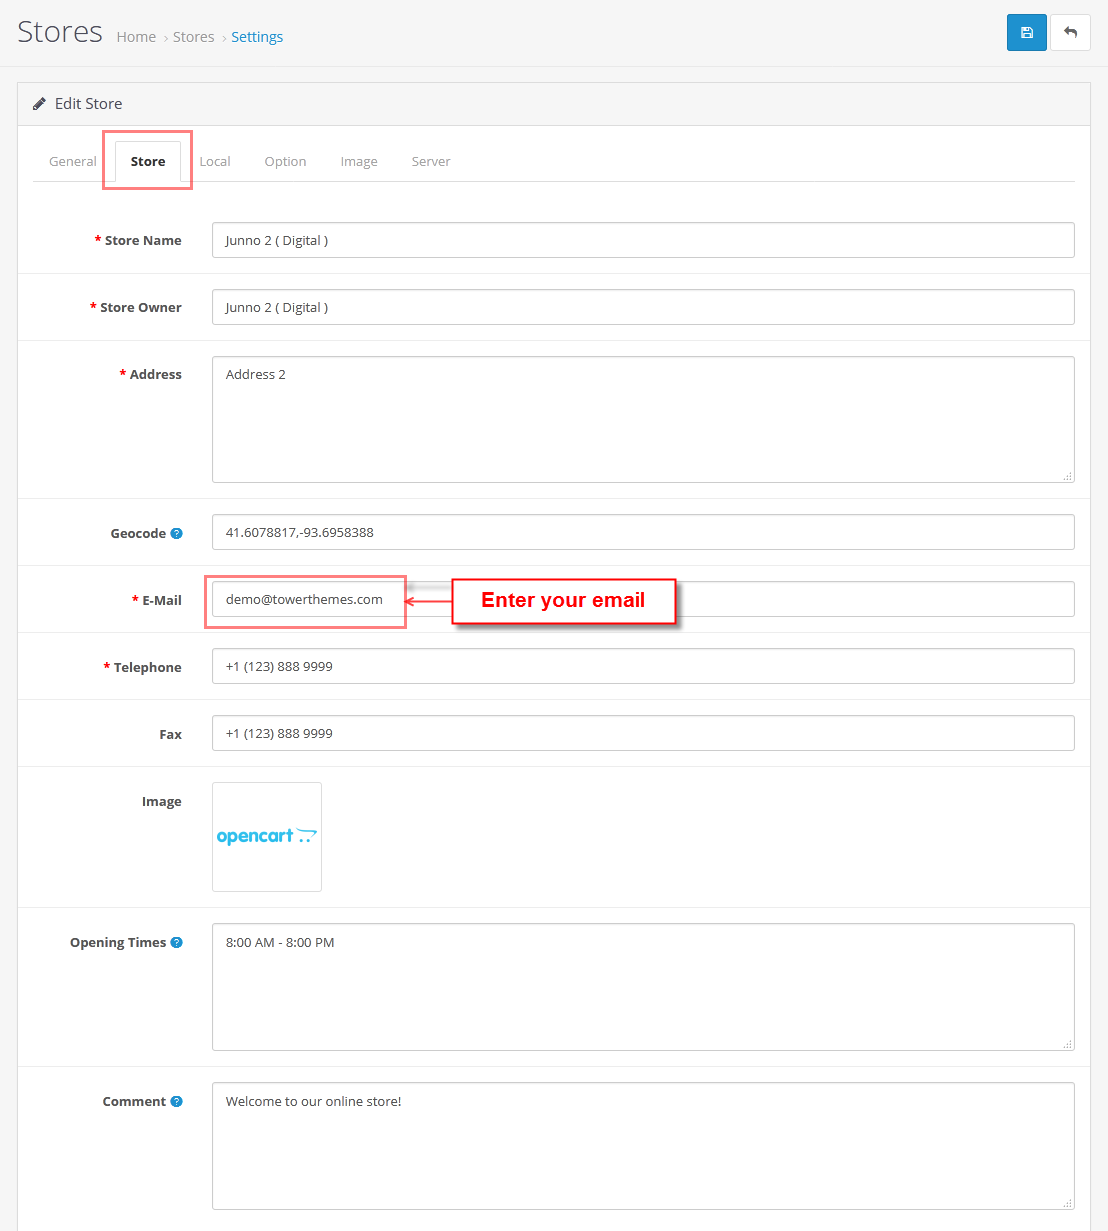
Note: You need remove the URL if you want to use that domain for different store.
- Click Save button when finish.
Install Theme
To install our theme, you need to do 2 steps :
We recommend installing Junno on a fresh copy of OpenCart or on existing setups with no custom modifications. See more at http://docs.opencart.com/installation/ . The installation is very easy, please follow these instructions carefully.
-
Download OpenCart archive from Opencart Website and unzip it.
Upload it to your server
Create new database:
Open your Browser and type : localhost/phpmyadmin or yourdomain/phpmyadmin
-
Then create database
-
Open browser and navigate to your site (where the achieve uploaded) to load default Opencart installer with the database you just created.
As an example, name of opencart is tt_junno_test.
Click Continue button.
-
We got:
You need to rename 2 files : config-dist.php to config.php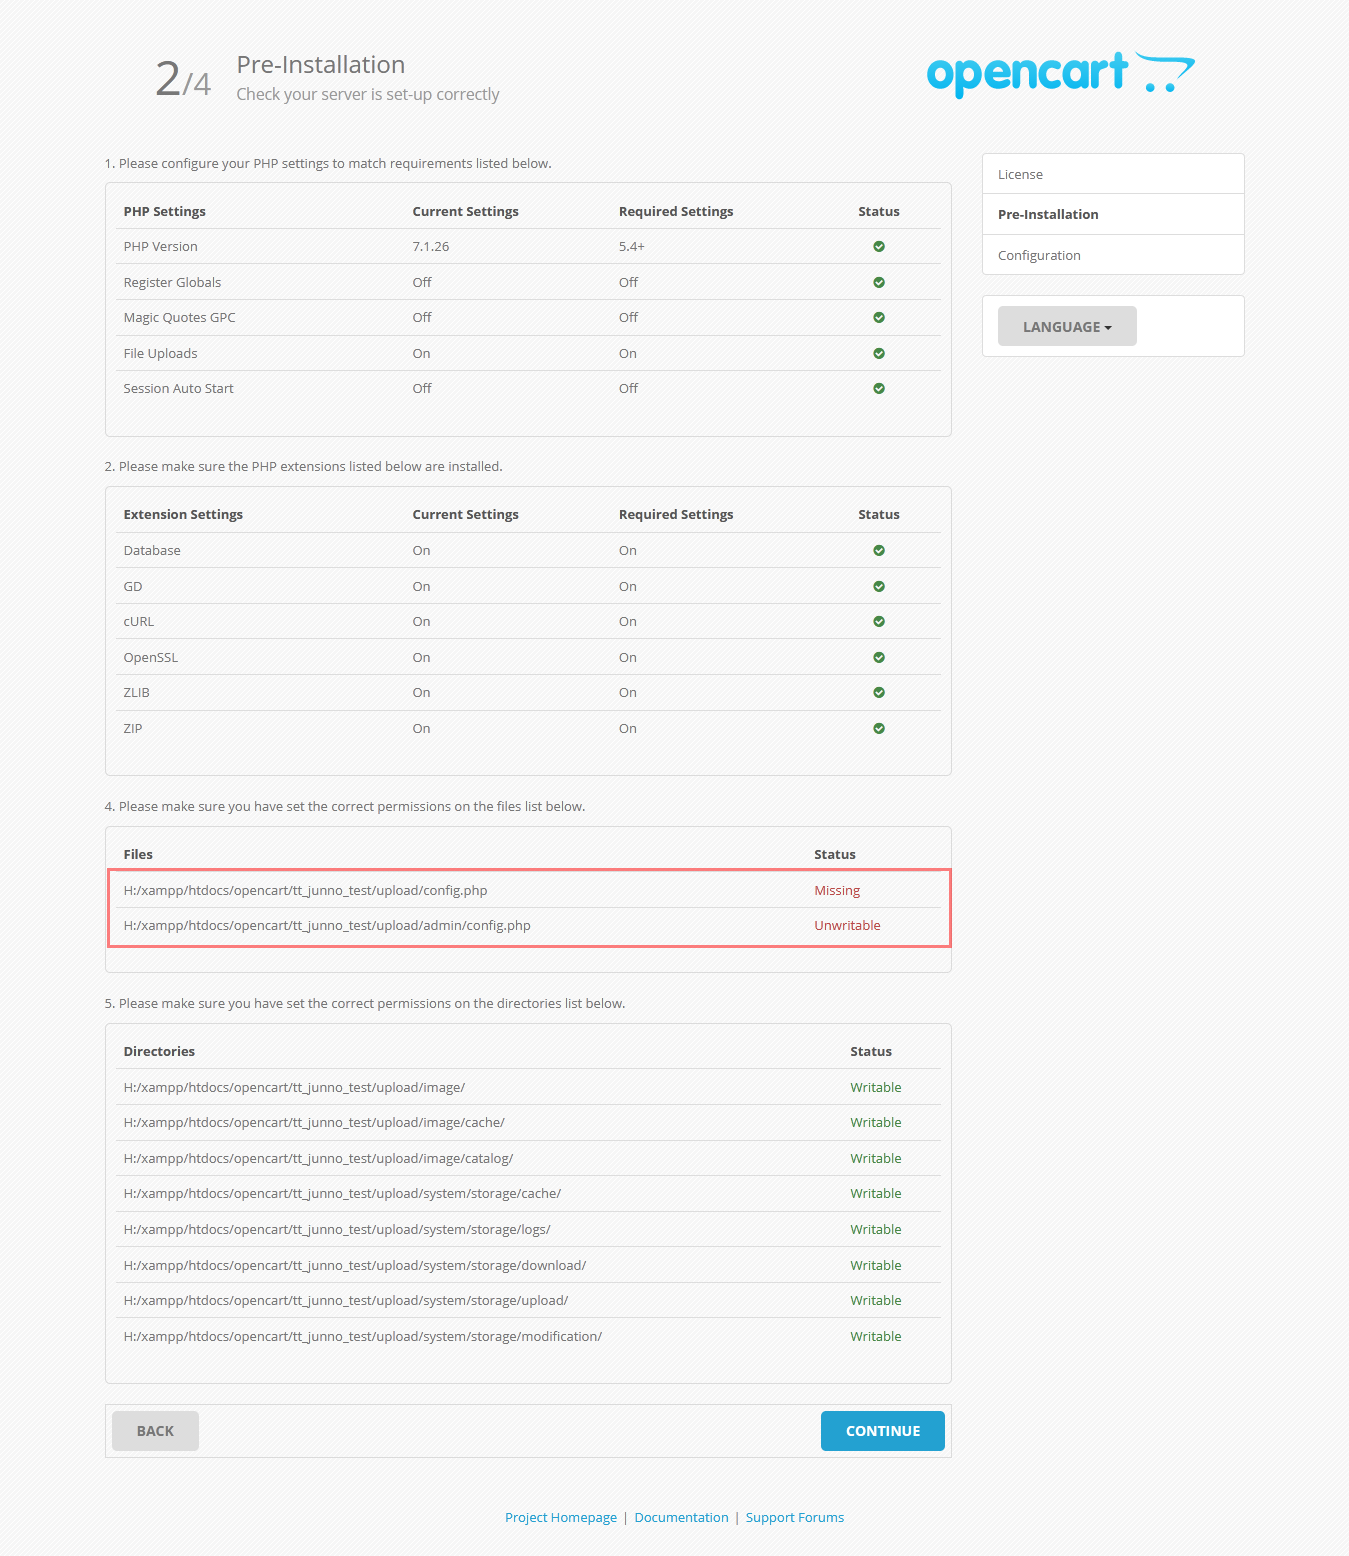
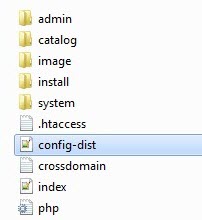 ------>
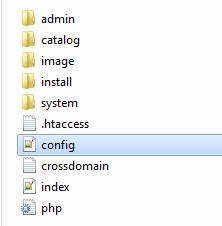
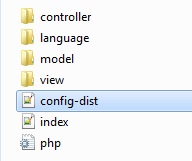 ------>
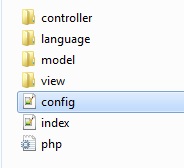
URL : "config-dist.php" and "admin/config-dist.php"
If you don't rename 2 these files, we got error :

Click Continue
-
We got:
Click Continue.
-
We got:
You need to delete install folder.
-
Click Go to your online shop to go to frontend
Click Login to your administration to go to backend
When finish install default opencart, we install theme:
*** You can see the tutorial at video :
*****Note: Before & after installation, Don't rename of databases in "database" folder in theme.
- Extract the tt_junno_theme_1.0.zip from the archive you downloaded from Themeforest.
- Locate the Junno folder . We recommend 3.0.x, as it has significant improvements.
- Drag the all folders (admin, catalog, image, database,...) over to your OpenCart installation and merge them with the existing ones.
- Login your opencart admin
-
Go to Extensions -> Extensions -> Choose the extension type -> Modules -> At Plaza Control Panel -> Click Install button

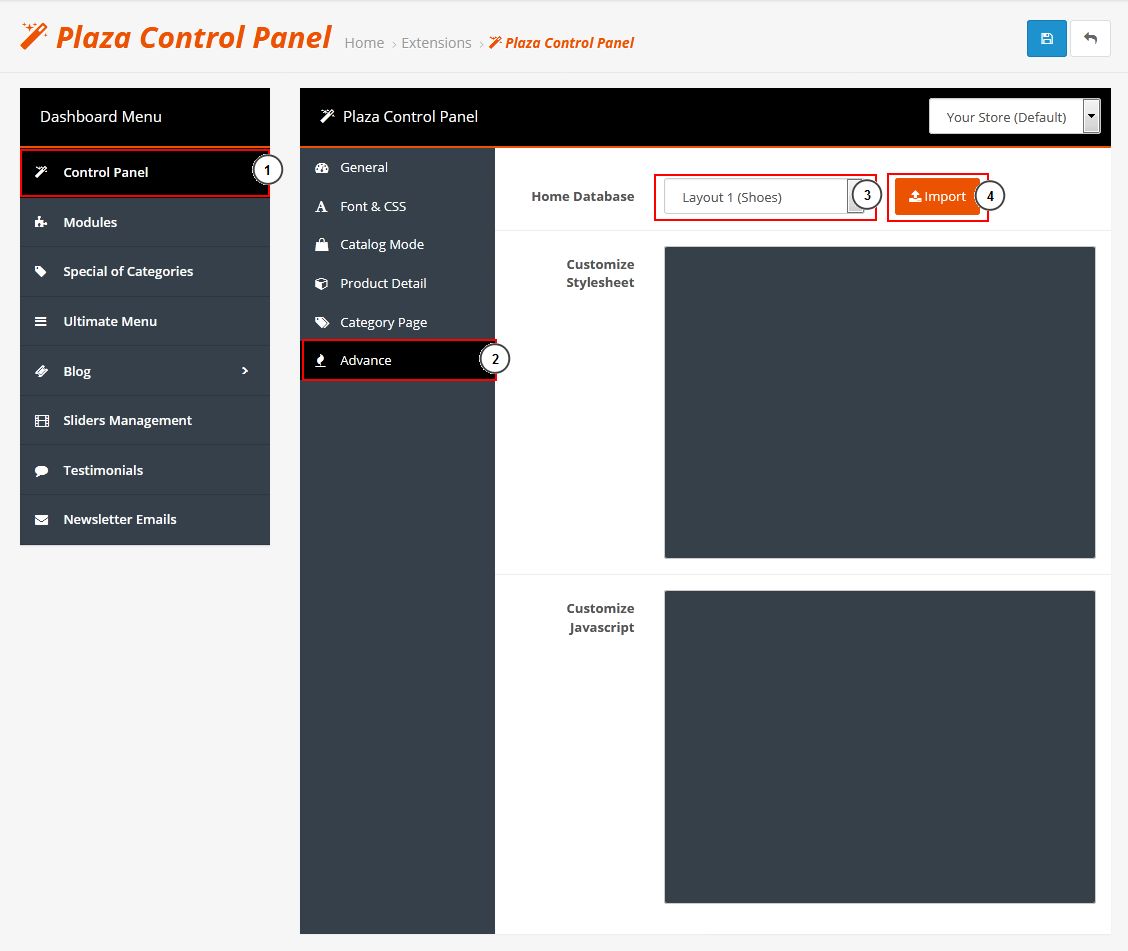
- At Plaza Control Panel : Choose Edit

-
Choose tab Control Panel -> click tab Advance:
At Home Database: Select layout you want to install -> Click Import
- Go to Extensions -> Modifications -> Select & refresh all modifications.
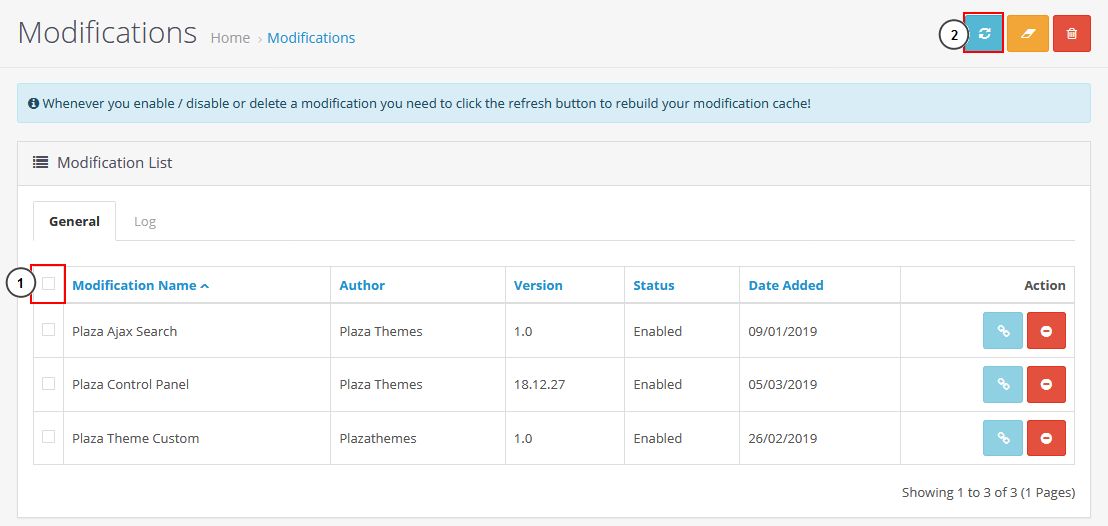
- Refesh your homepage. Finish installer.
Change theme layout in Opencart
***To install other themes when finish install the first theme, please:
- Login your opencart admin
- Go to PlazaThemes Dashboard -> Control Panel -> Advance
-
At Home Database: Select layout you want to install -> Click Import
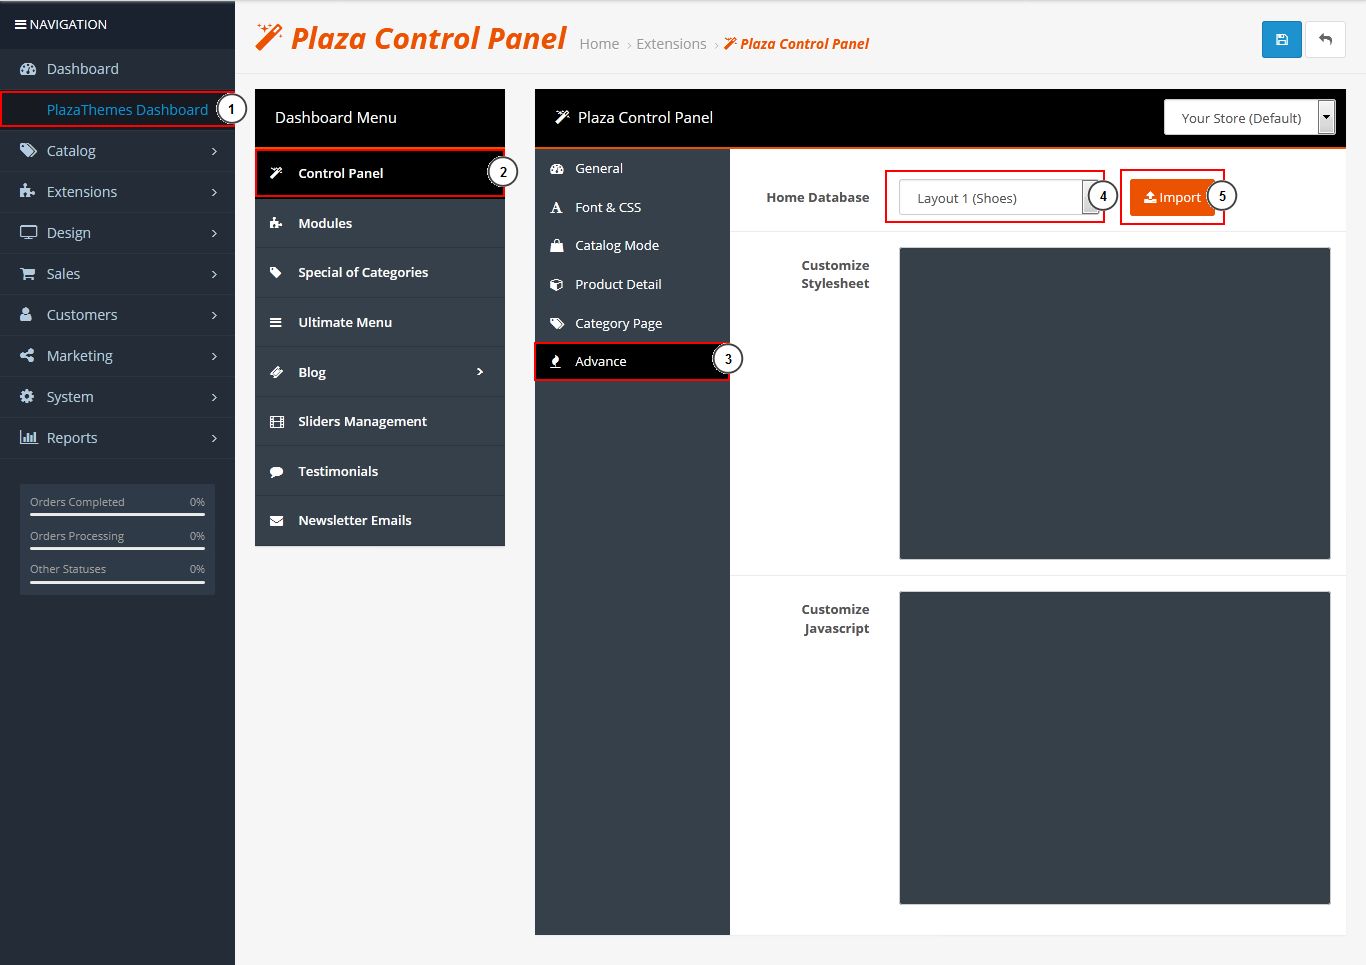
- Click Save button.
Adjust your image sizes
Before you start using your store with the Junno theme, image settings must be edited with the following values:
- Login to your Opencart Admin Area
- Go to Extensions -> Extensions > Choose the extension type > Themes > Your Store > Edit
- At Image part, image settings can be edited with the values.
You can set number of products per Category page.
Upload your store logo and icon
To upload your store logo and icon, please do these steps :
- Open your OpenCart Administration page and go to System -> Settings -> At Your Store (Default) : Choose Edit -> click tab Image :
- Upload your store logo and icon:
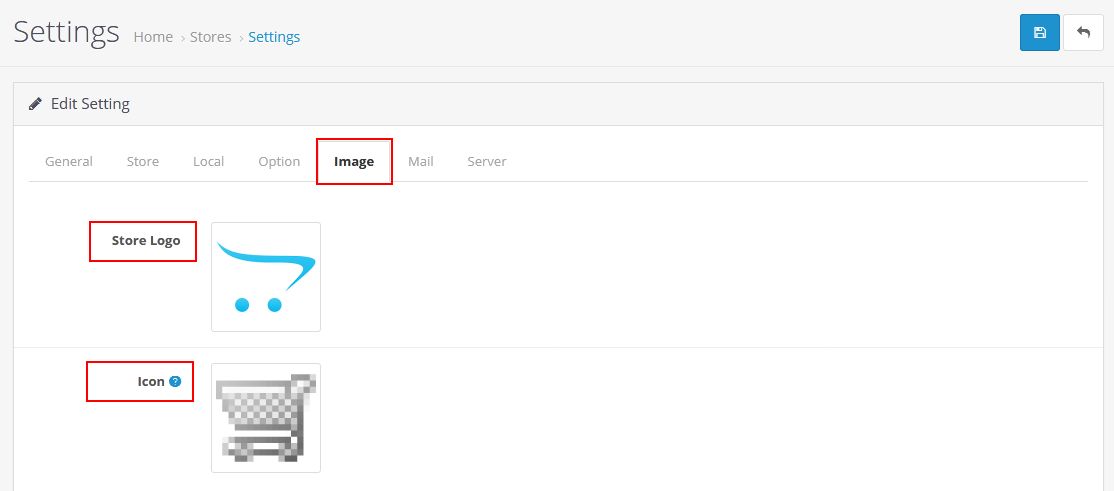
- At Store Logo : Upload your logo
- At Icon : Upload your store icon
- Click Save to save your changes.
How to add new products
-
Login your opencart admin
-
Go to Catalog -> Products -> Add New

-
Now you will see seven tabs (General, Data, Links, Attribute, Option, Discount, Special, Image, Reward Points, and Design). Be sure to fill in the Product Name , Meta Tags Title - required fields - on the first tab.
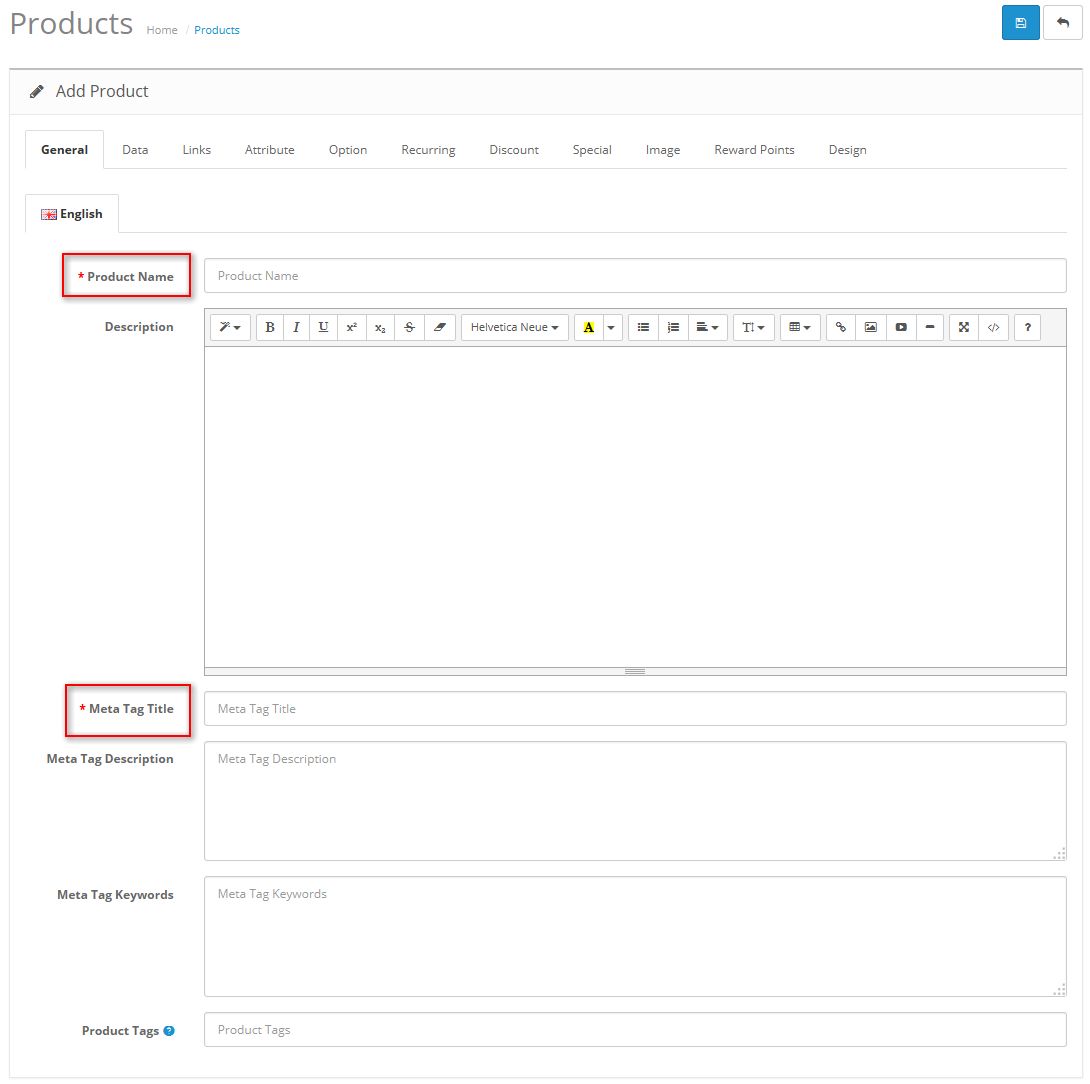
Click Save button when finish.
You can add as many products as you would like.
How to set special products
***A special price is a product's sale price. For example a product may have cost $400, but using the specials option in OpenCart you can set the price to $350. Customers can see the "old price - new price" difference.
-
Login your opencart admin
-
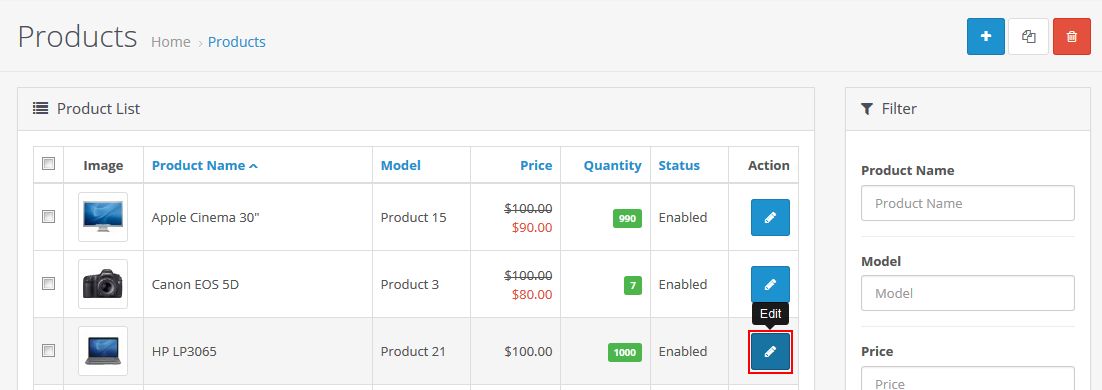
Go to Catalog -> Products
-
Search for the product you would like to set on specials. Click Edit link to edit it.
-
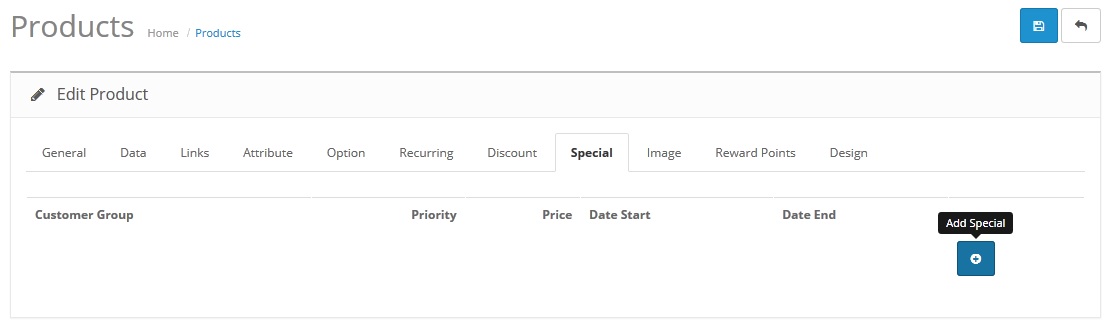
Choose Special tab and click Add Special button
-
Special prices change the value of the product price to the new special price. Specials for a customer group will display the special price only if the customer is logged in as that group.
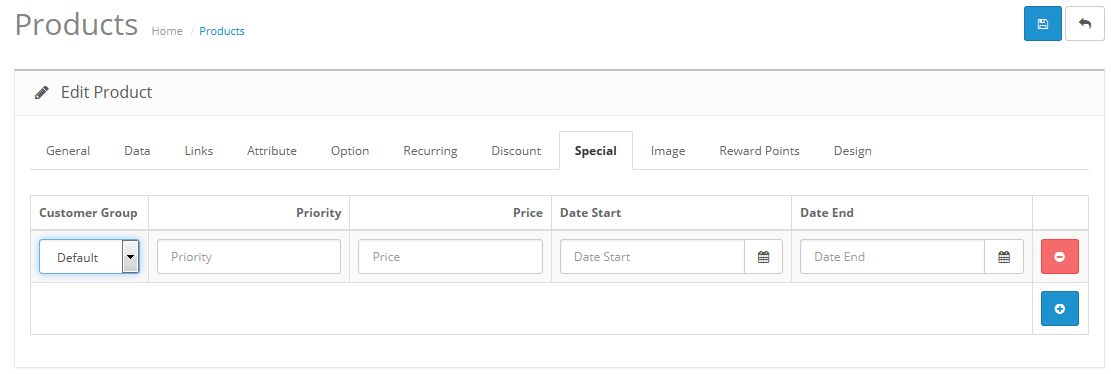
Customer Group - Optionally select a customer group you want this special to apply to.
Priority - If you will offer multiple specials and/or discounts, enter 1 for this to be applied first, 2 for this to be applied second.
Price - The price you want the customer to see.
Date Start - When you want this special price to appear.
Date End - When you want this special price to disappear.
Click Save button when finish.
How to set discount products
***Discount means that the price of a given product decreases as a customer buys more of it. In other words, a single piece may cost $30, but if you buy five pieces then each would only cost $28. The more a customer buys, the more they save.
Login your opencart admin
Go to Catalog -> Products
-
Locate the product you want to create the discount for . Click Edit link to edit it.
-
Choose Discount tab and click Add Discount button
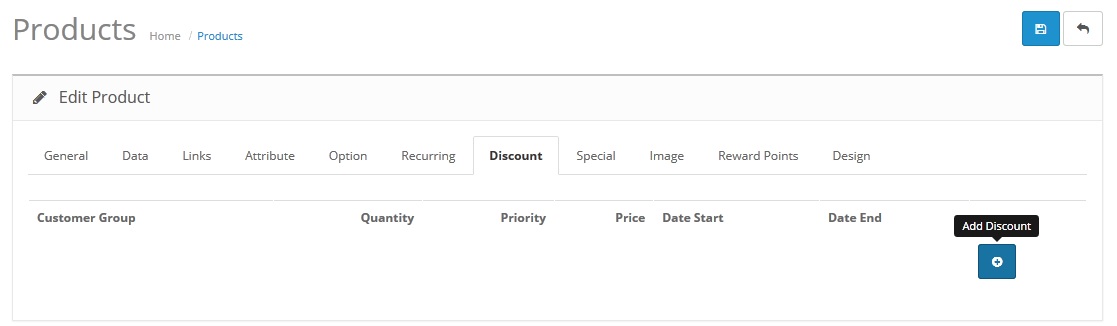
-
We got :
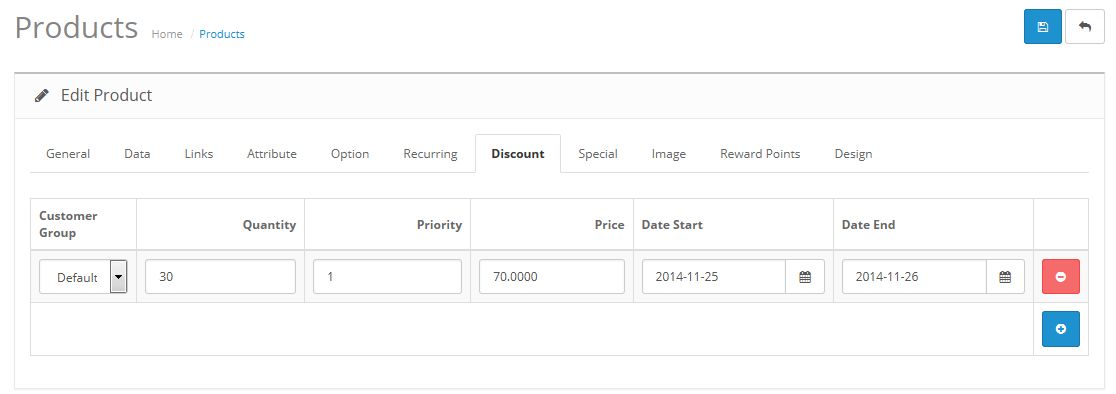
Customer Group - Optionally select a customer group you want this special to apply to.
Quantity - Set how many pieces a customer needs to purchase in order to get the discounted price.
Priority - If you will offer multiple specials and/or discounts, enter 1 for this to be applied first, 2 for this to be applied second.
Price - The price you want the customer to see.
Date Start - When you want this discount price to appear.
Date End - When you want this discount price to disappear.
Click Save button when finish.
How to set related products
Login your opencart admin
Go to Catalog -> Products
-
Locate the product you want to add related products to . Click Edit link to edit it.
-
Choose Links tab and scroll down until you see the Related Products field
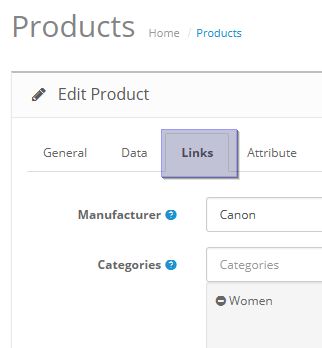
-
Start typing a product name in that field and OpenCart will drop down a list of products that start with whatever letters you have typed in.
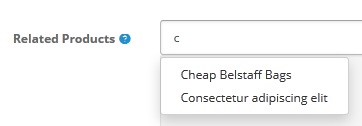
Important! If the product you are typing is not in your OpenCart products, the drop box will not appear. Make sure you are typing a product that you have in your OpenCart.
-
Click Save button when finish.
Creating Category
* See more at http://docs.opencart.com/catalog/category/ to understand about Category in Opencart.
* See more at Attributes to understand about attributes in Opencart.
* See more at Filter to learn how to add filters.
Junno Shoes
Home page
Category & Detail
Category
Product
Junno Digital
Home page
Category & Detail
Category
Product

Junno Organic
Home page
Category & Detail
Category
Product
Junno Cosmetic
Home page
Category & Detail
Category
Product
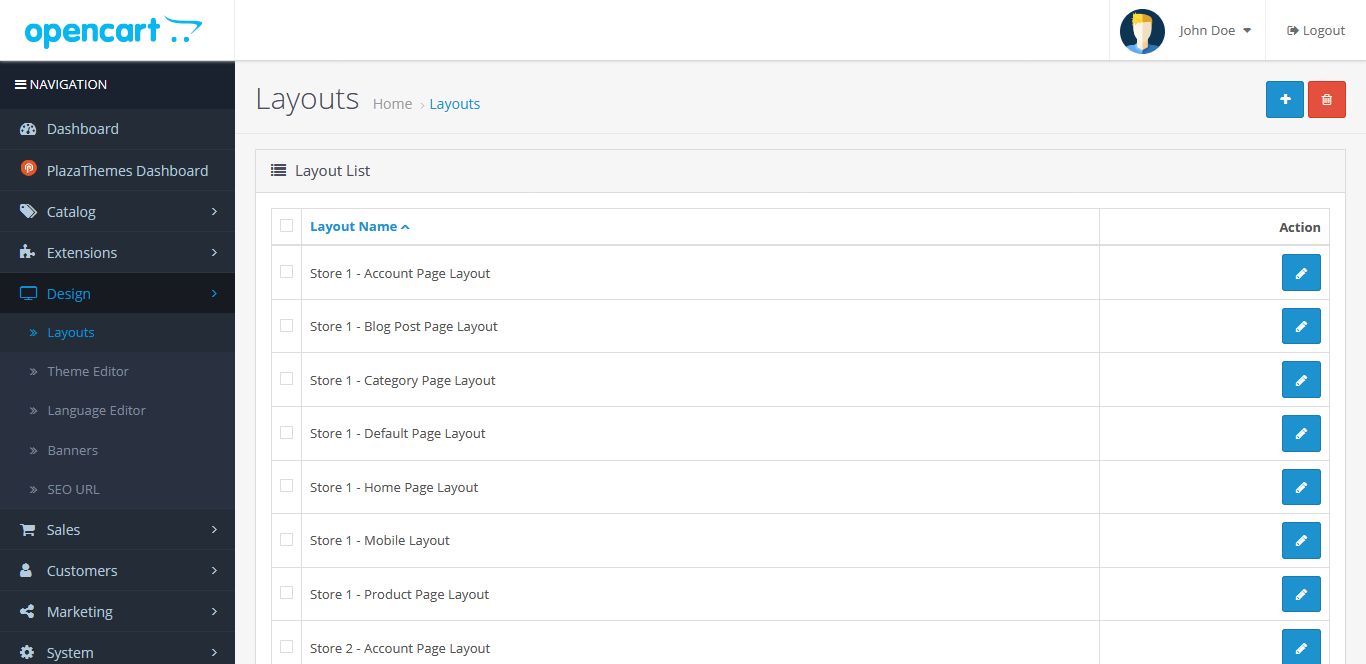
Set layout position of module in OpenCart 3.0
After install various extensions that best suit your needs, you need to set layout position of module. Please see these steps below:
- Go to Design > Layouts
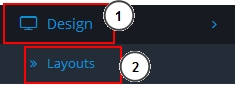
- Click on Edit button to set the modules position for Home page.
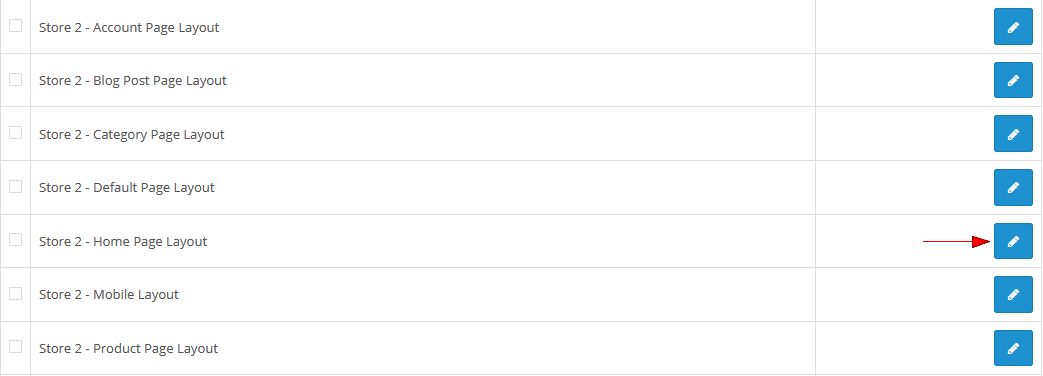
-
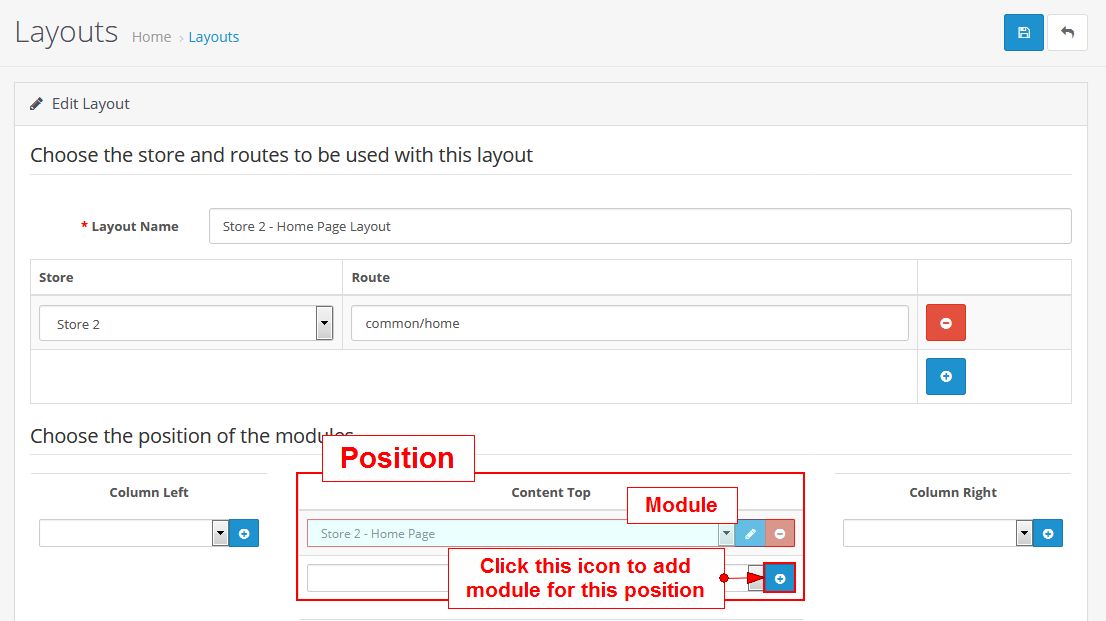
- Select the Position for layout of module.
- Select module from Modules option.
- Click Add Module to add module for each position
Example: with Plaza Layout Composer -> Store 2 - Home Page Layout module
- Click on Save button in the top right corner when you have completed settings of layout
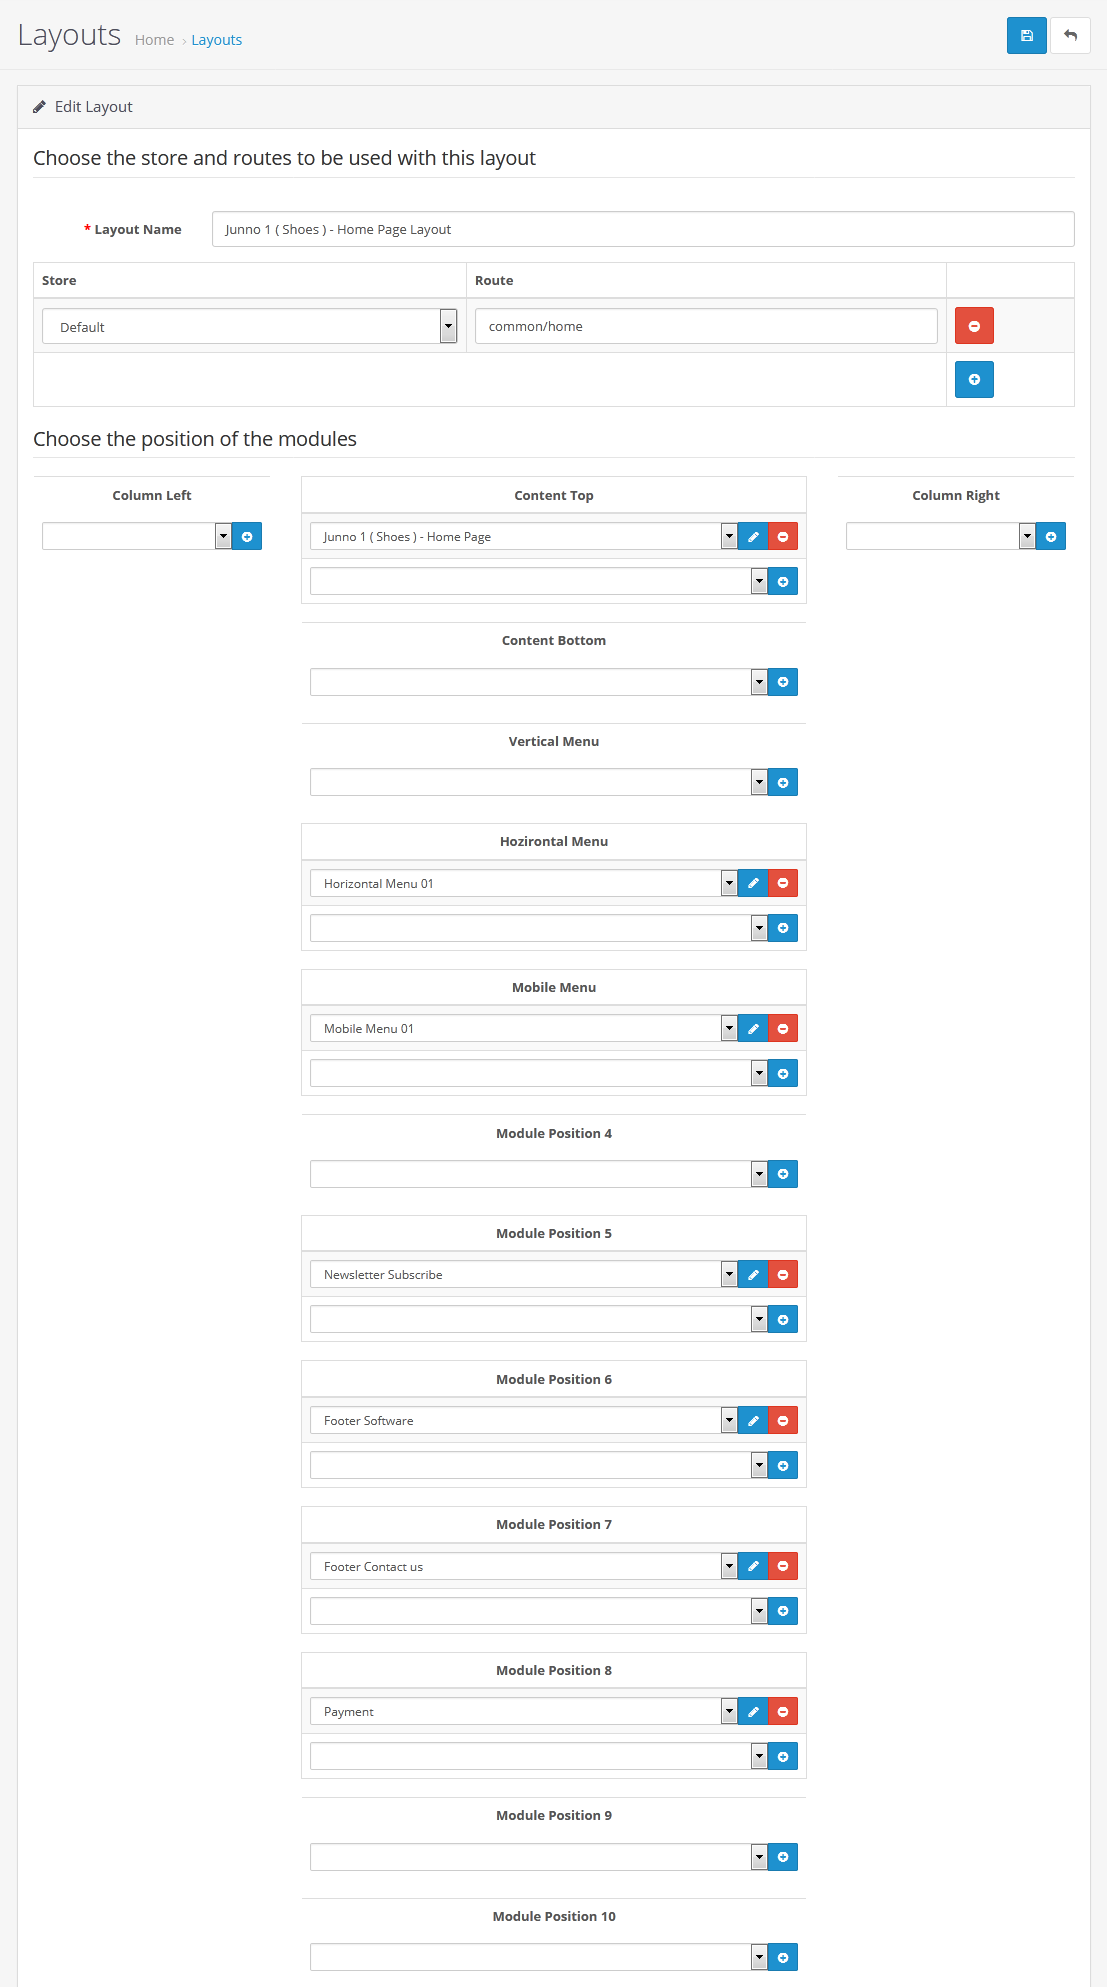
Junno Shoes
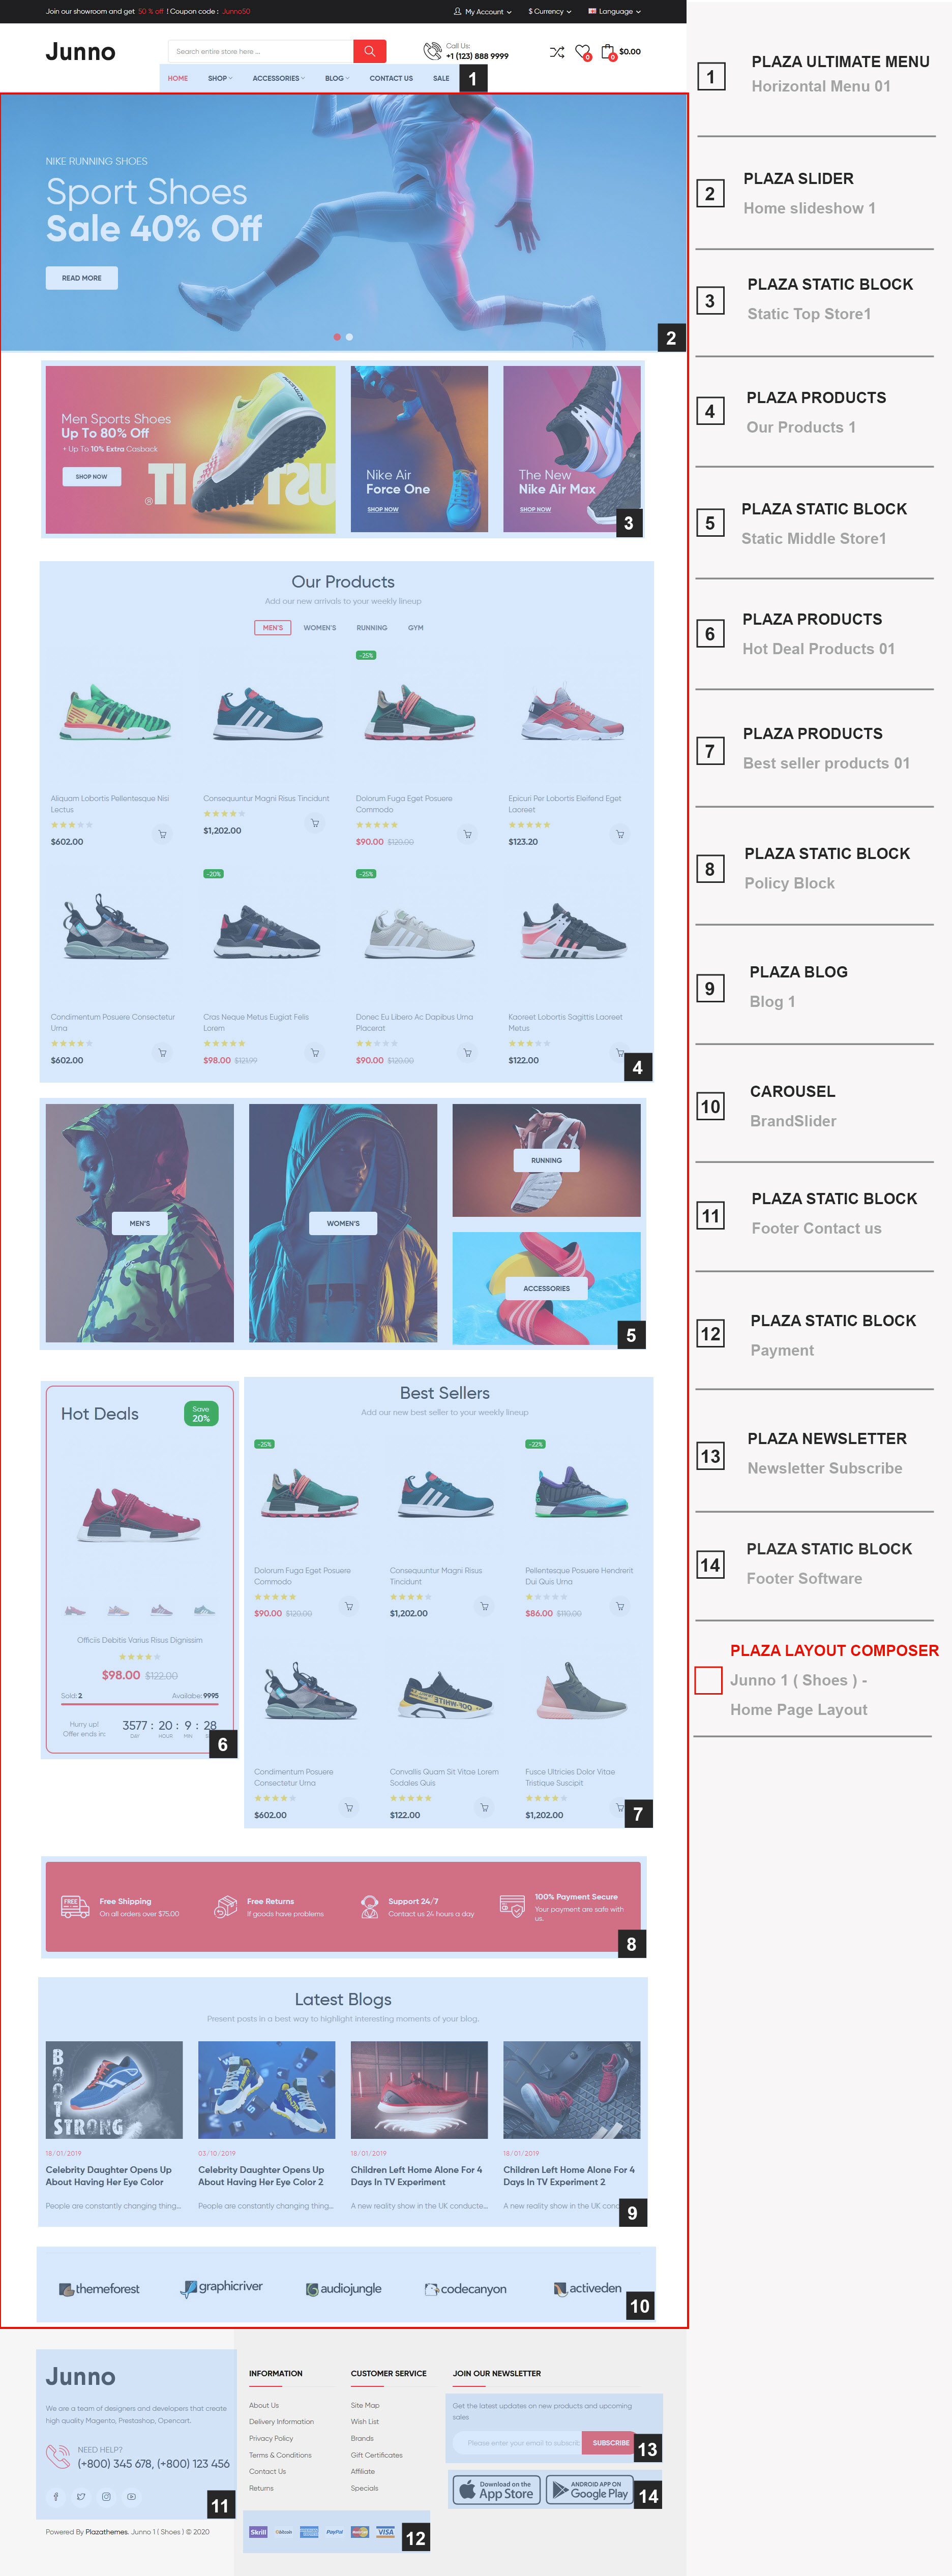
-> To set the layout like Junno Cosmetic: Login admin -> Design -> Layouts -> Junno 1 ( Shoes ) - Home Page Layout and set the layout like :
Category
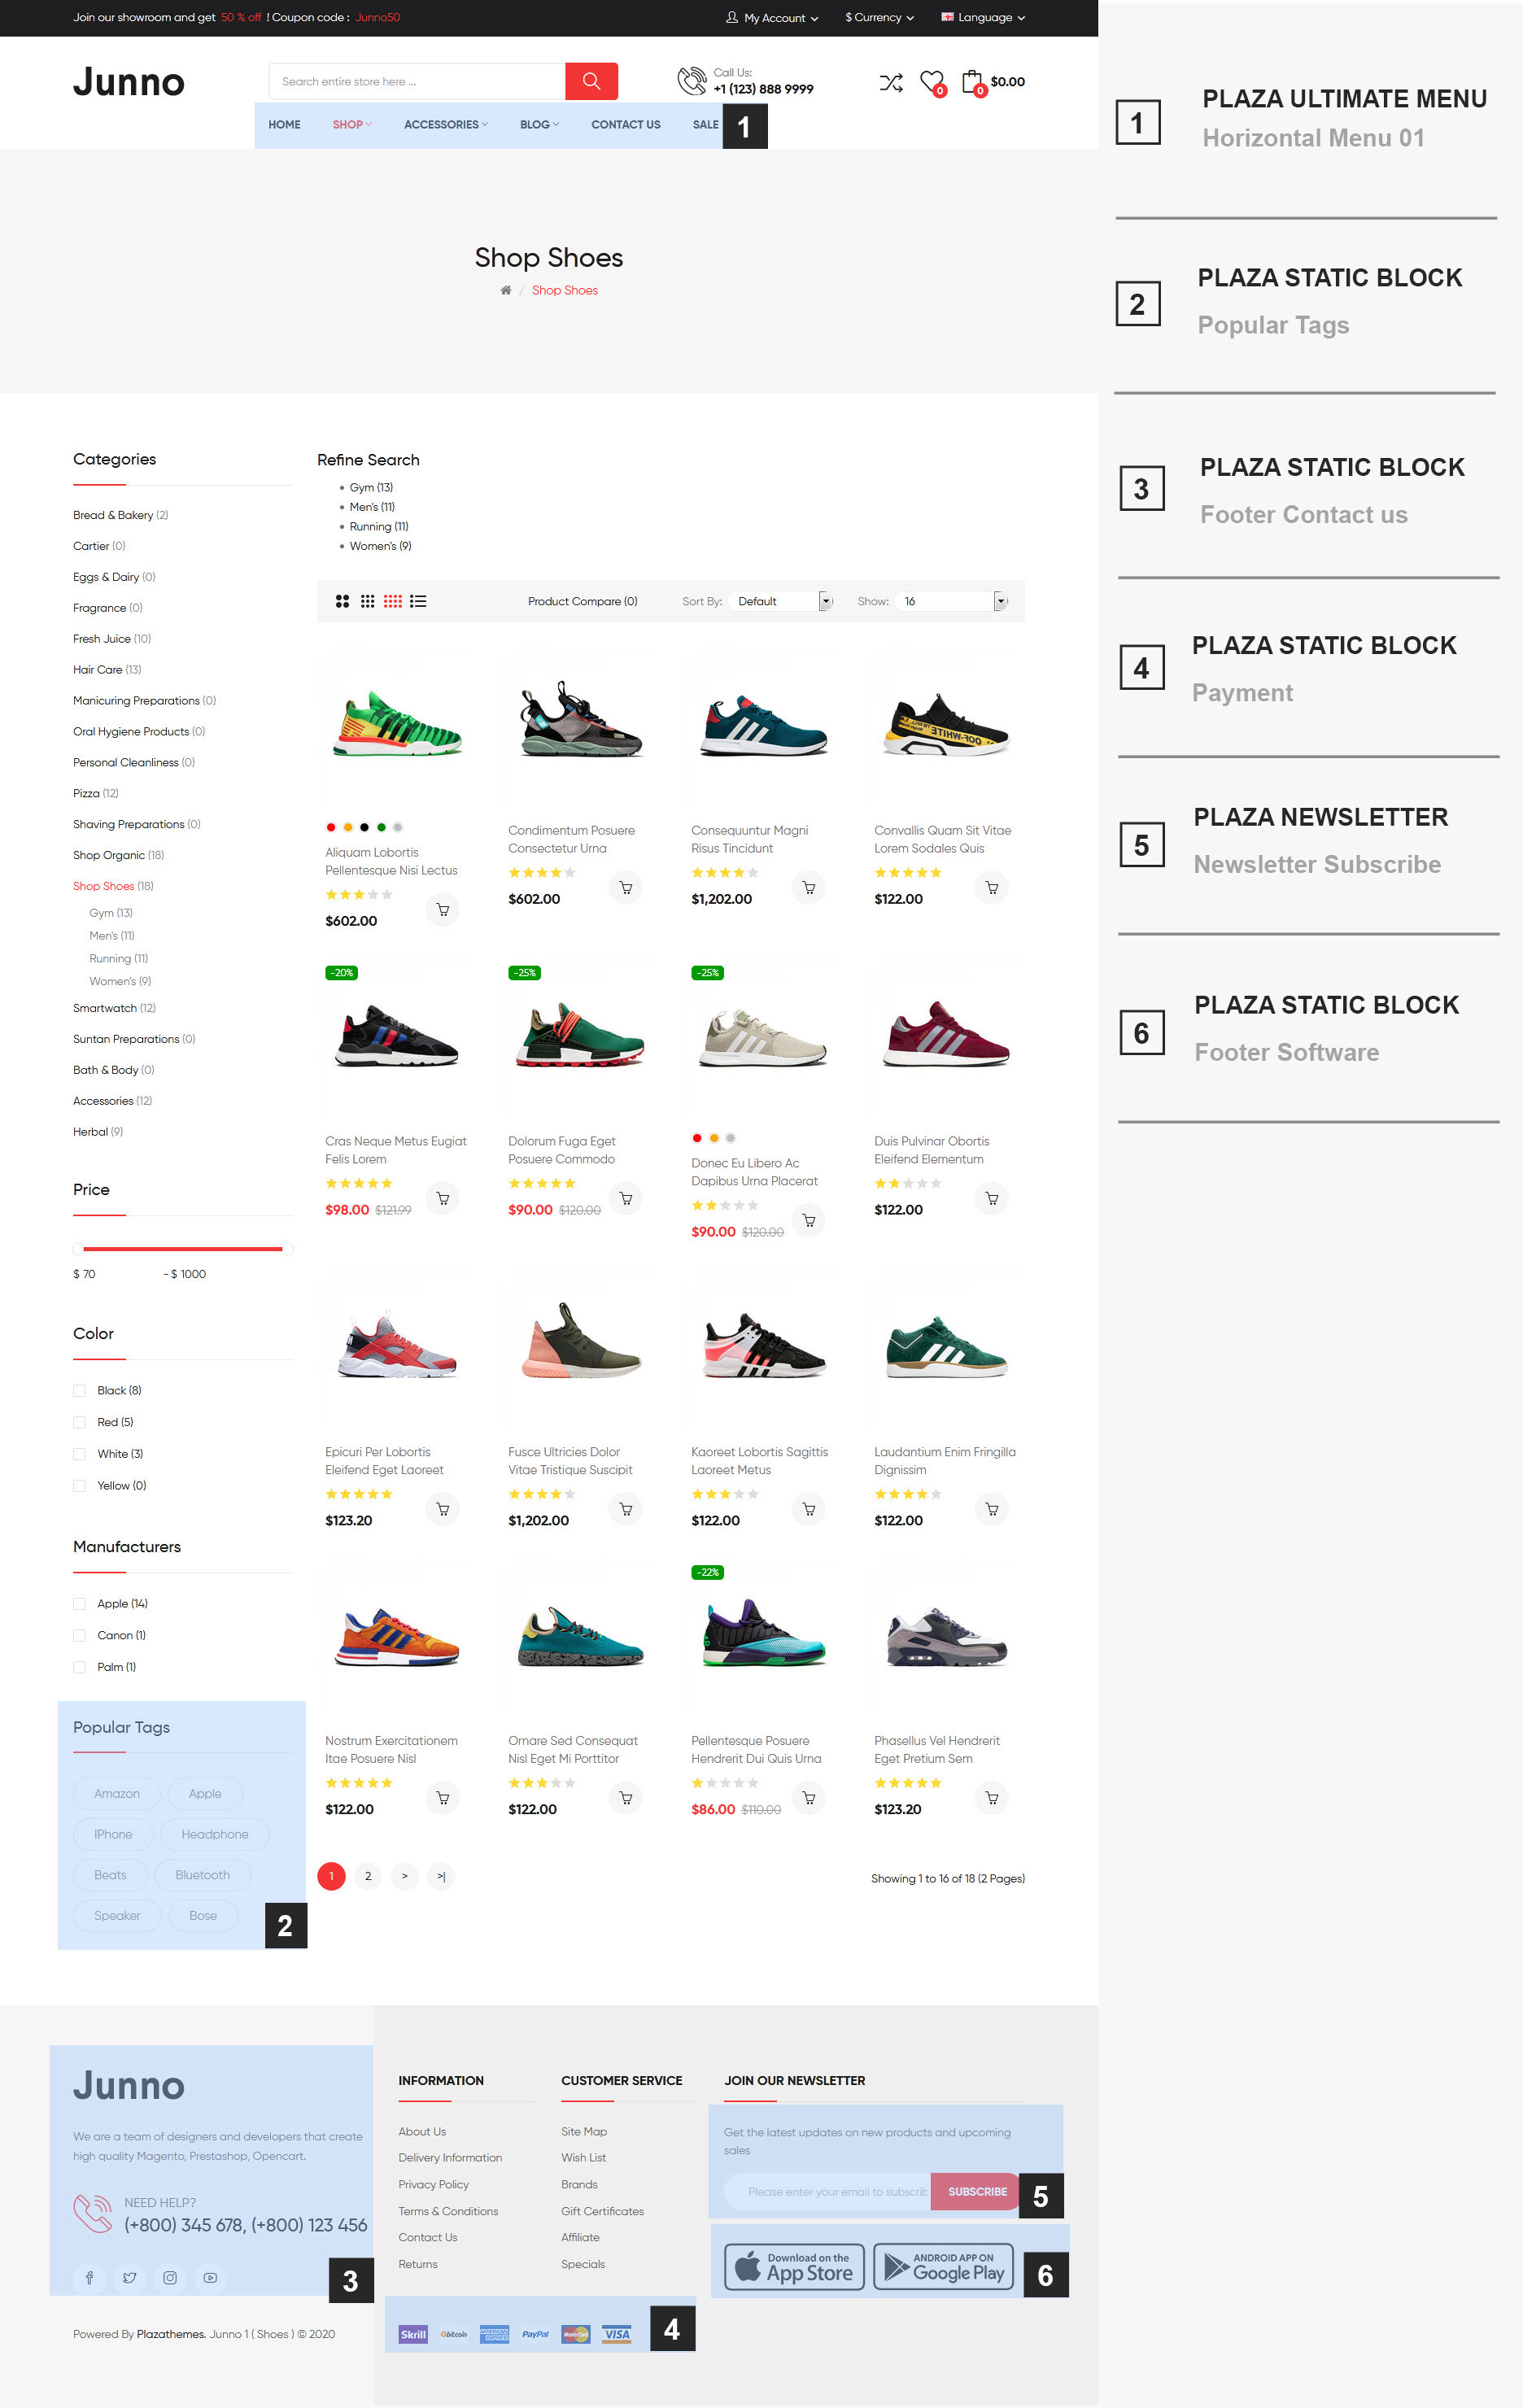
-> To set the layout like Category page : Login admin -> Design -> Layouts -> Junno 1 ( Shoes ) - Category Page Layout and set the layout like:

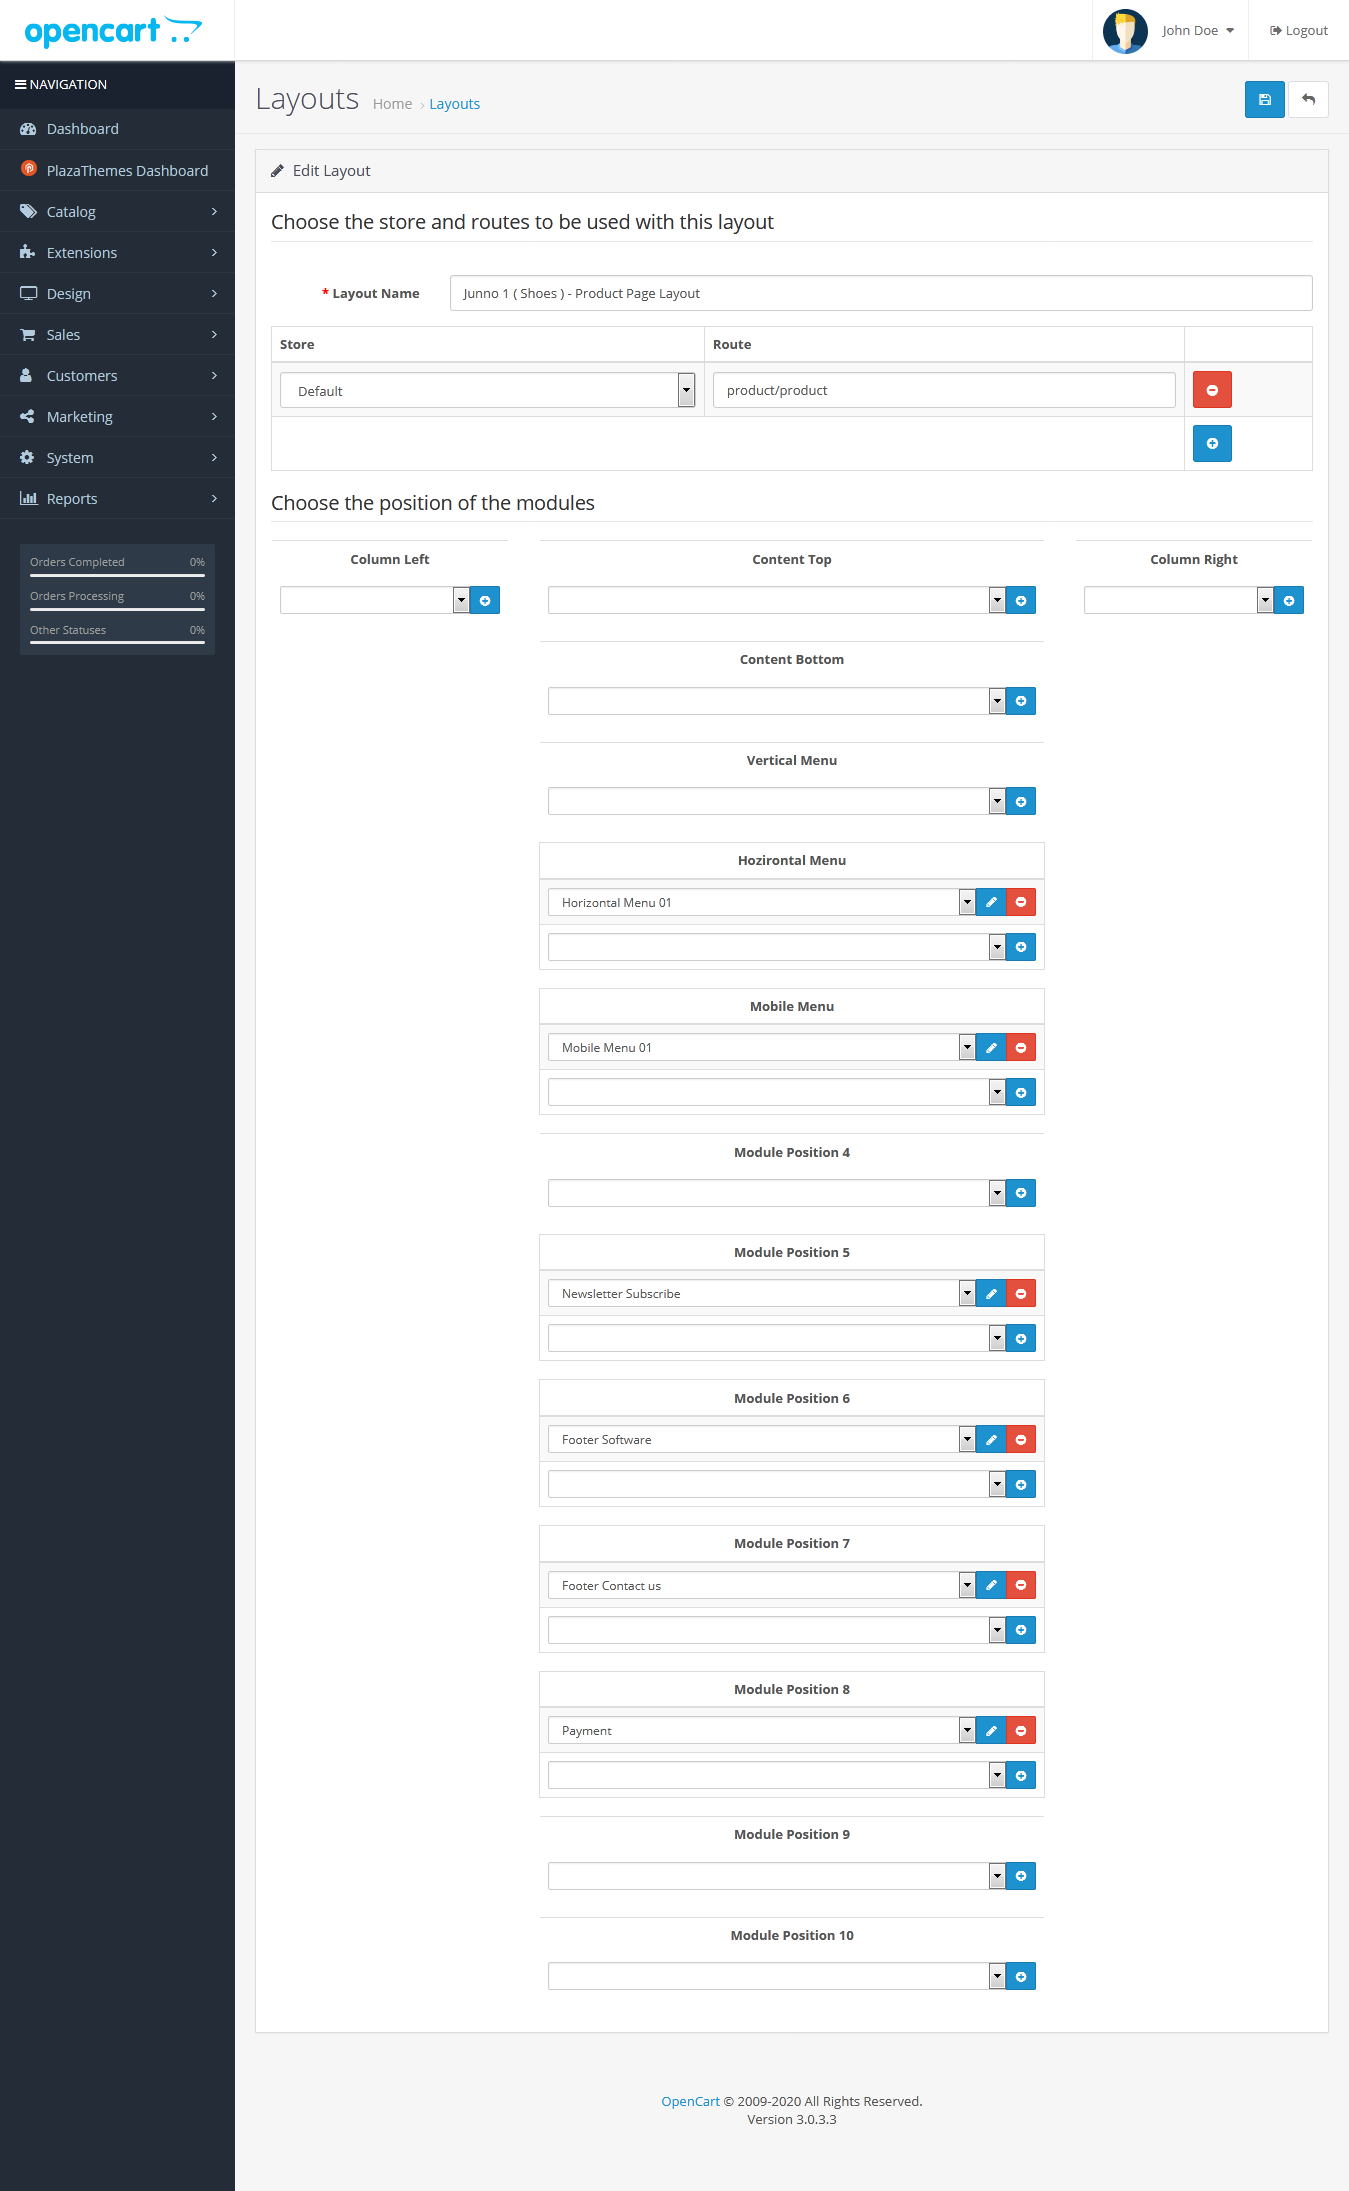
Detail
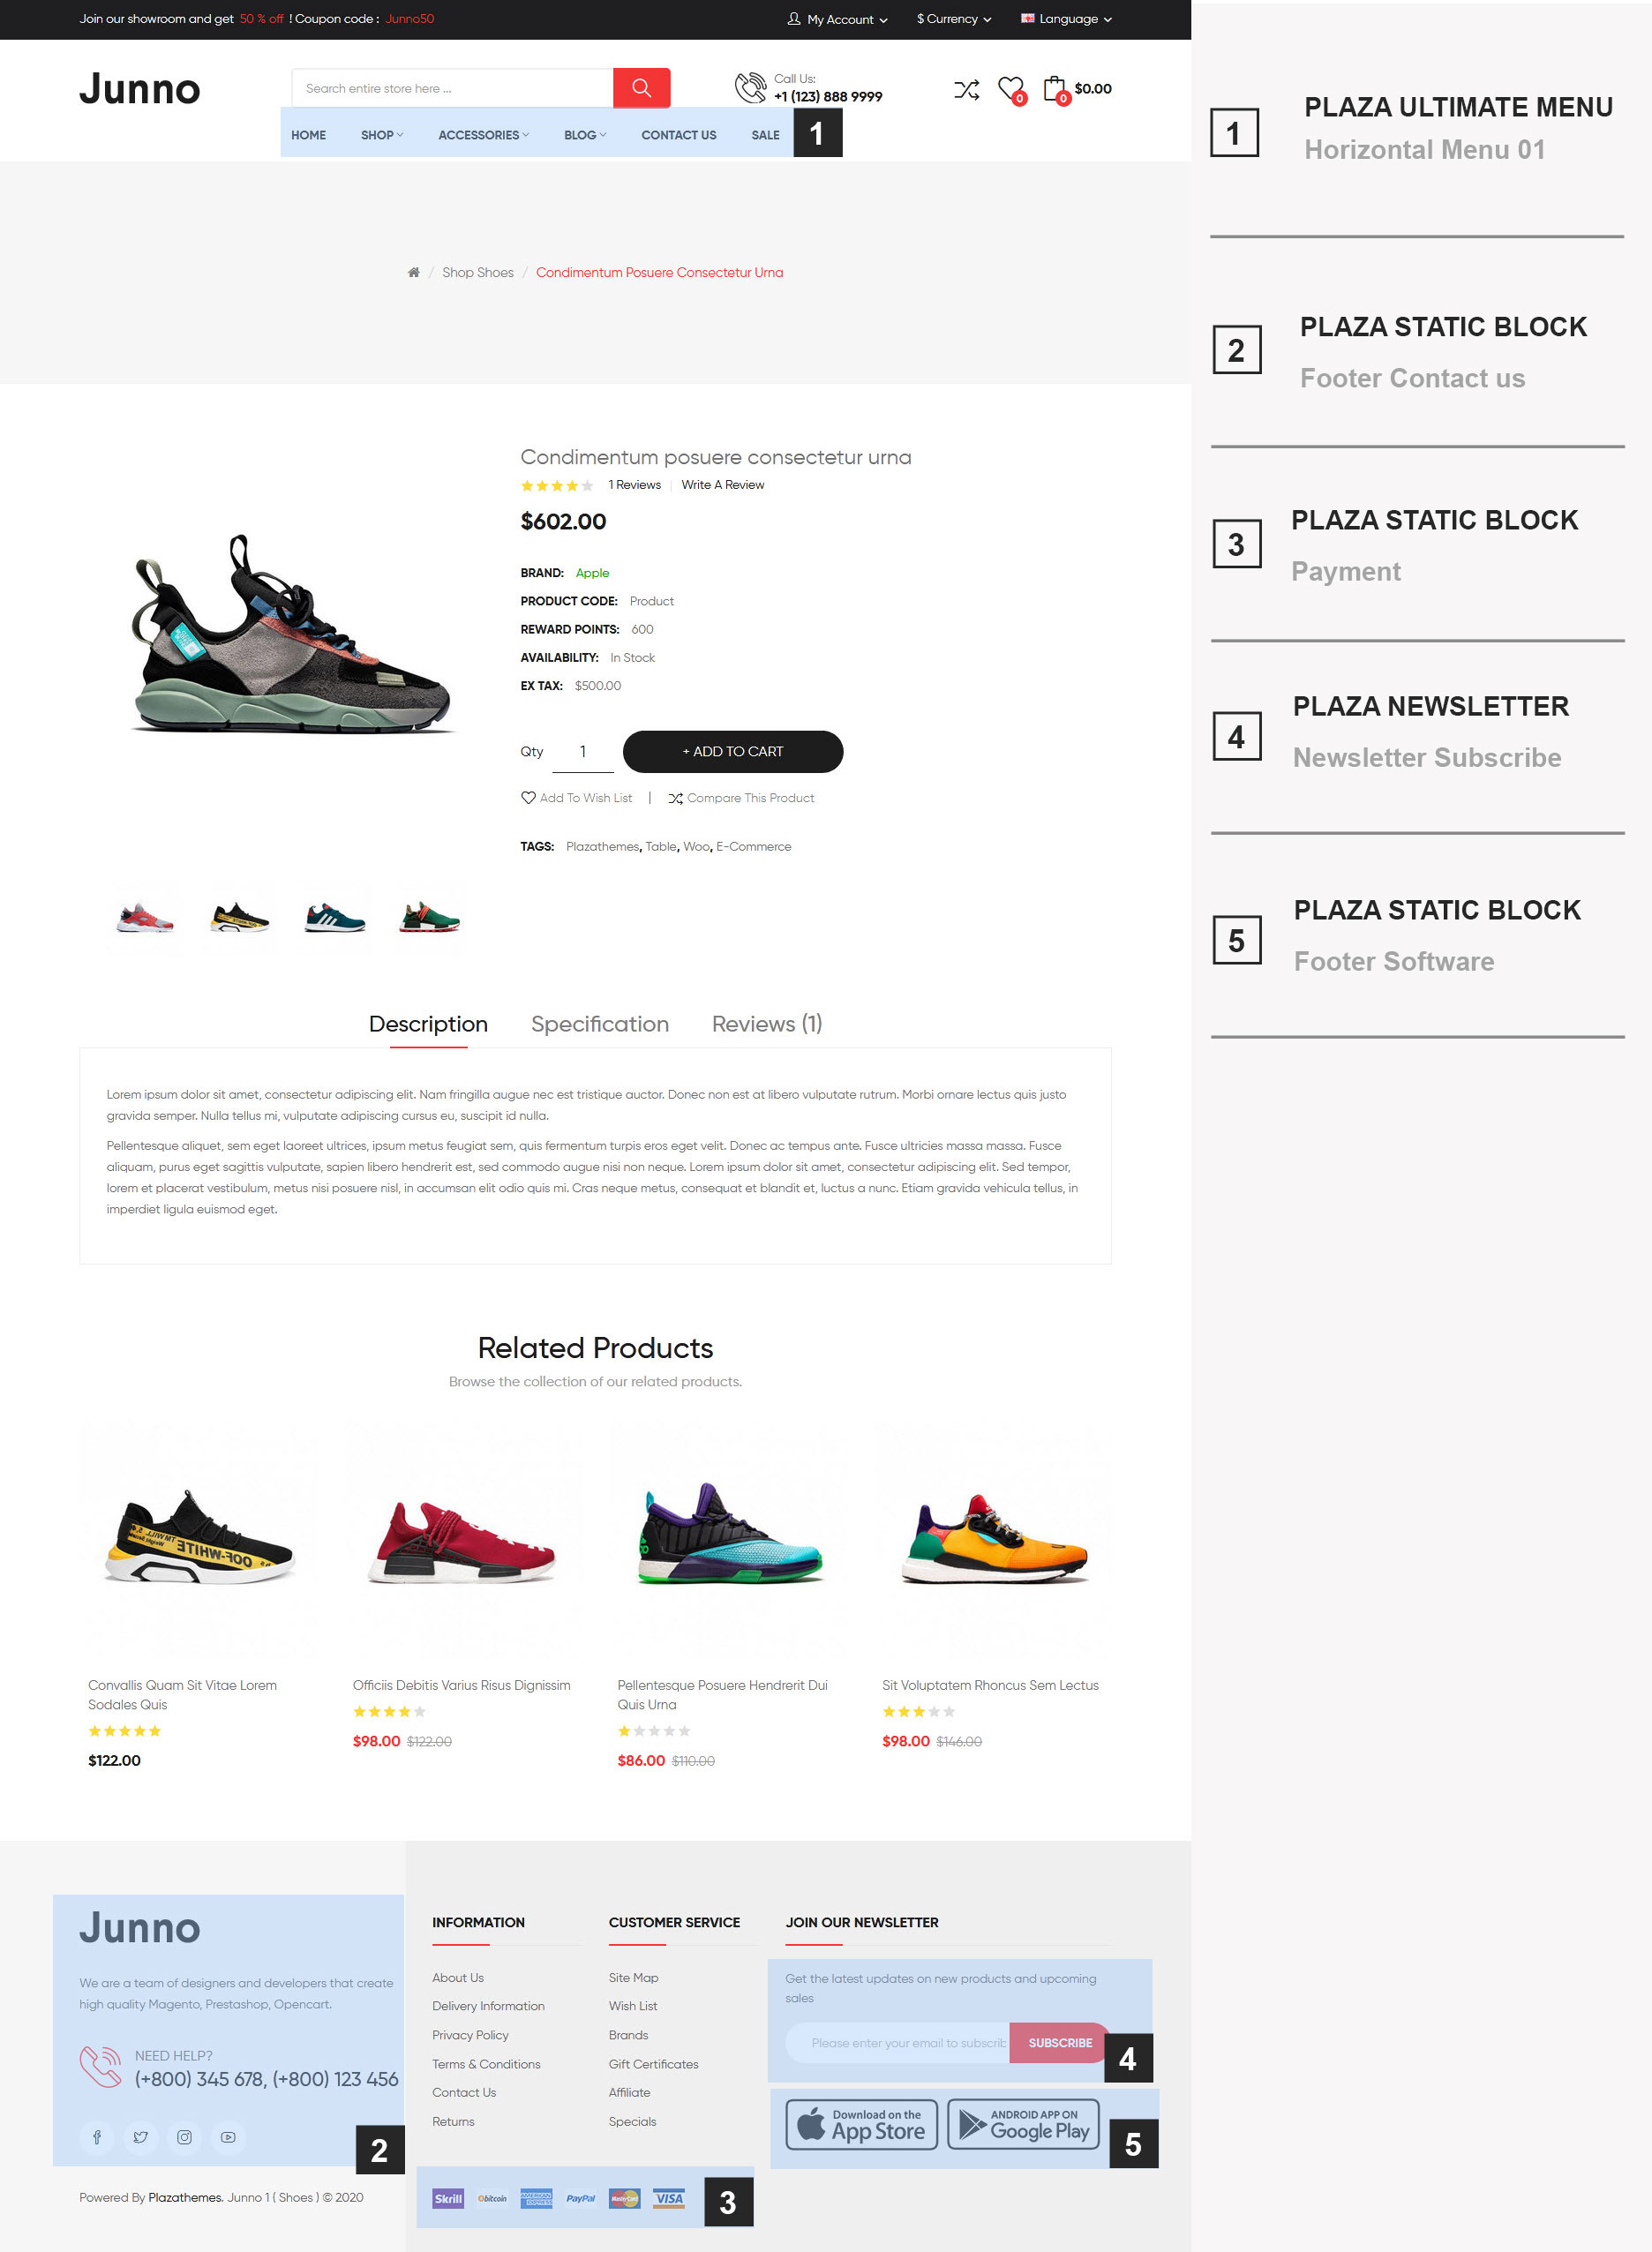
-> To set the layout like Product page : Login admin -> Design -> Layouts -> Junno 1 ( Shoes ) - Product Page Layout and set the layout like:
Mobile layout
-> To set the layout like mobile layout : Login admin -> Design -> Layouts -> Junno 1 ( Shoes ) - Mobile Layout and set the layout like:

Junno Digital
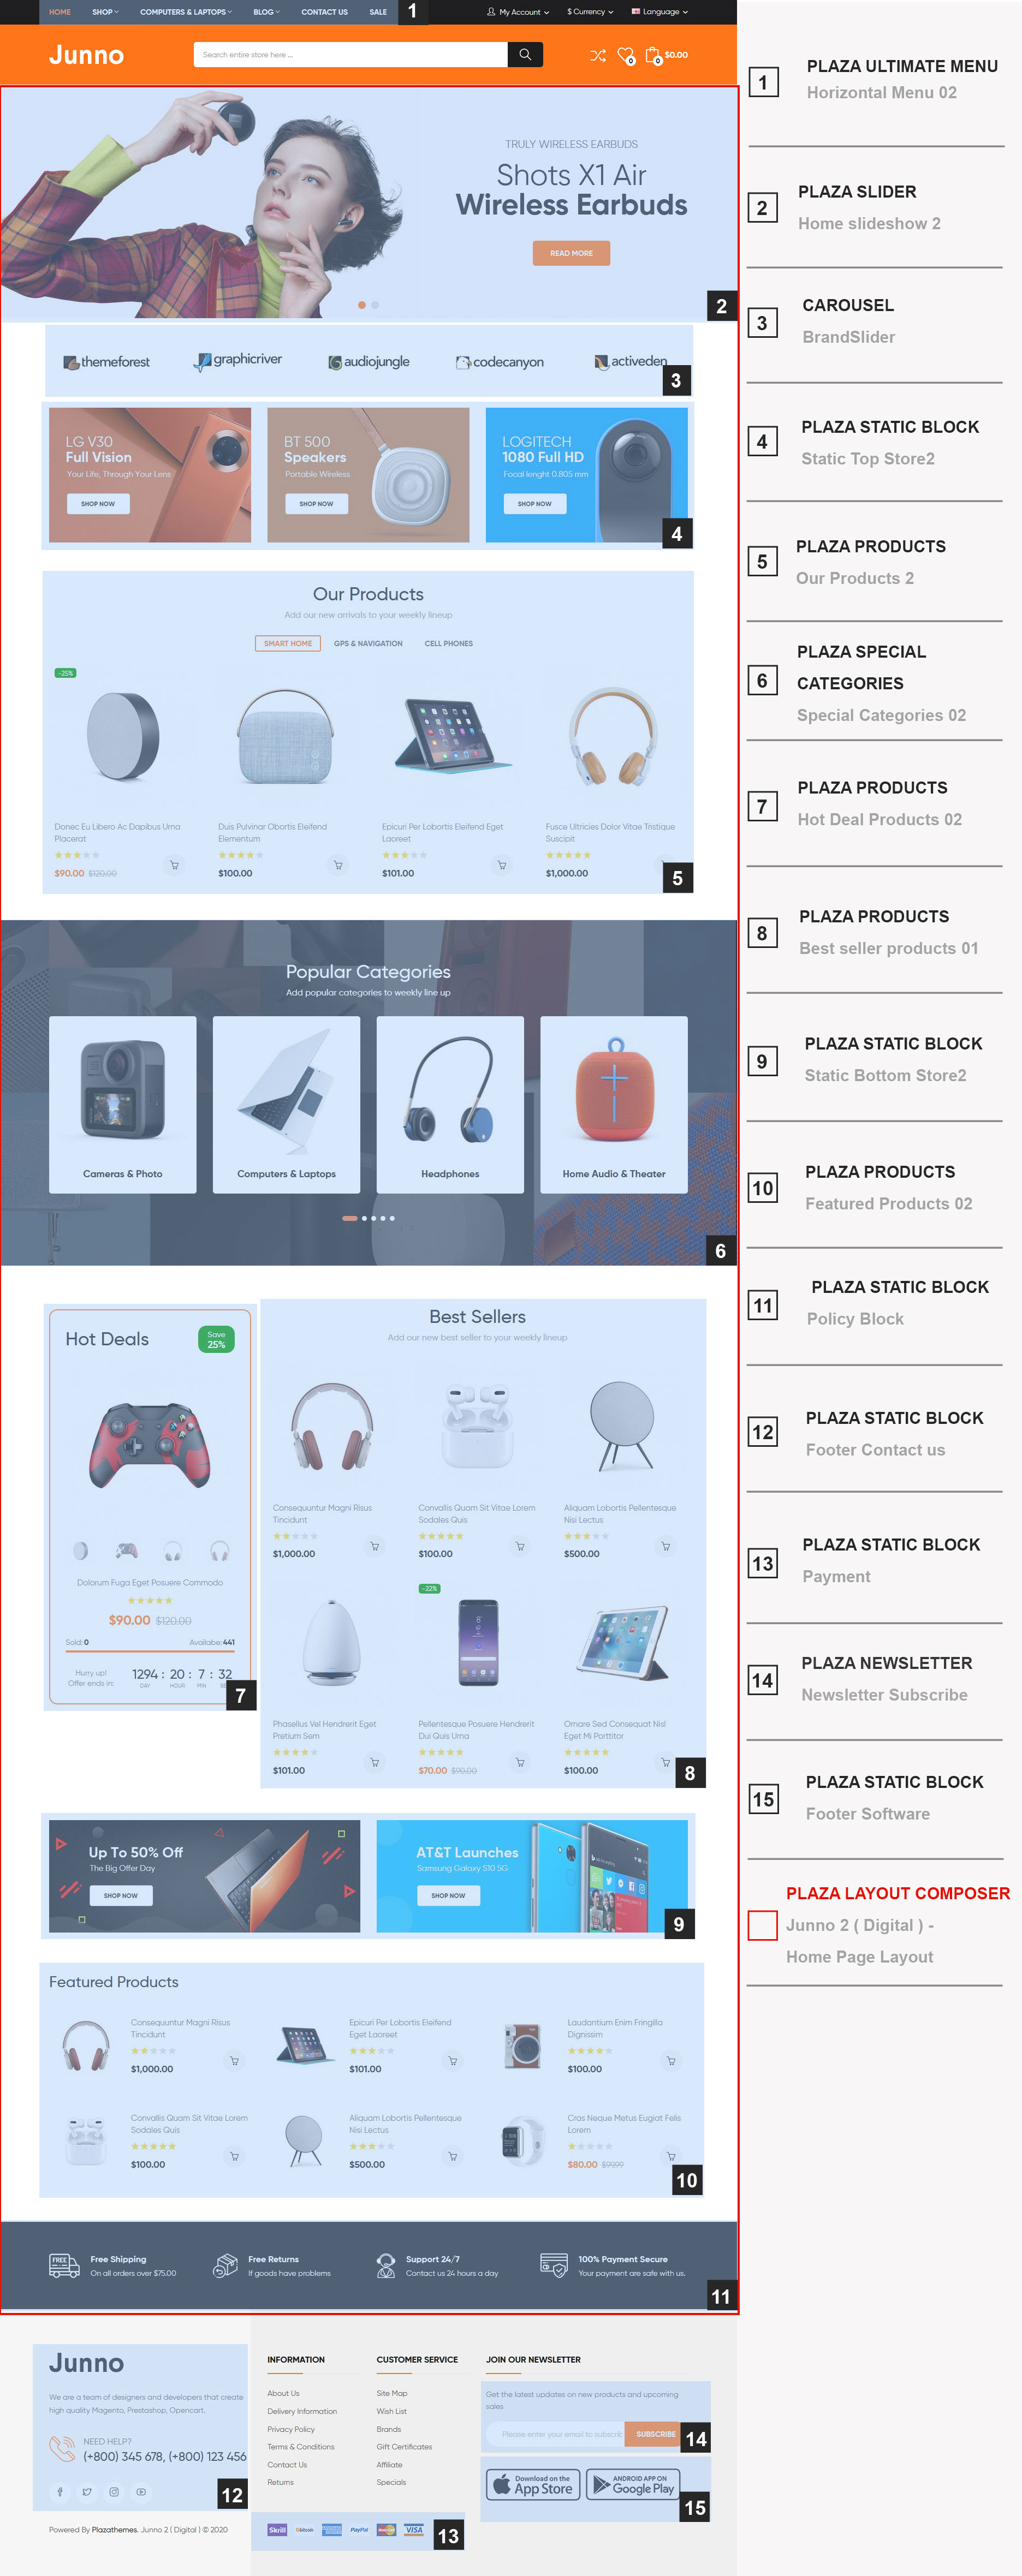
-> To set the layout like Junno Cosmetic: Login admin -> Design -> Layouts -> Junno 2 ( Digital ) - Home Page Layout and set the layout like :

Category
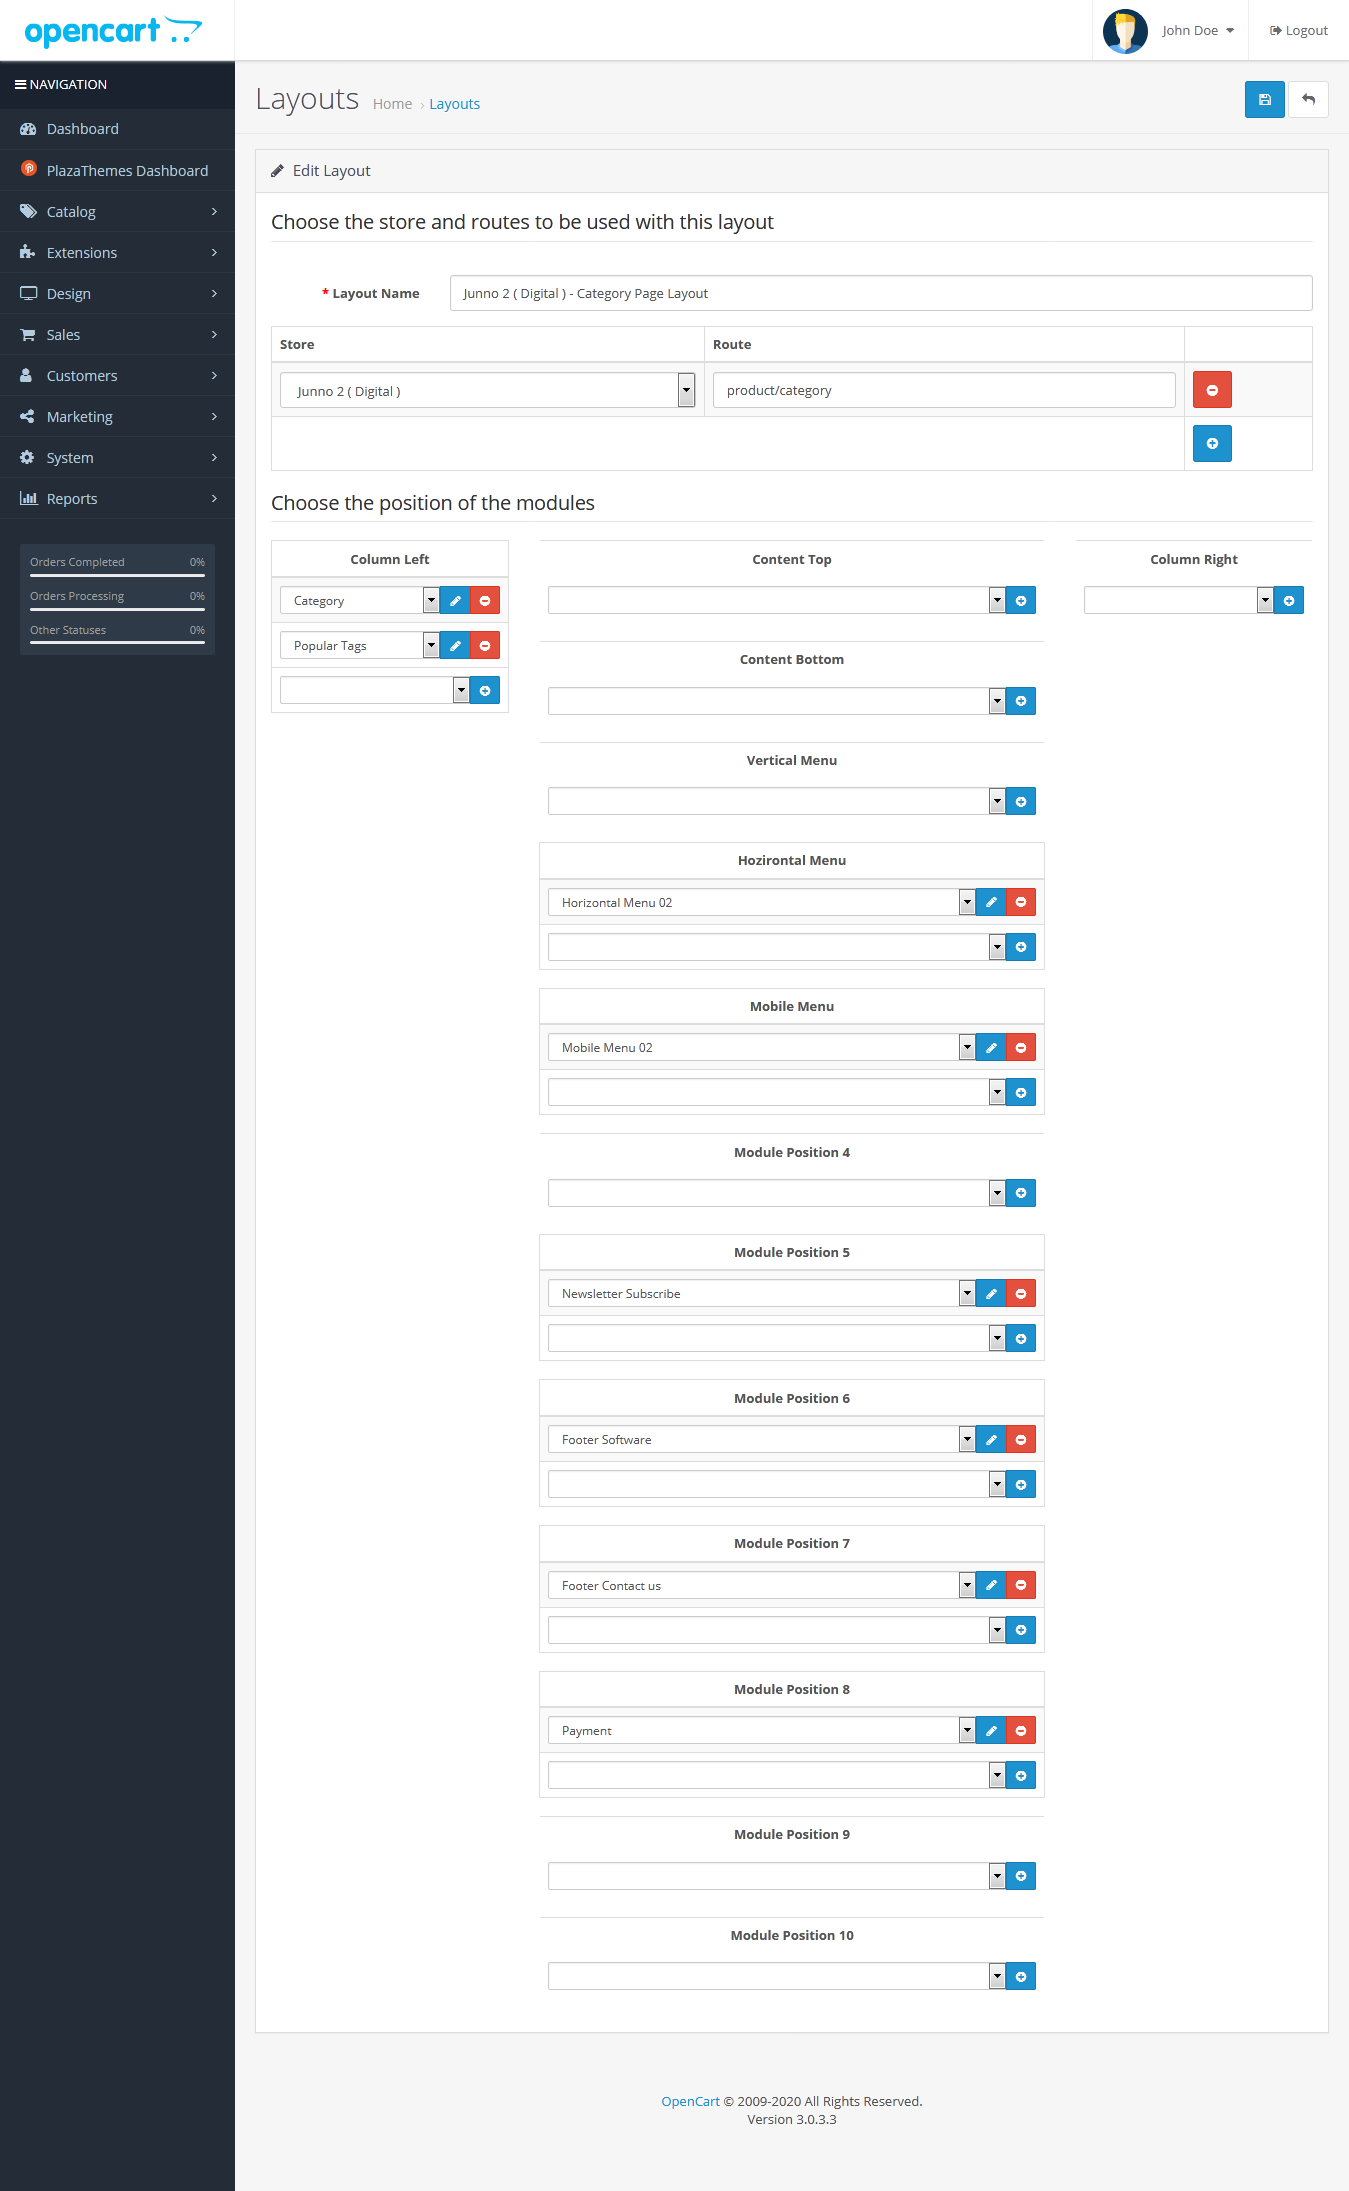
-> To set the layout like Category page : Login admin -> Design -> Layouts -> Junno 2 ( Digital ) - Category Page Layout and set the layout like:
Detail
-> To set the layout like Product page : Login admin -> Design -> Layouts -> Junno 2 ( Digital ) - Product Page Layout and set the layout like:

Mobile layout
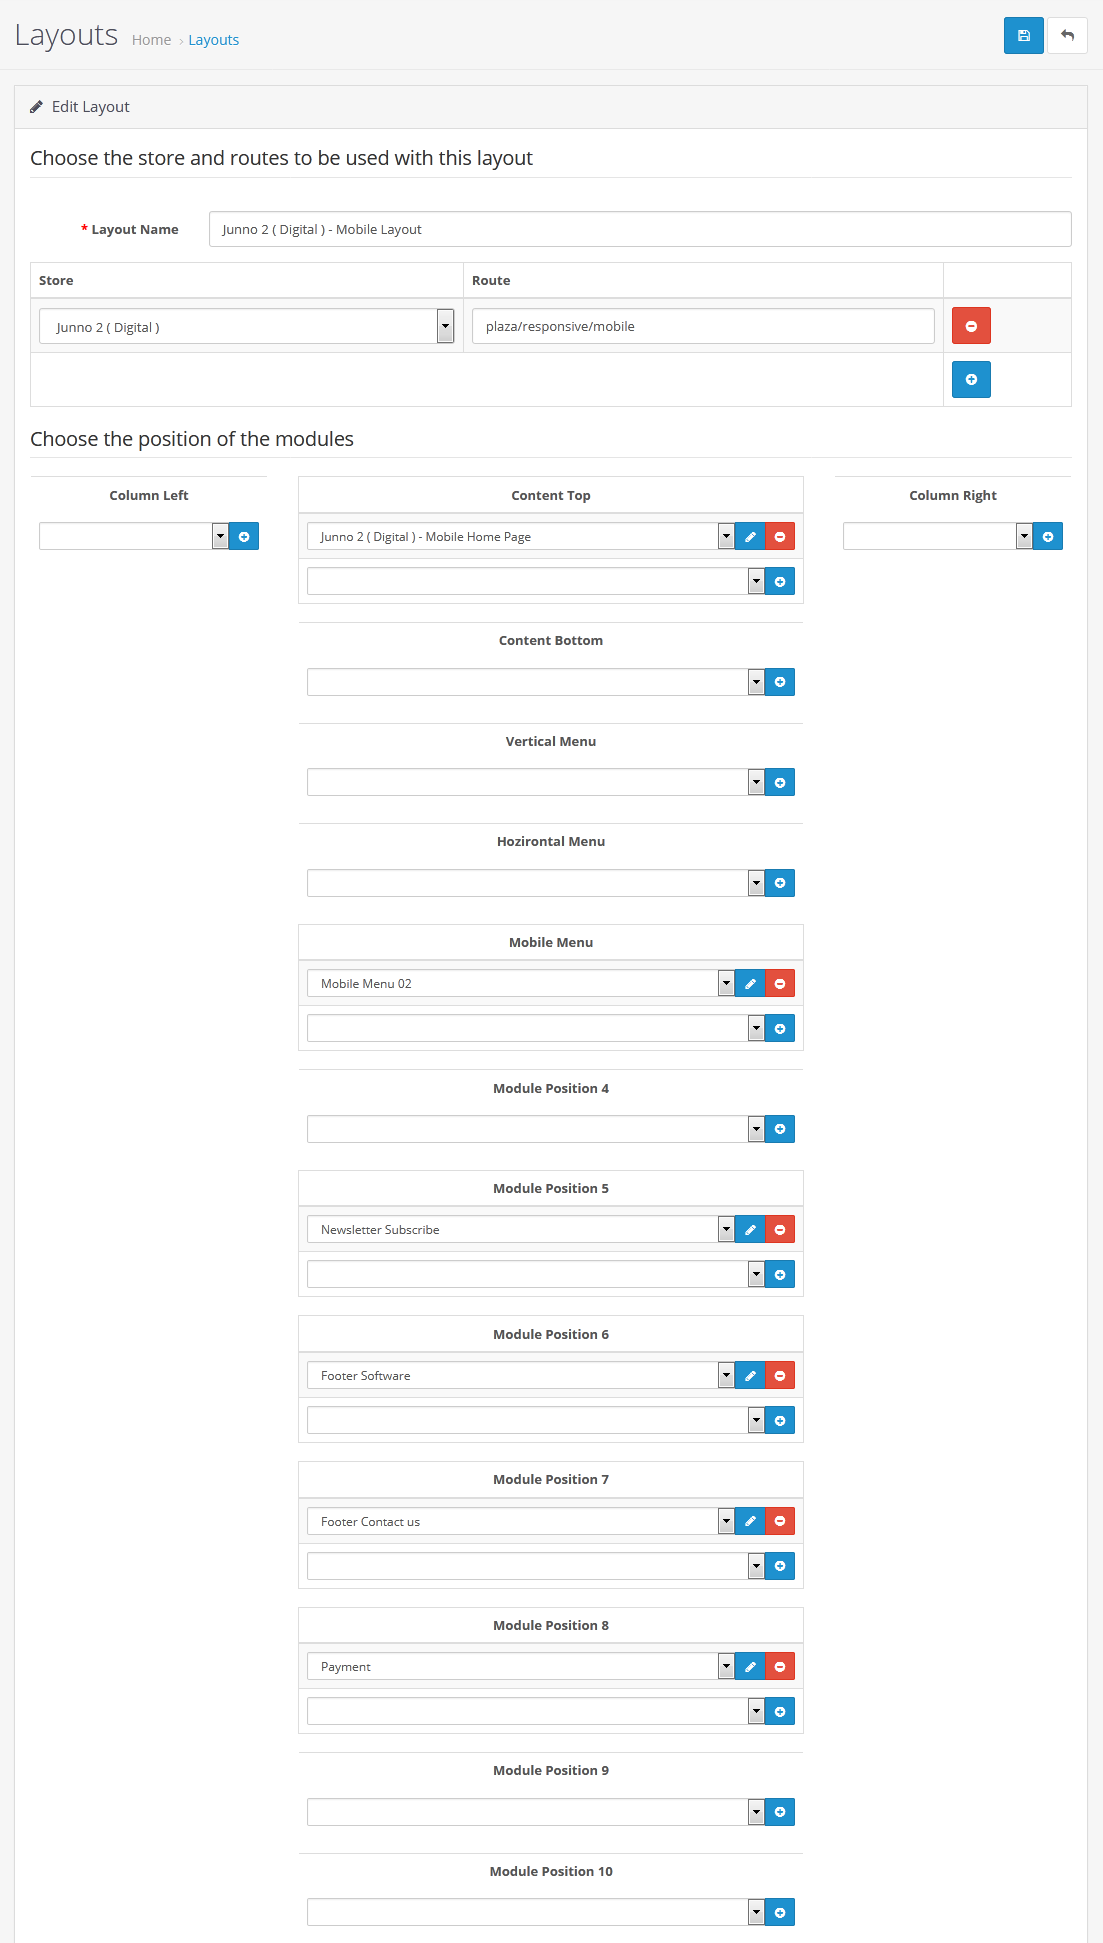
-> To set the layout like mobile layout : Login admin -> Design -> Layouts -> Junno 2 ( Digital ) - Mobile Layout and set the layout like:
Junno Organic
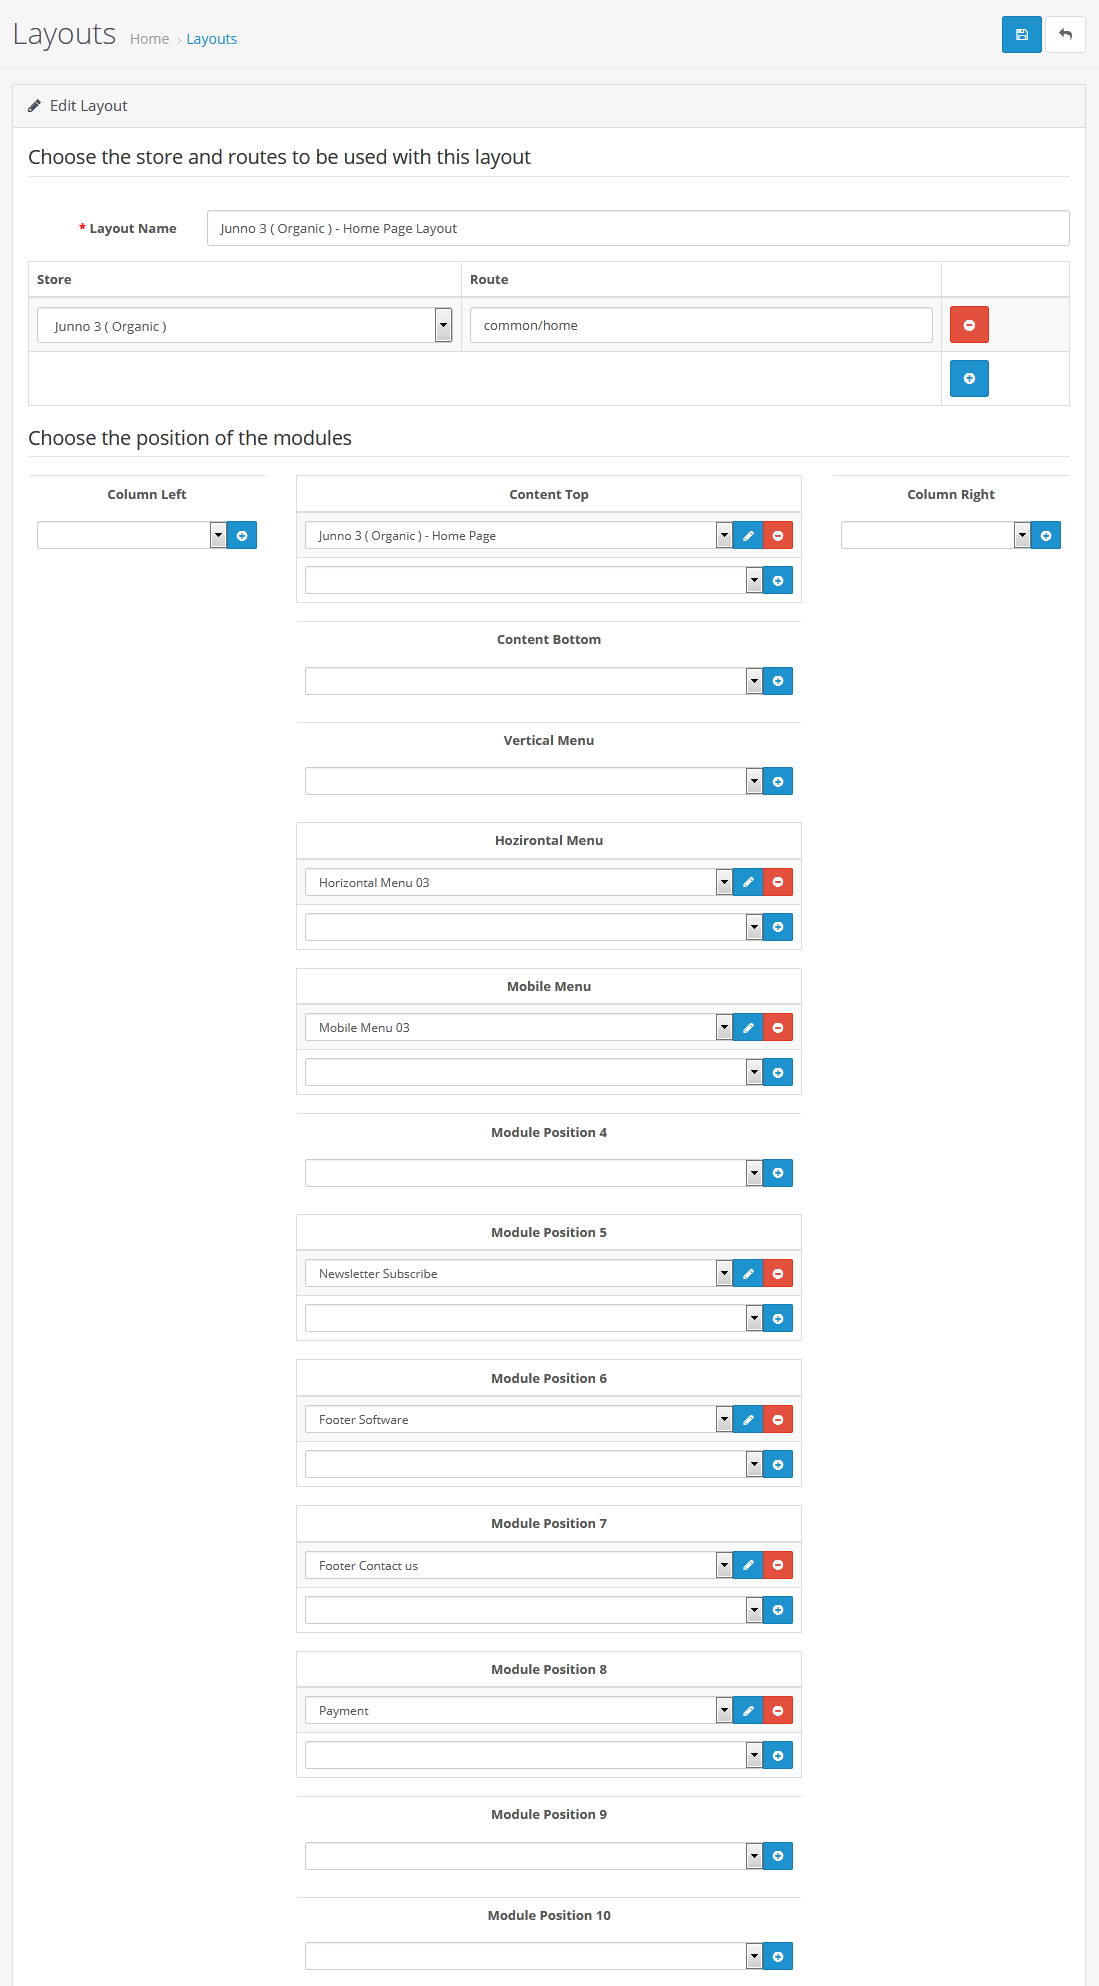
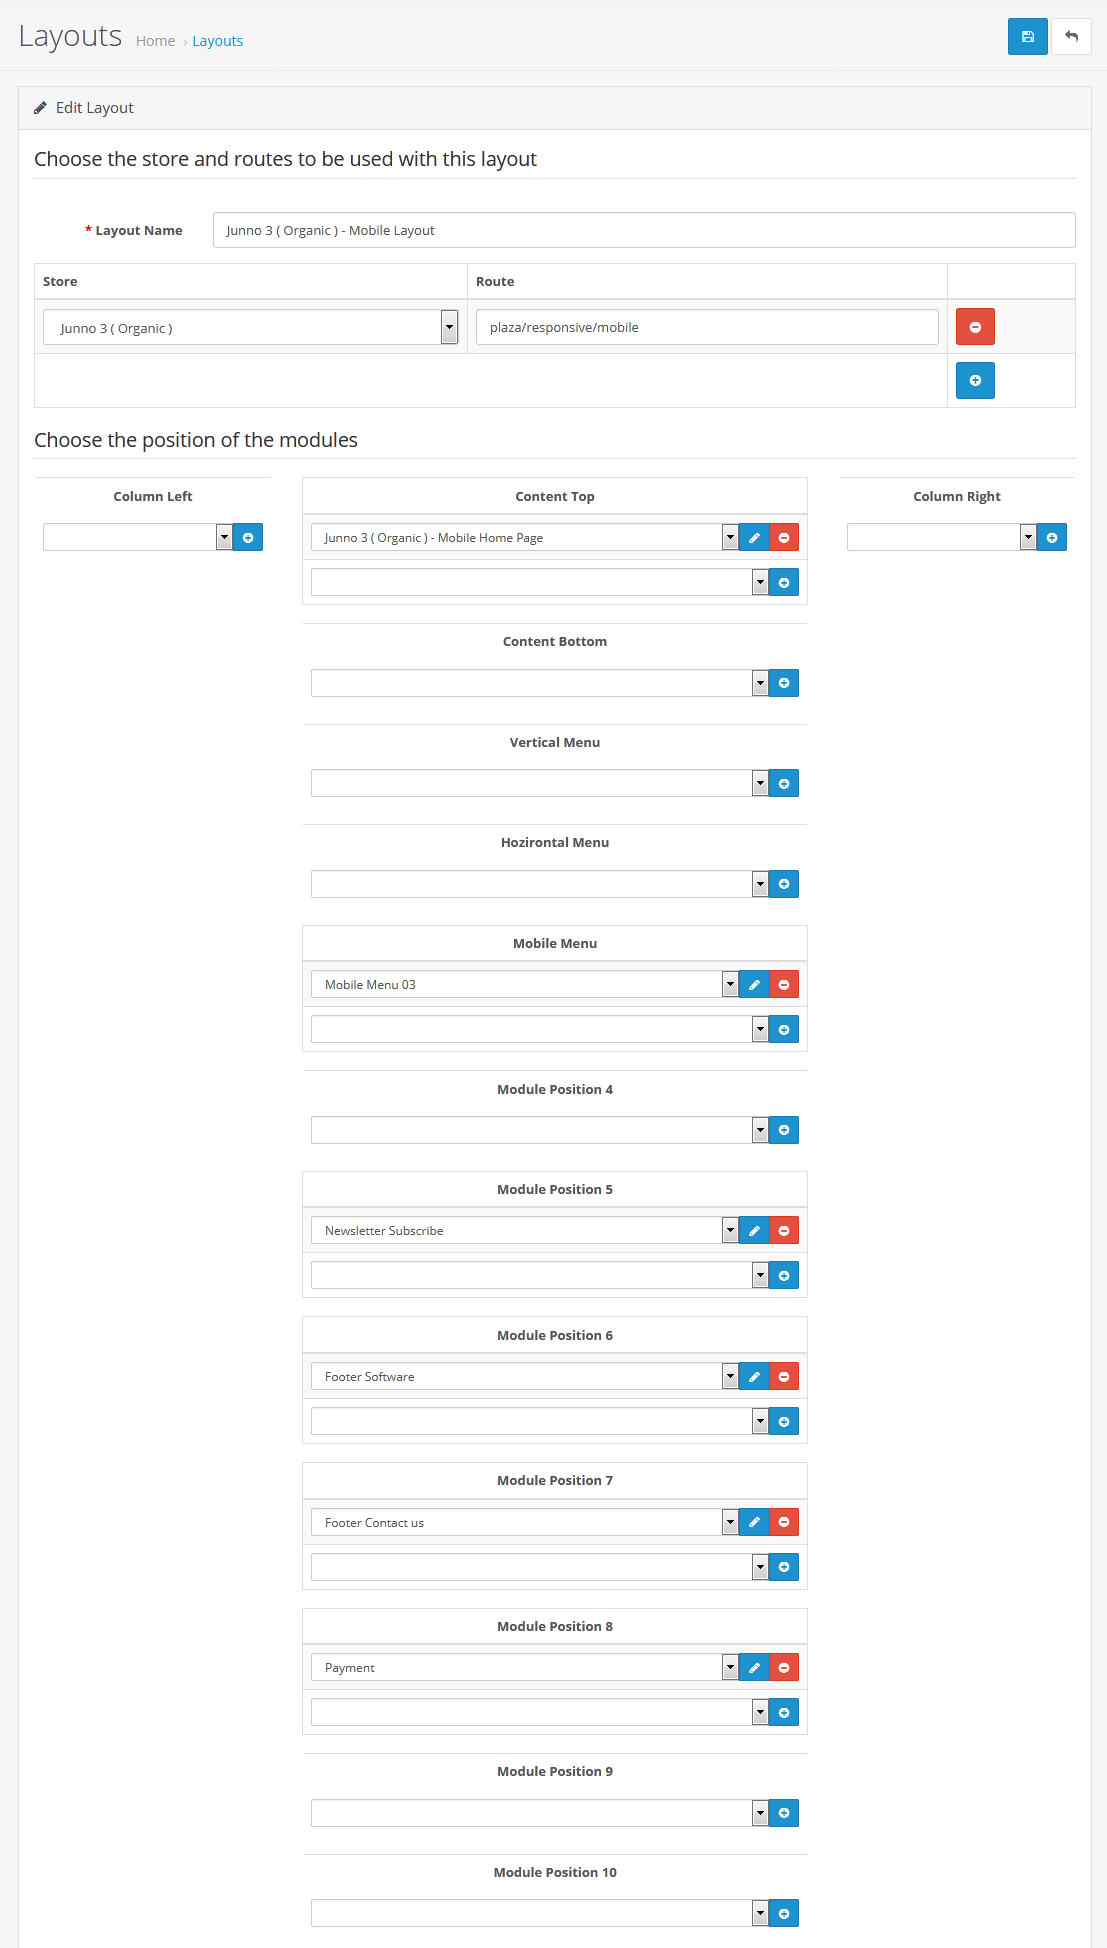
-> To set the layout like Junno Cosmetic: Login admin -> Design -> Layouts -> Junno 3 ( Organic ) - Home Page Layout and set the layout like :
Category
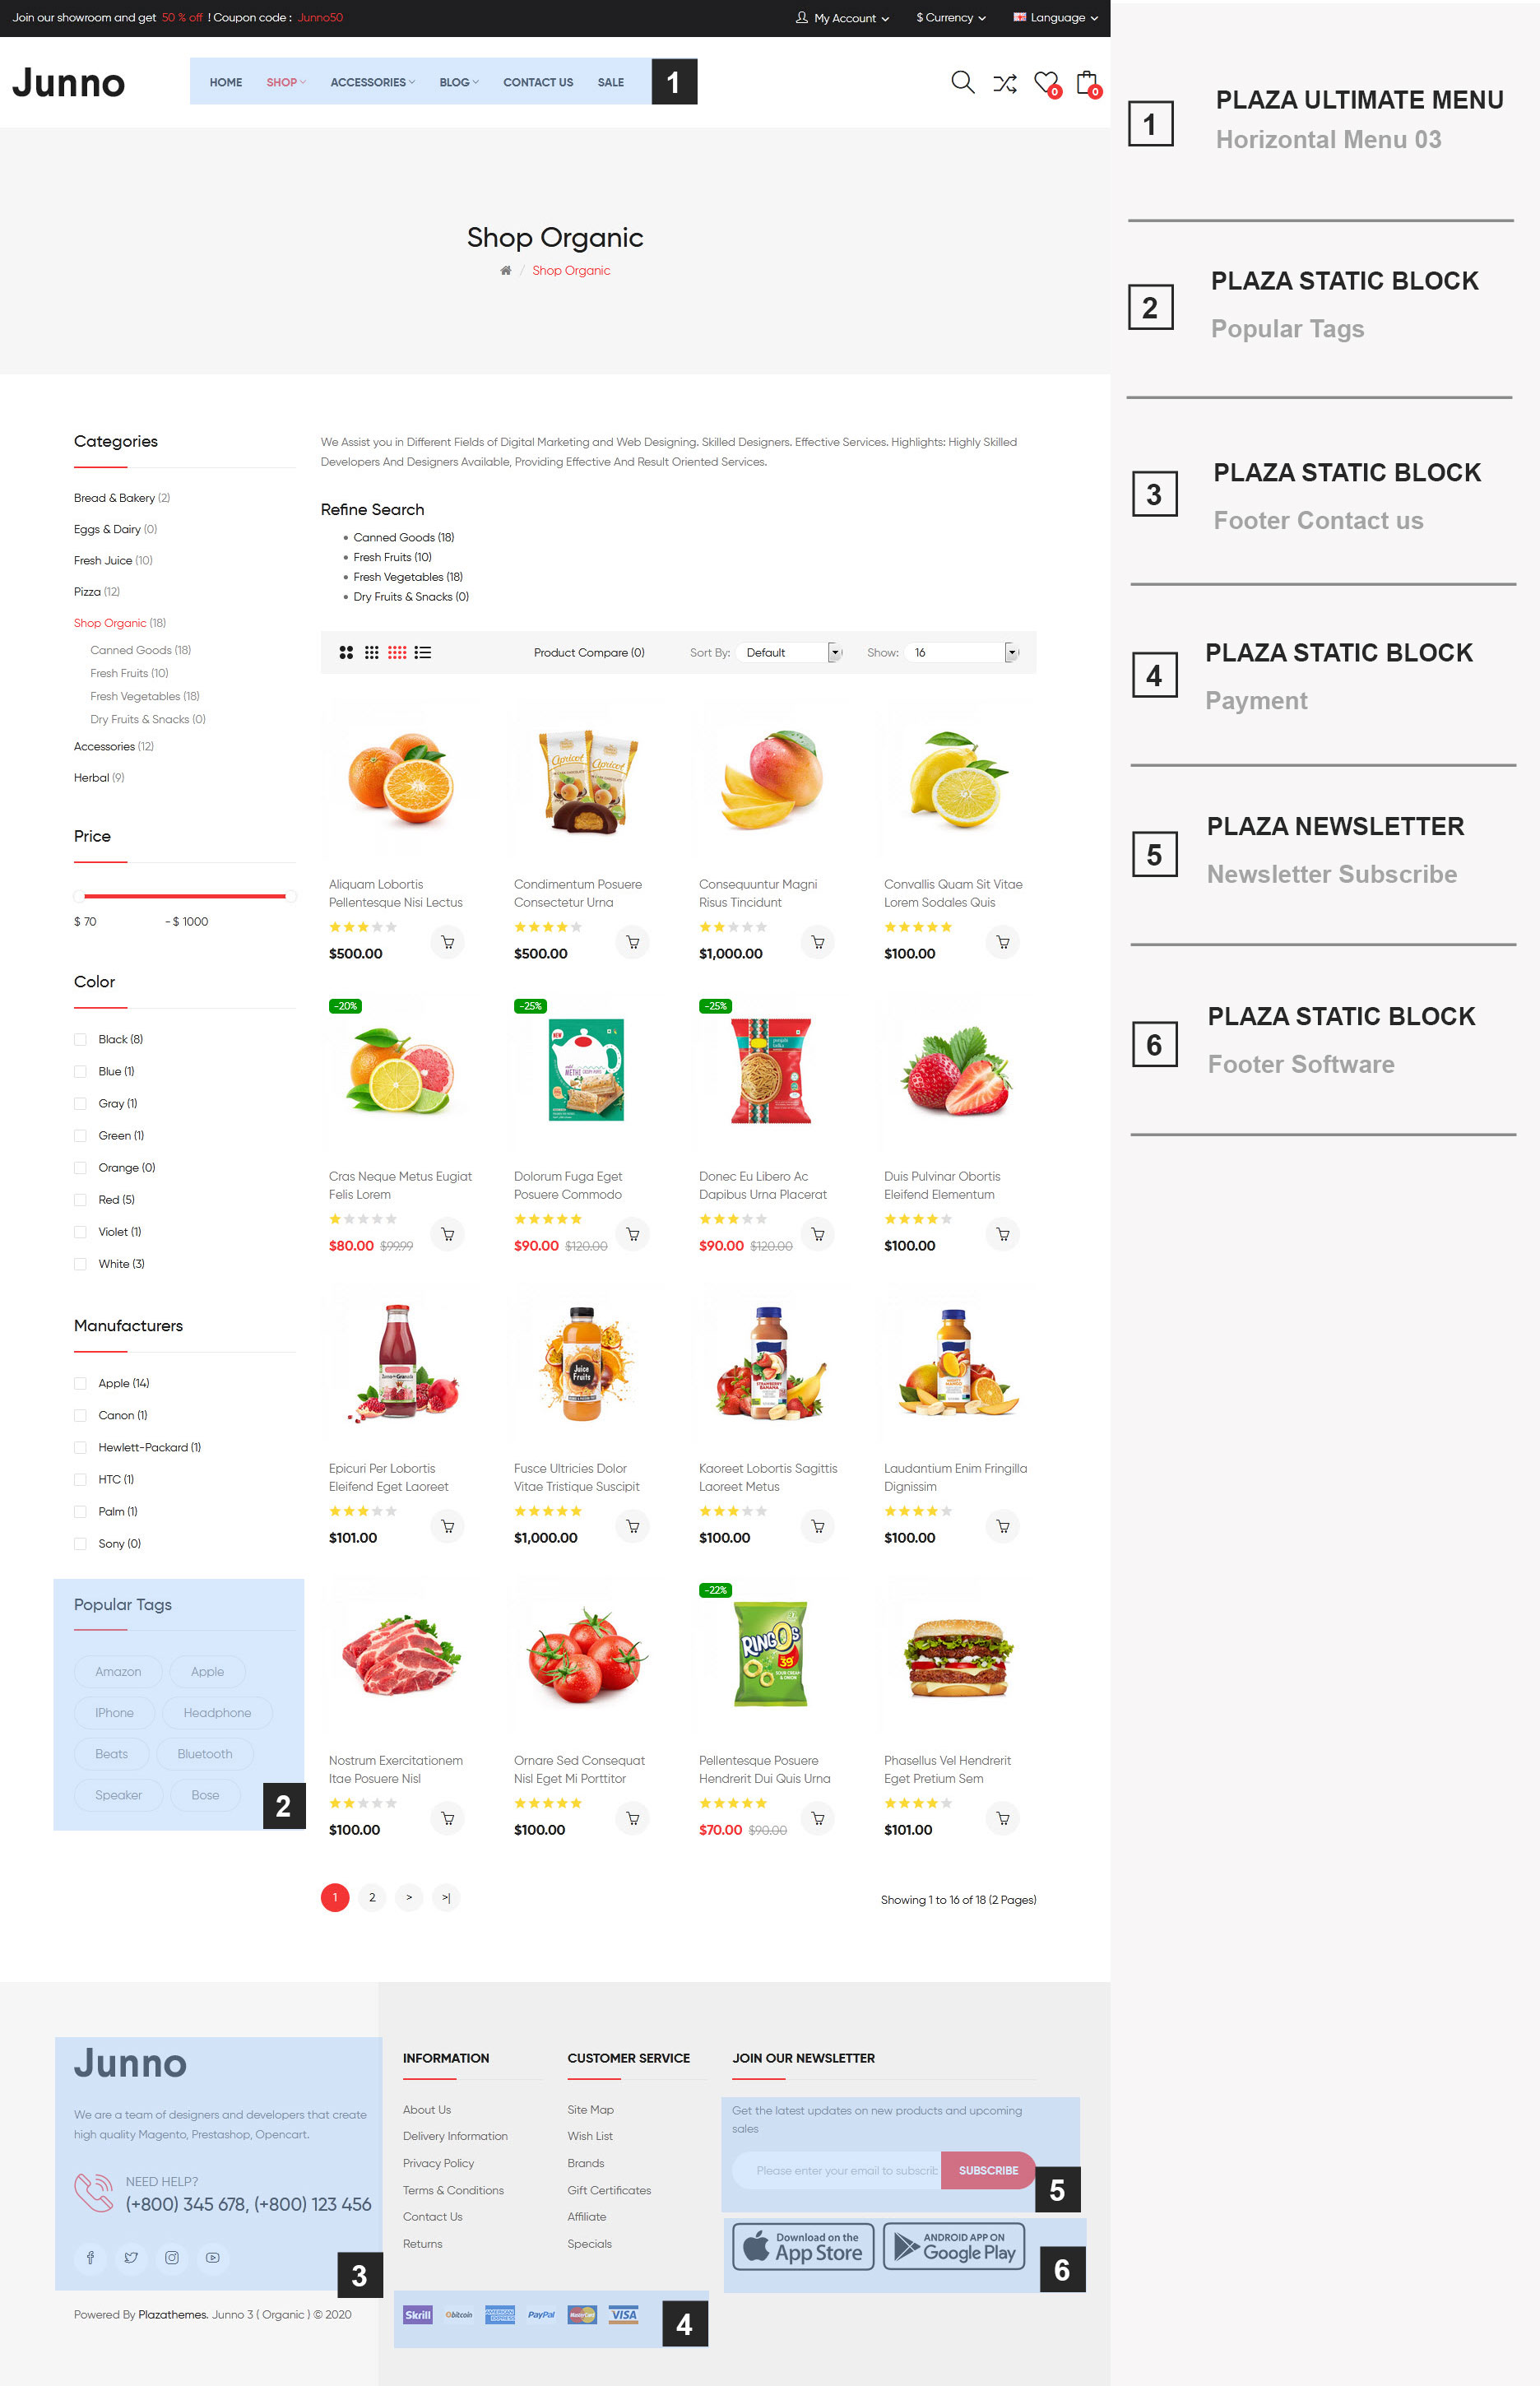
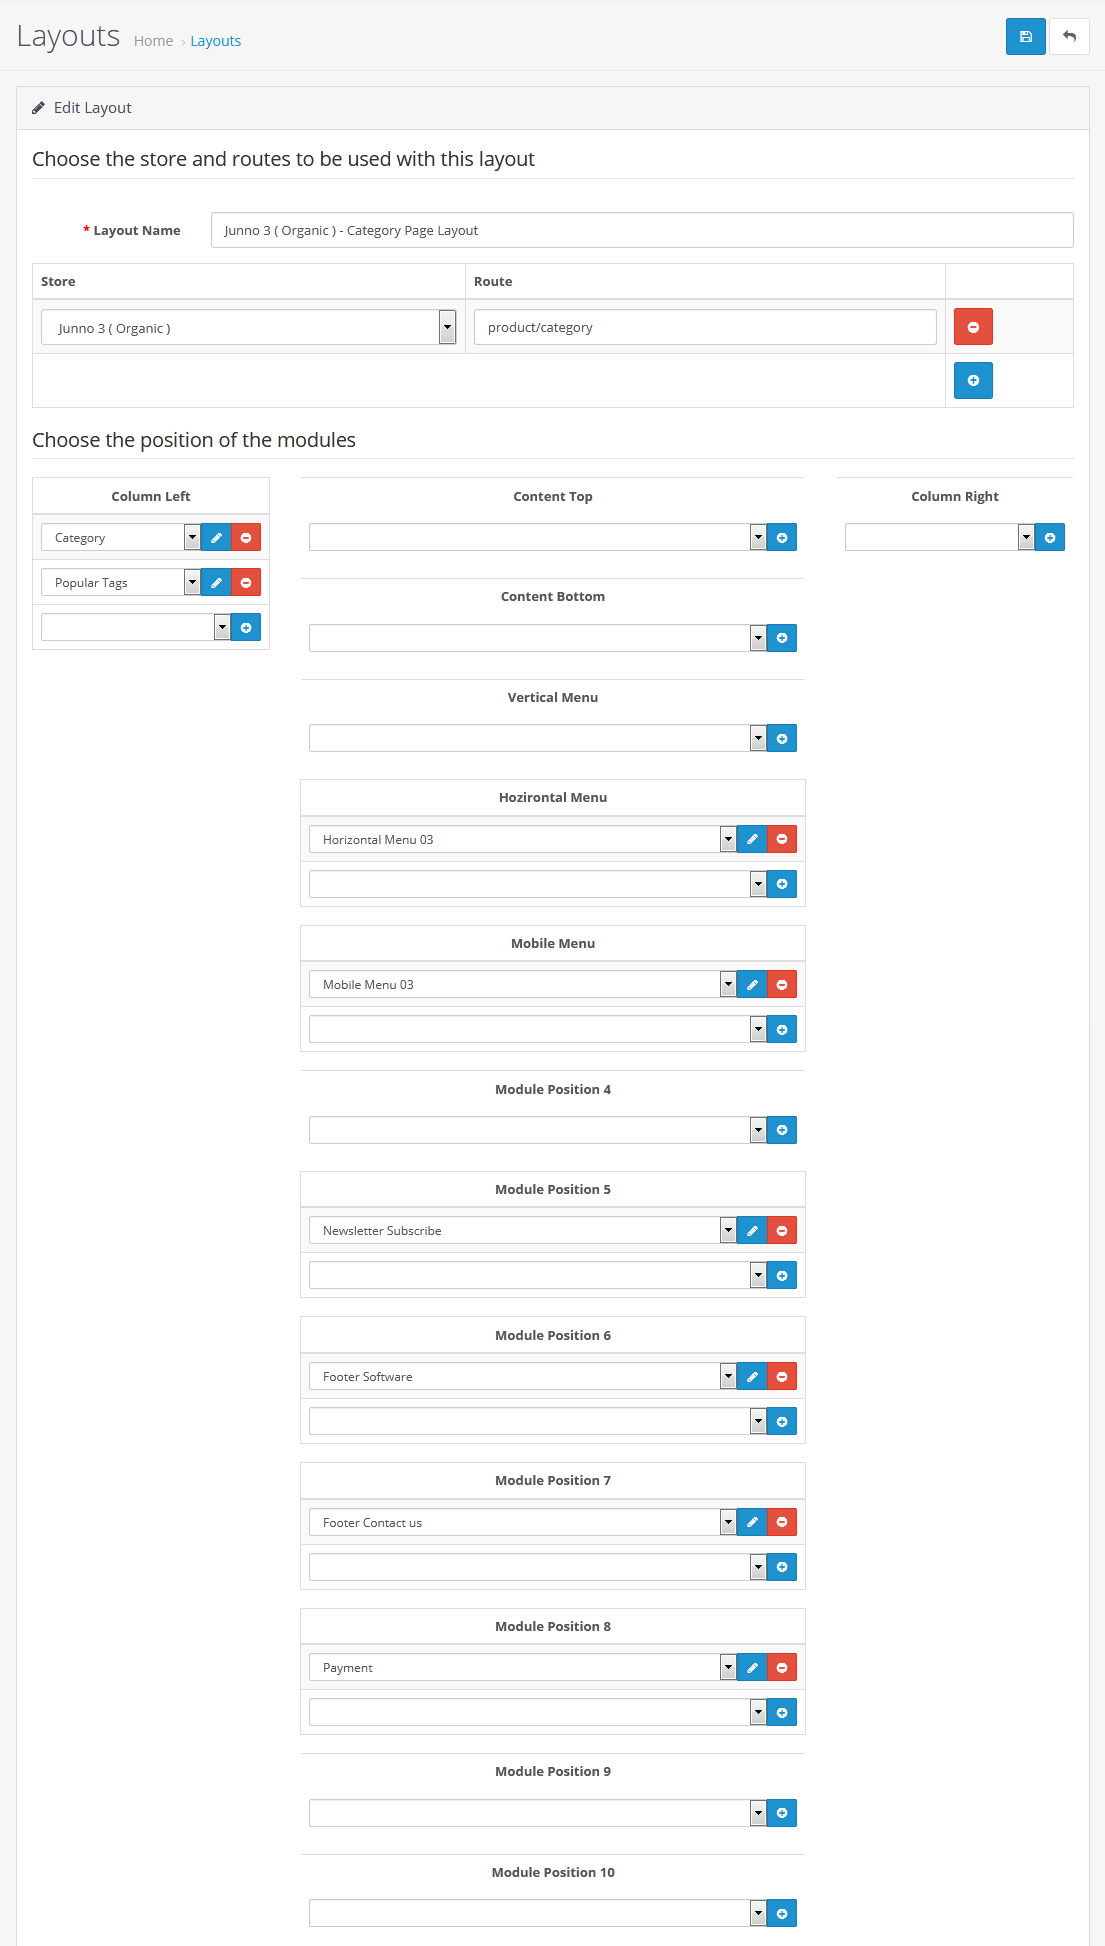
-> To set the layout like Category page : Login admin -> Design -> Layouts -> Junno 3 ( Organic ) - Category Page Layout and set the layout like:
Detail
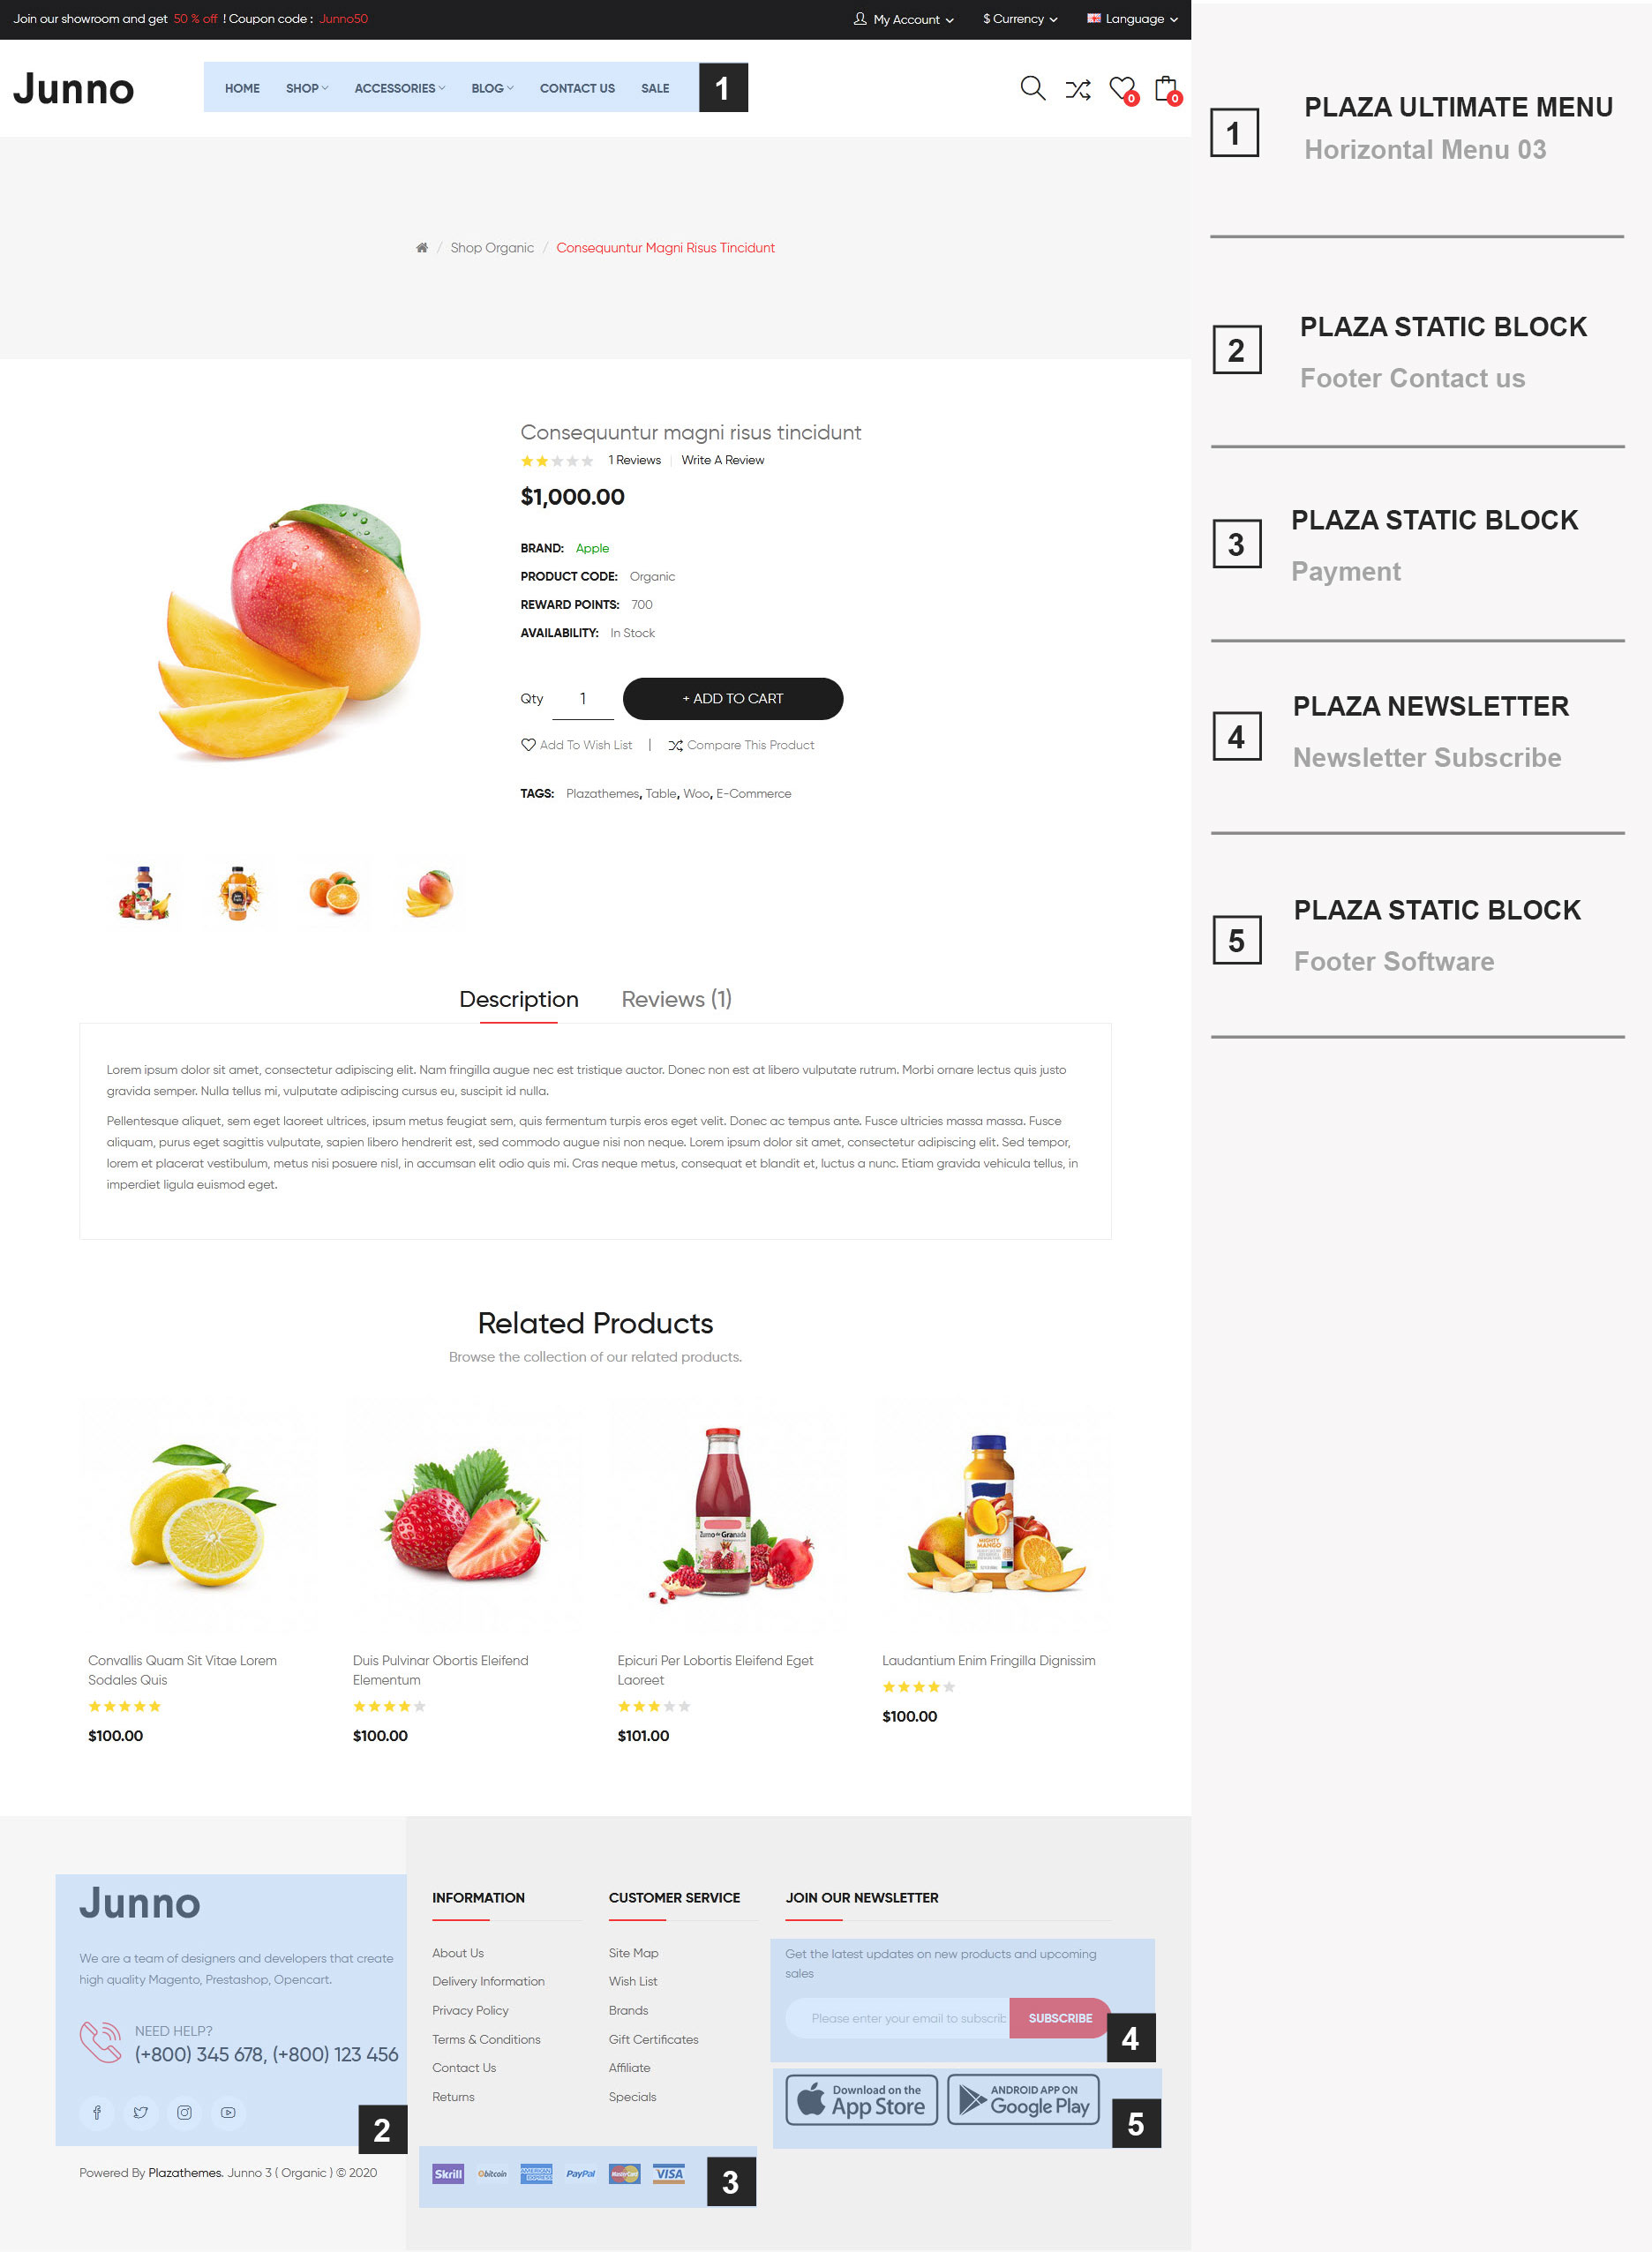
-> To set the layout like Product page : Login admin -> Design -> Layouts -> Junno 3 ( Organic ) - Product Page Layout and set the layout like:

Mobile layout
-> To set the layout like mobile layout : Login admin -> Design -> Layouts -> Junno 3 ( Organic ) - Mobile Layout and set the layout like:
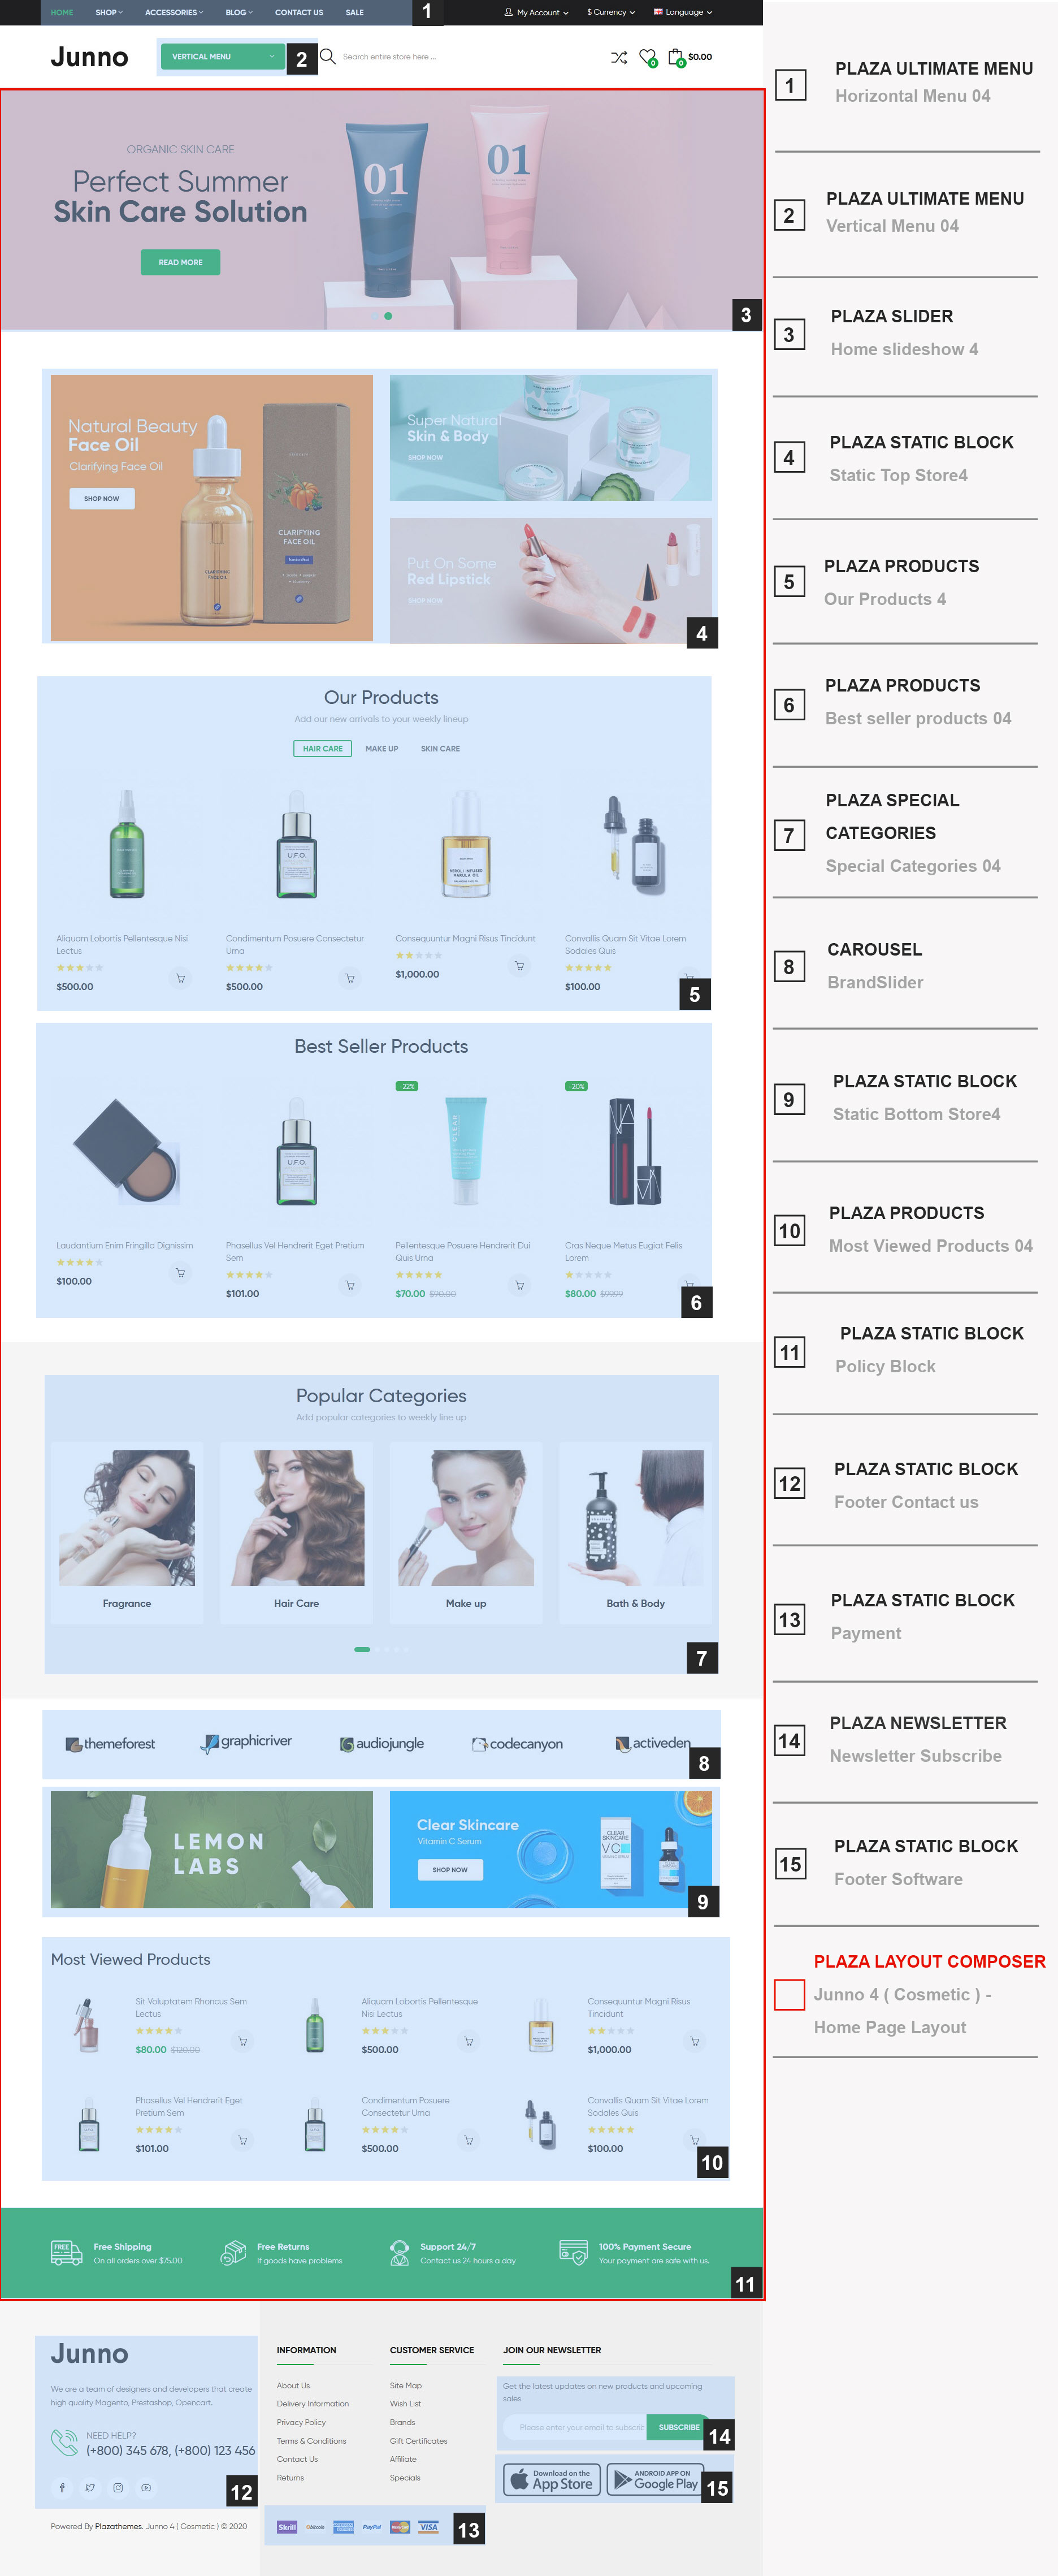
Junno Cosmetic
-> To set the layout like Junno Cosmetic: Login admin -> Design -> Layouts -> Junno 4 ( Cosmetic ) - Home Page Layout and set the layout like :

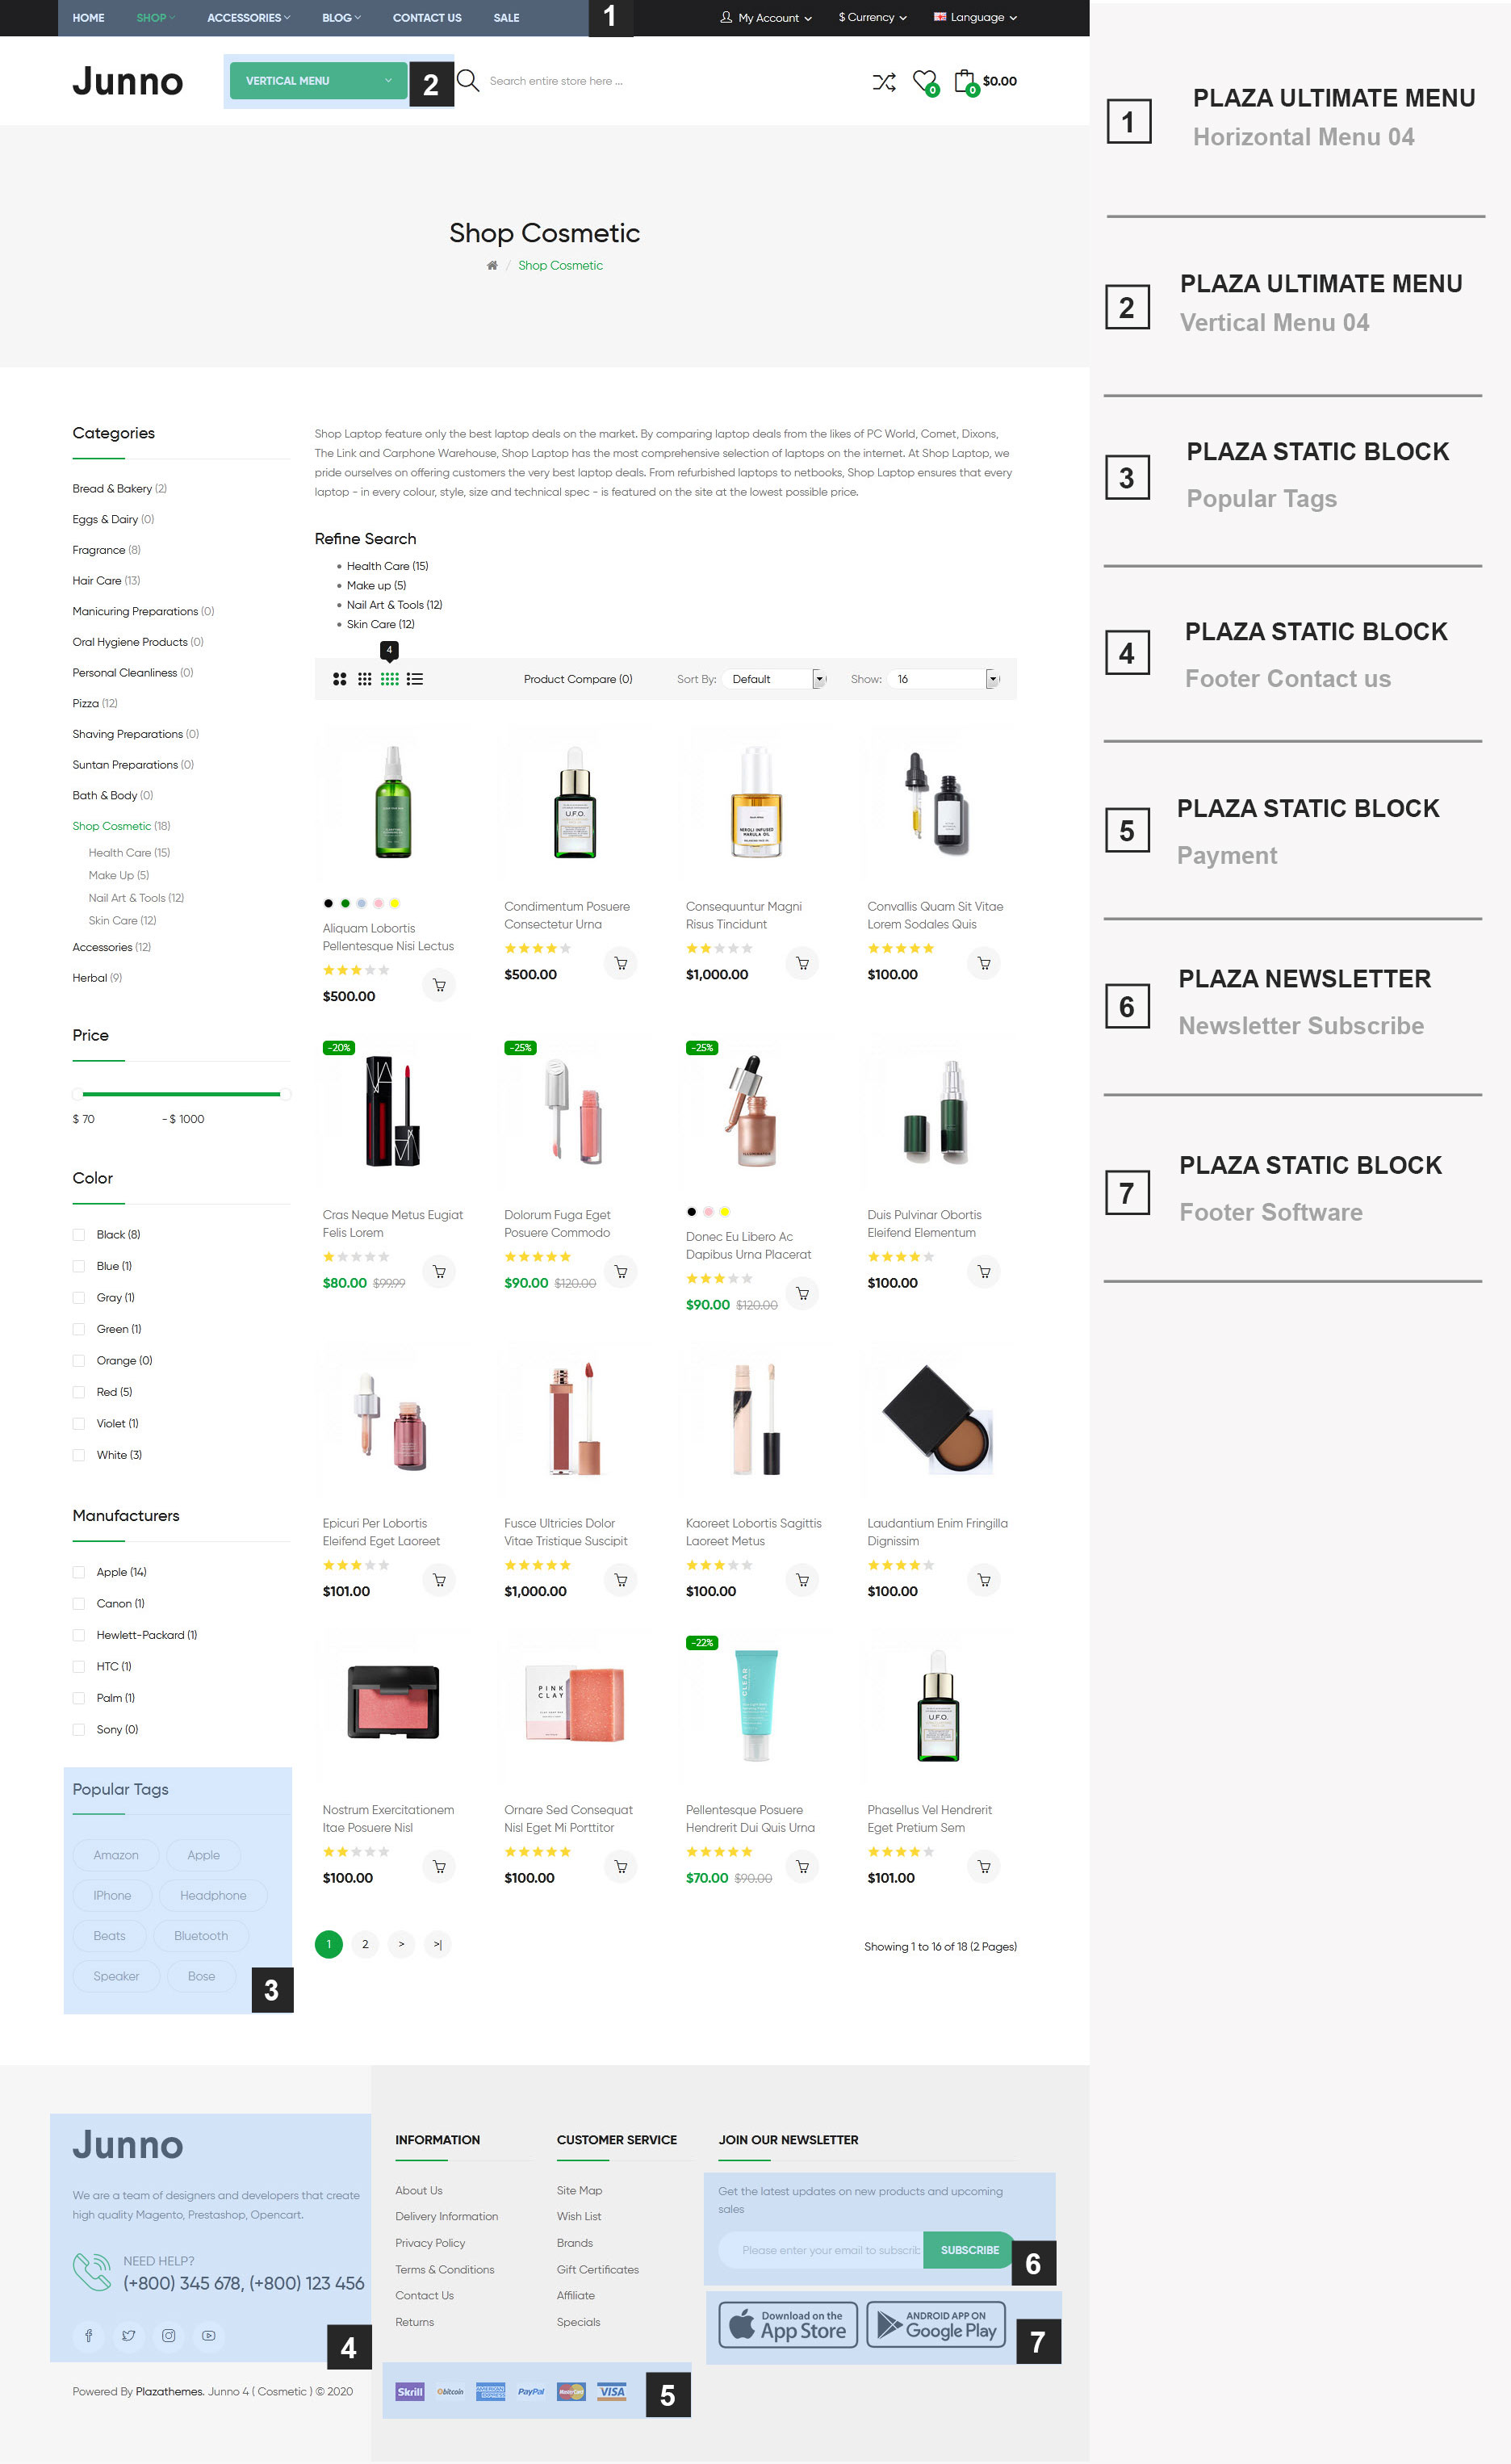
Category
-> To set the layout like Category page : Login admin -> Design -> Layouts -> Junno 4 ( Cosmetic ) - Category Page Layout and set the layout like:

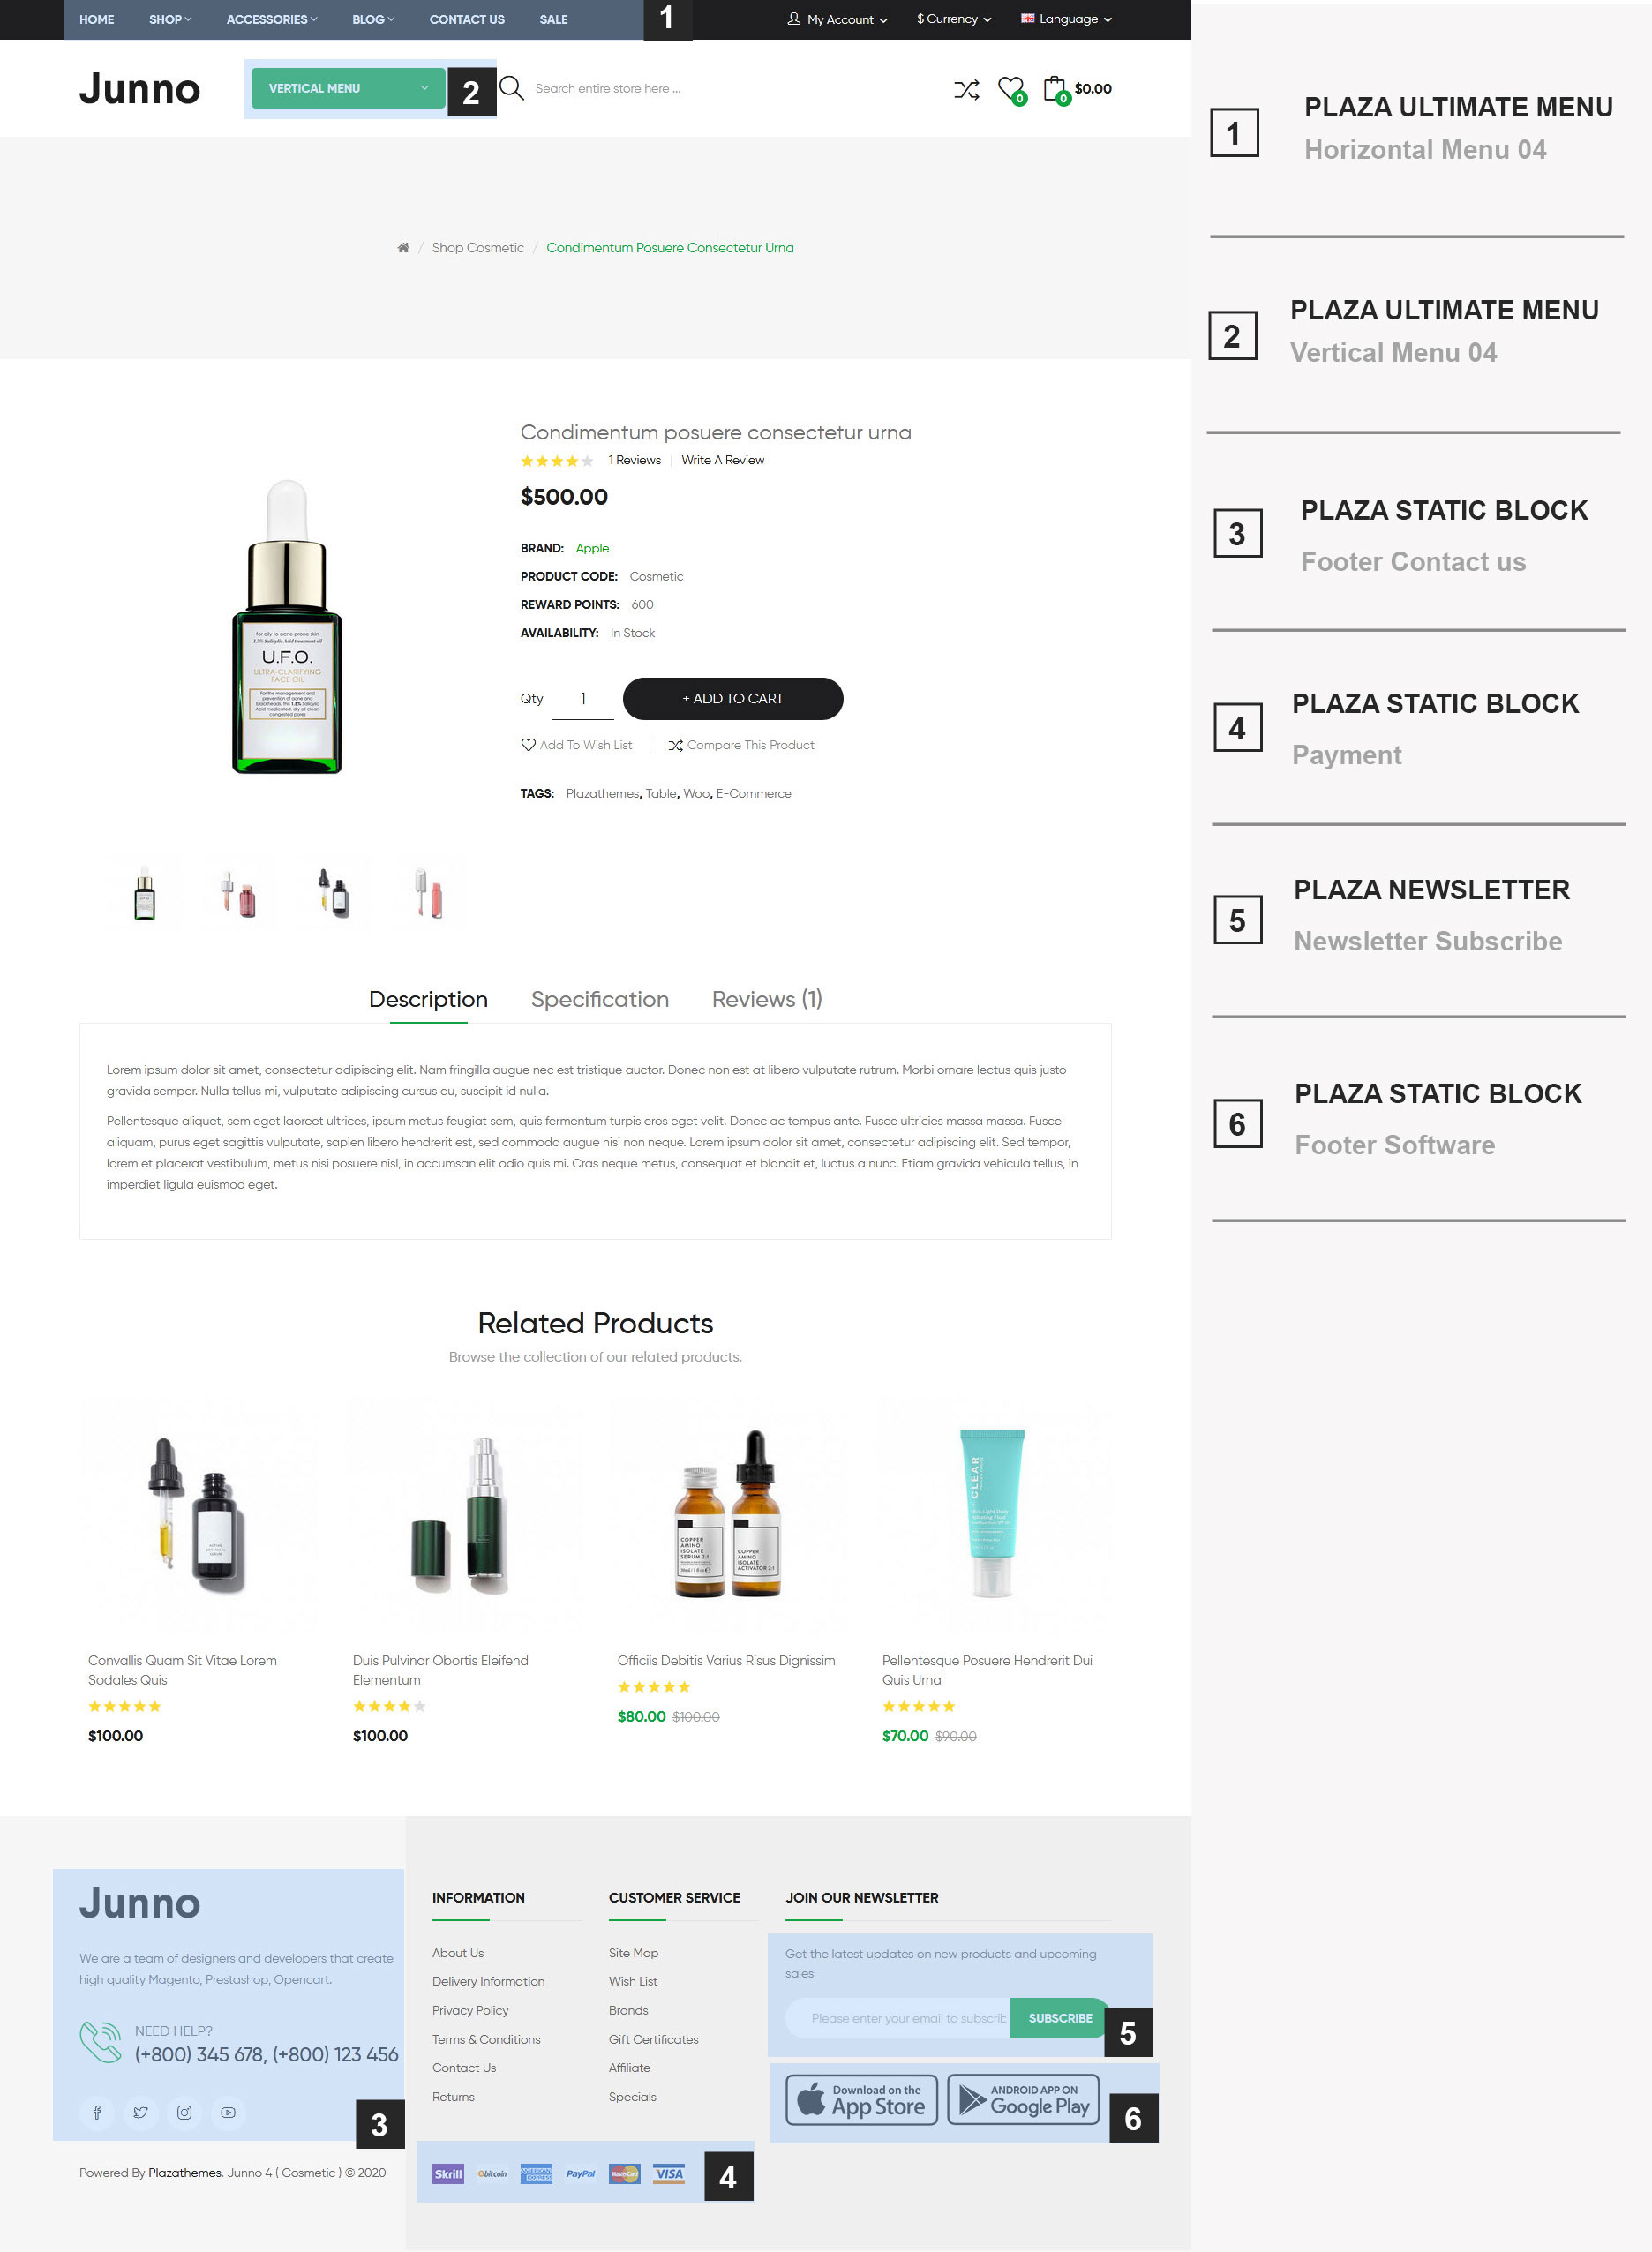
Detail
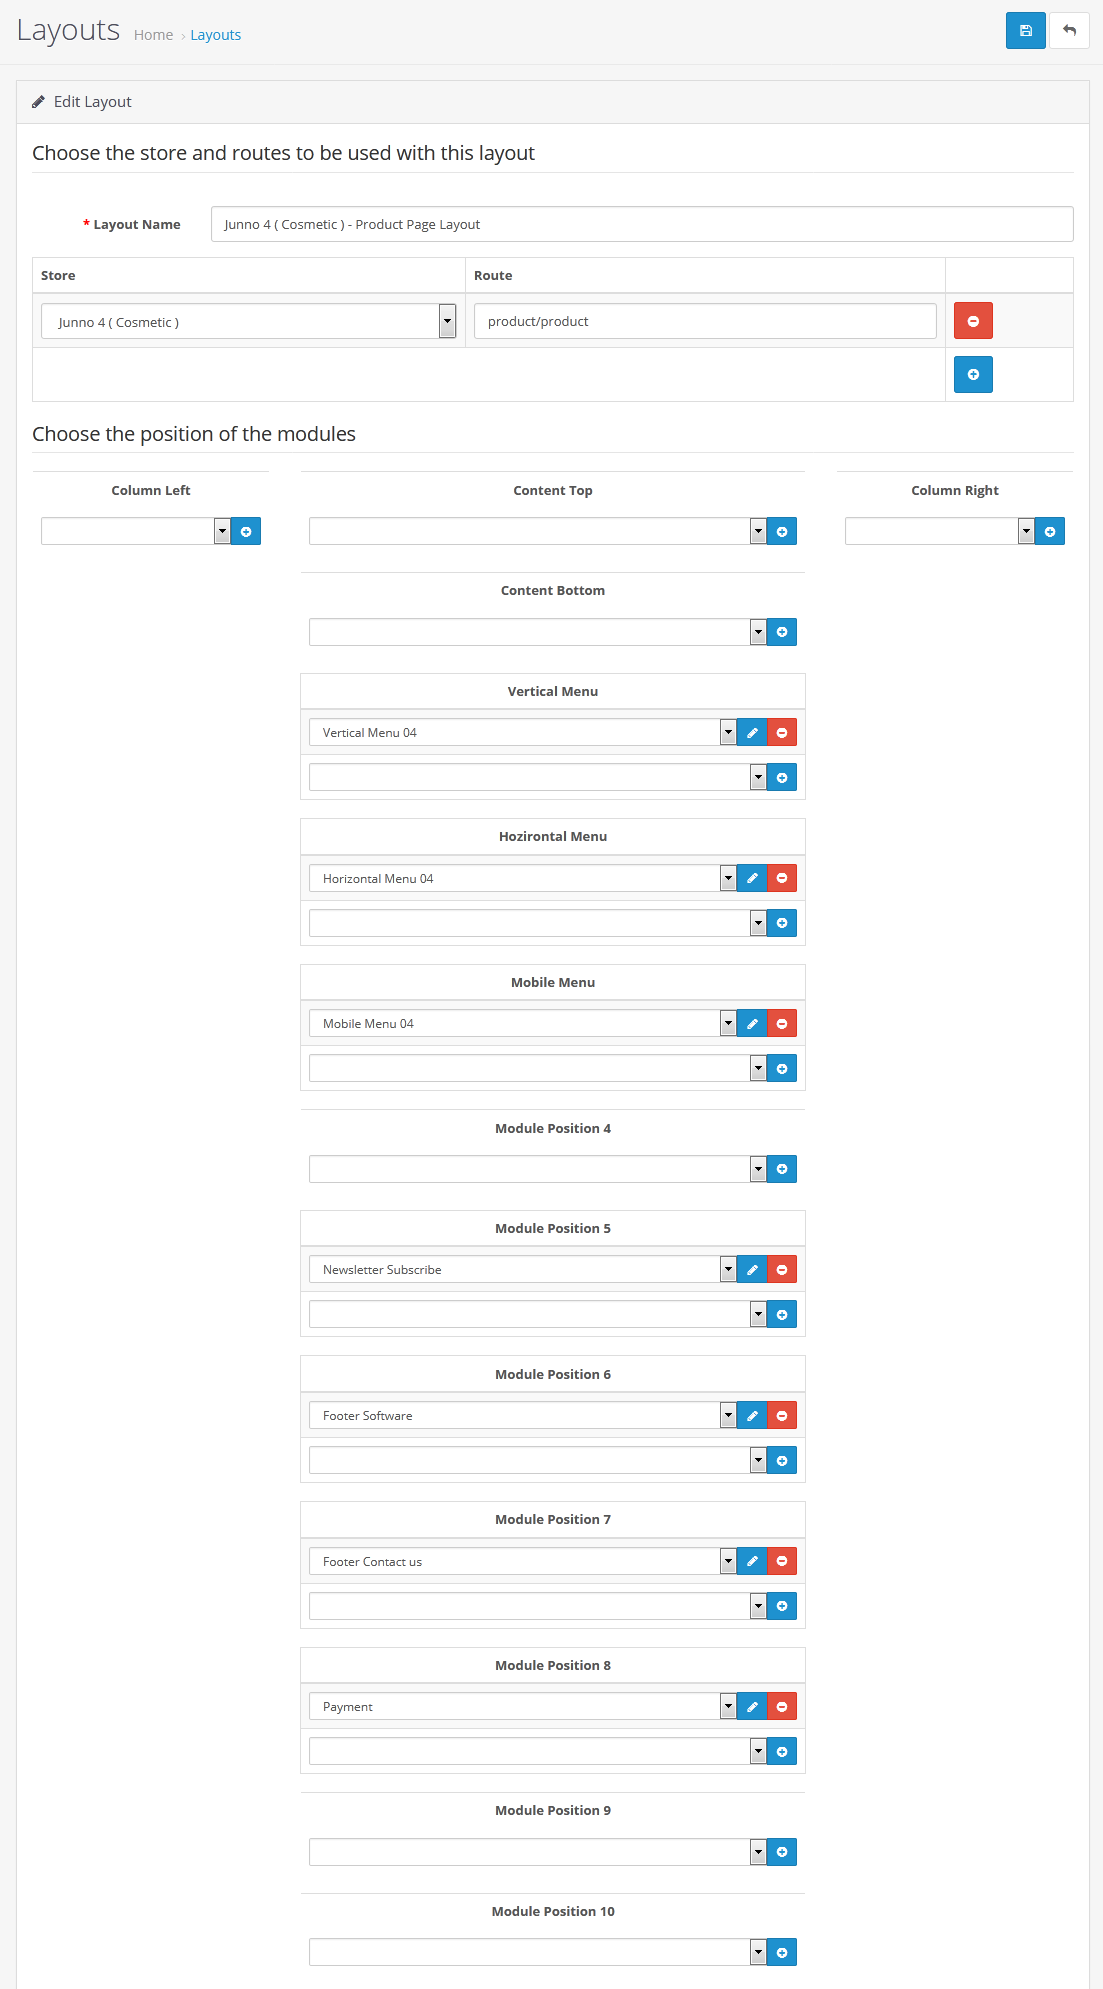
-> To set the layout like Product page : Login admin -> Design -> Layouts -> Junno 4 ( Cosmetic ) - Product Page Layout and set the layout like:
Mobile layout
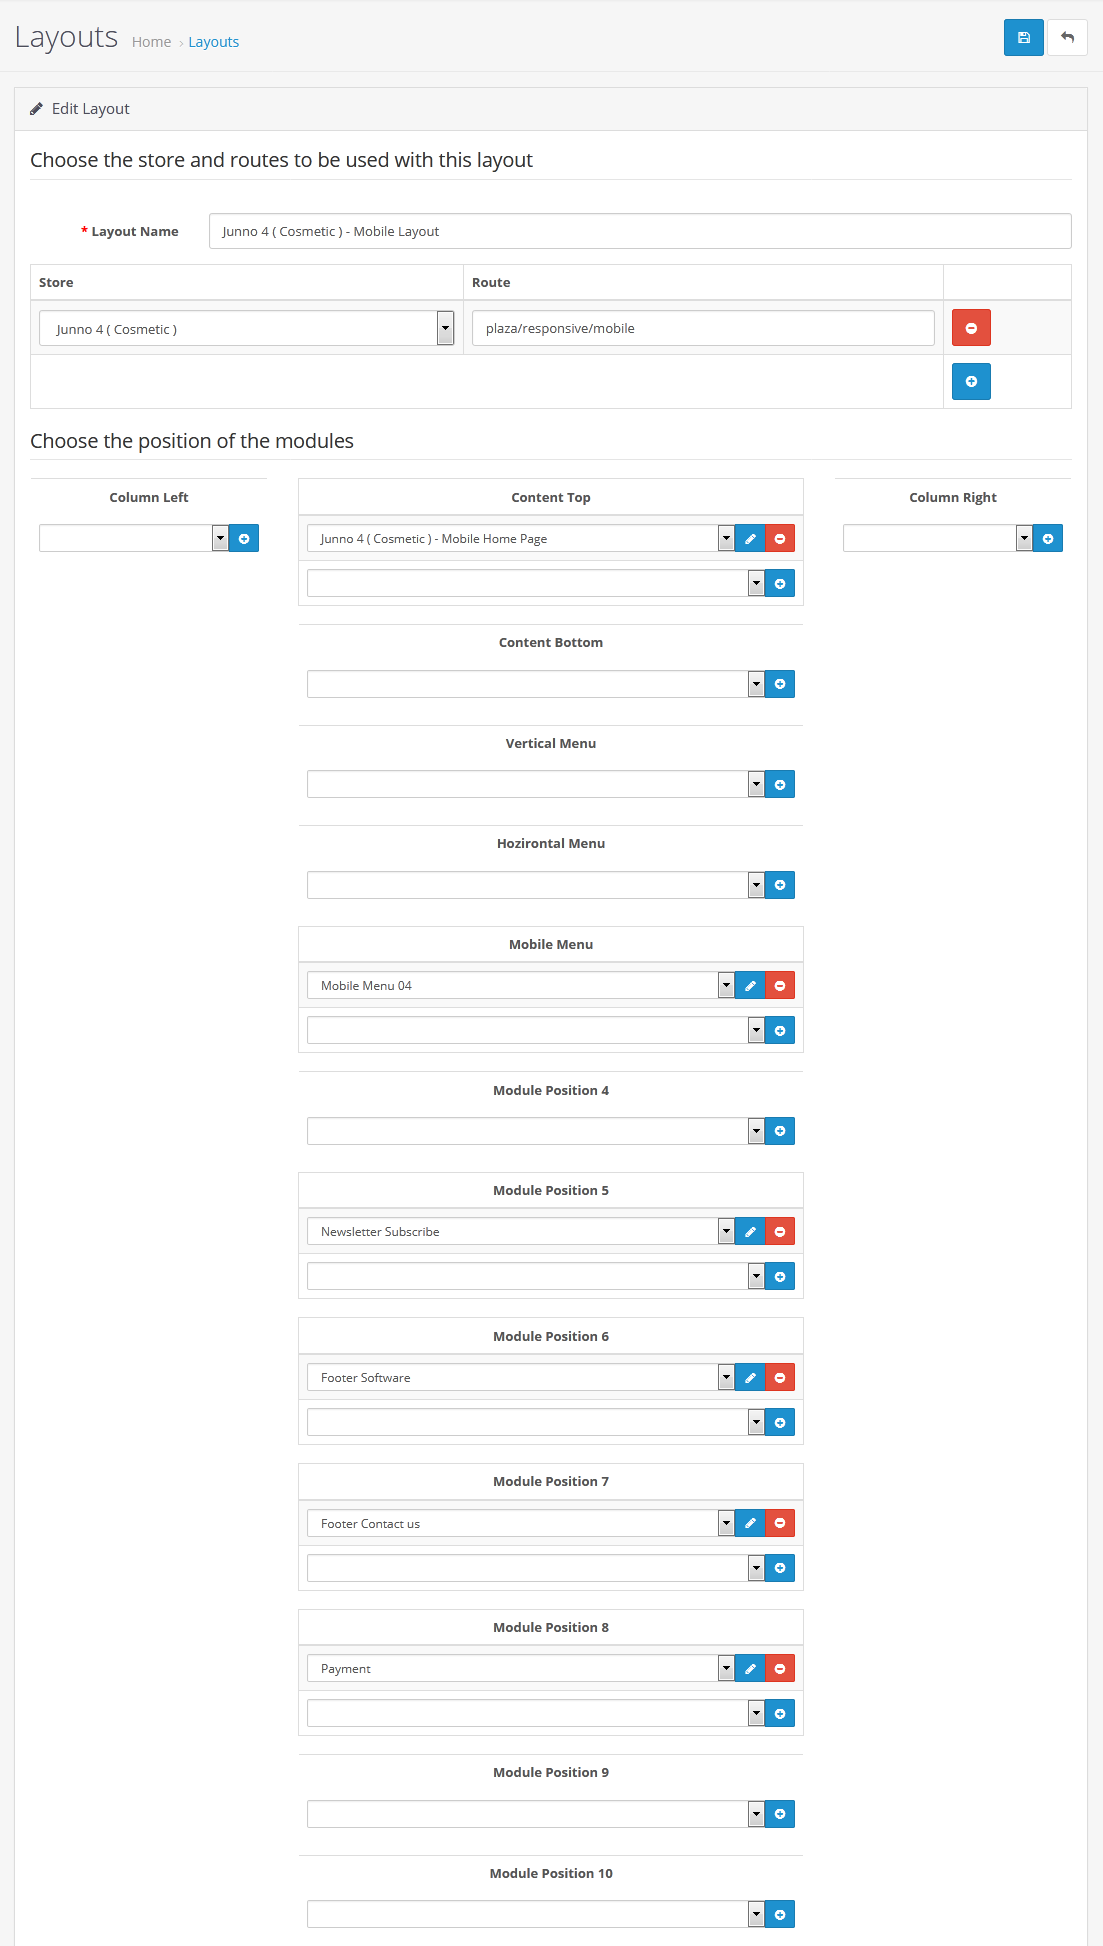
-> To set the layout like mobile layout : Login admin -> Design -> Layouts -> Junno 4 ( Cosmetic ) - Mobile Layout and set the layout like:
How to edit Header and Footer
1. To edit Header:
- Please modify this file : \catalog\view\theme\[name_theme]\template\common\header.twig and then edit .
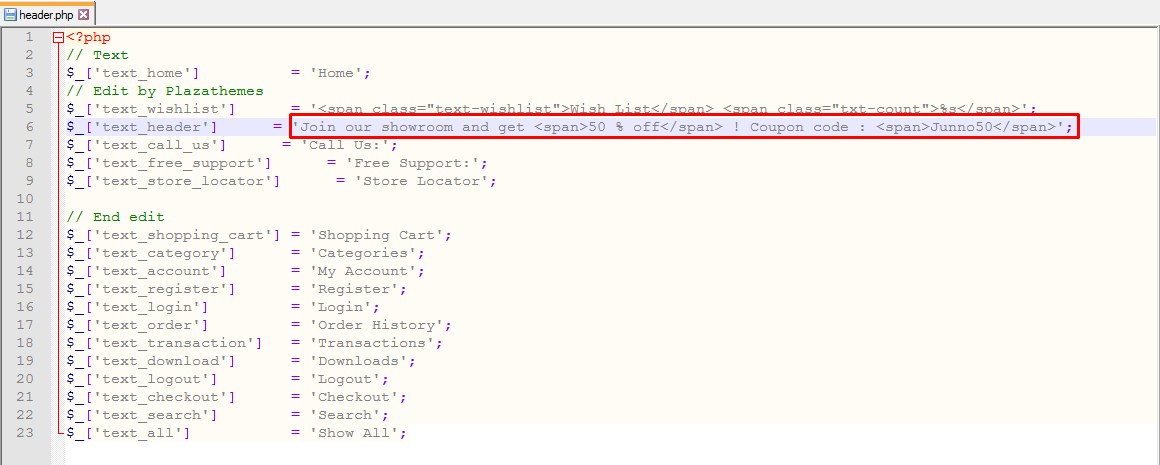
- To edit text on Header : \catalog\language\en-gb\common\header.php and then edit .
Example: Translate text "Join our showroom and get 50 % off ! Coupon code : Junno50" at #Junno Digital:
-
Go to \catalog\language\en-gb\common\header.php -> Edit & Save this file
2. To edit Footer :
- Please modify this file : \catalog\view\theme\[name_theme]\template\common\footer.twig then edit.
- To edit text on Footer : \catalog\language\en-gb\common\footer.php and then edit .
Example: Translate title "Powered By Plazathemes. Your Store © 2020" at #Junno Digital:
-
Go to \catalog\language\en-gb\common\footer.php -> Edit & Save this file

How to edit contacts information in header

- Login your opencart admin
- Go to System -> Settings
- At column Store Name , choose your store that you want to use, click Edit button.
- Choose tab Store
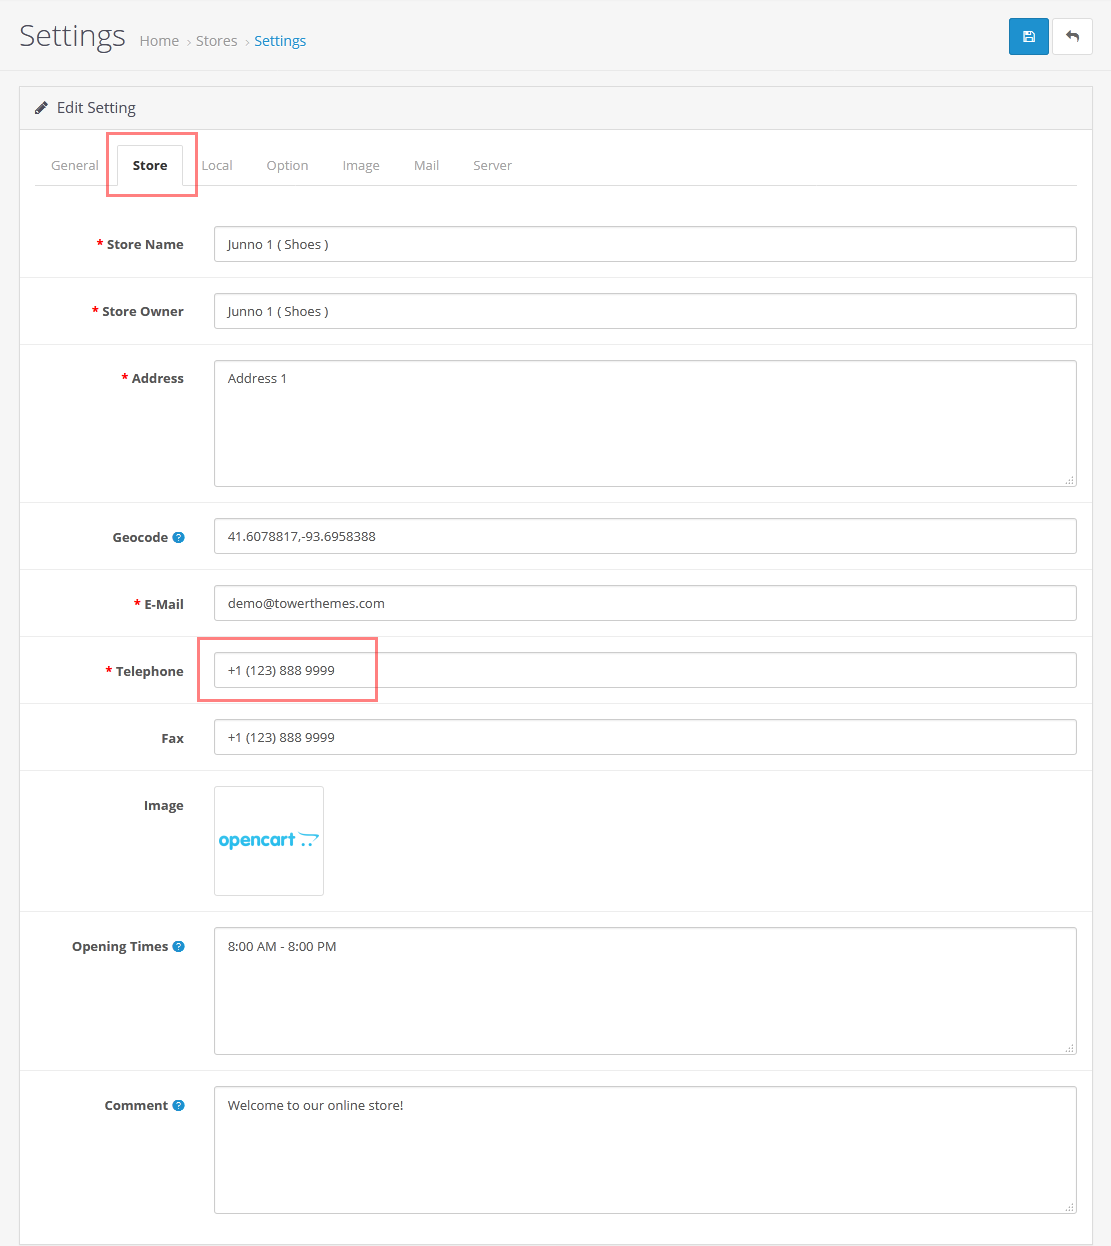
Click Save
How to customize thumbnail image and Related Slider in Product page
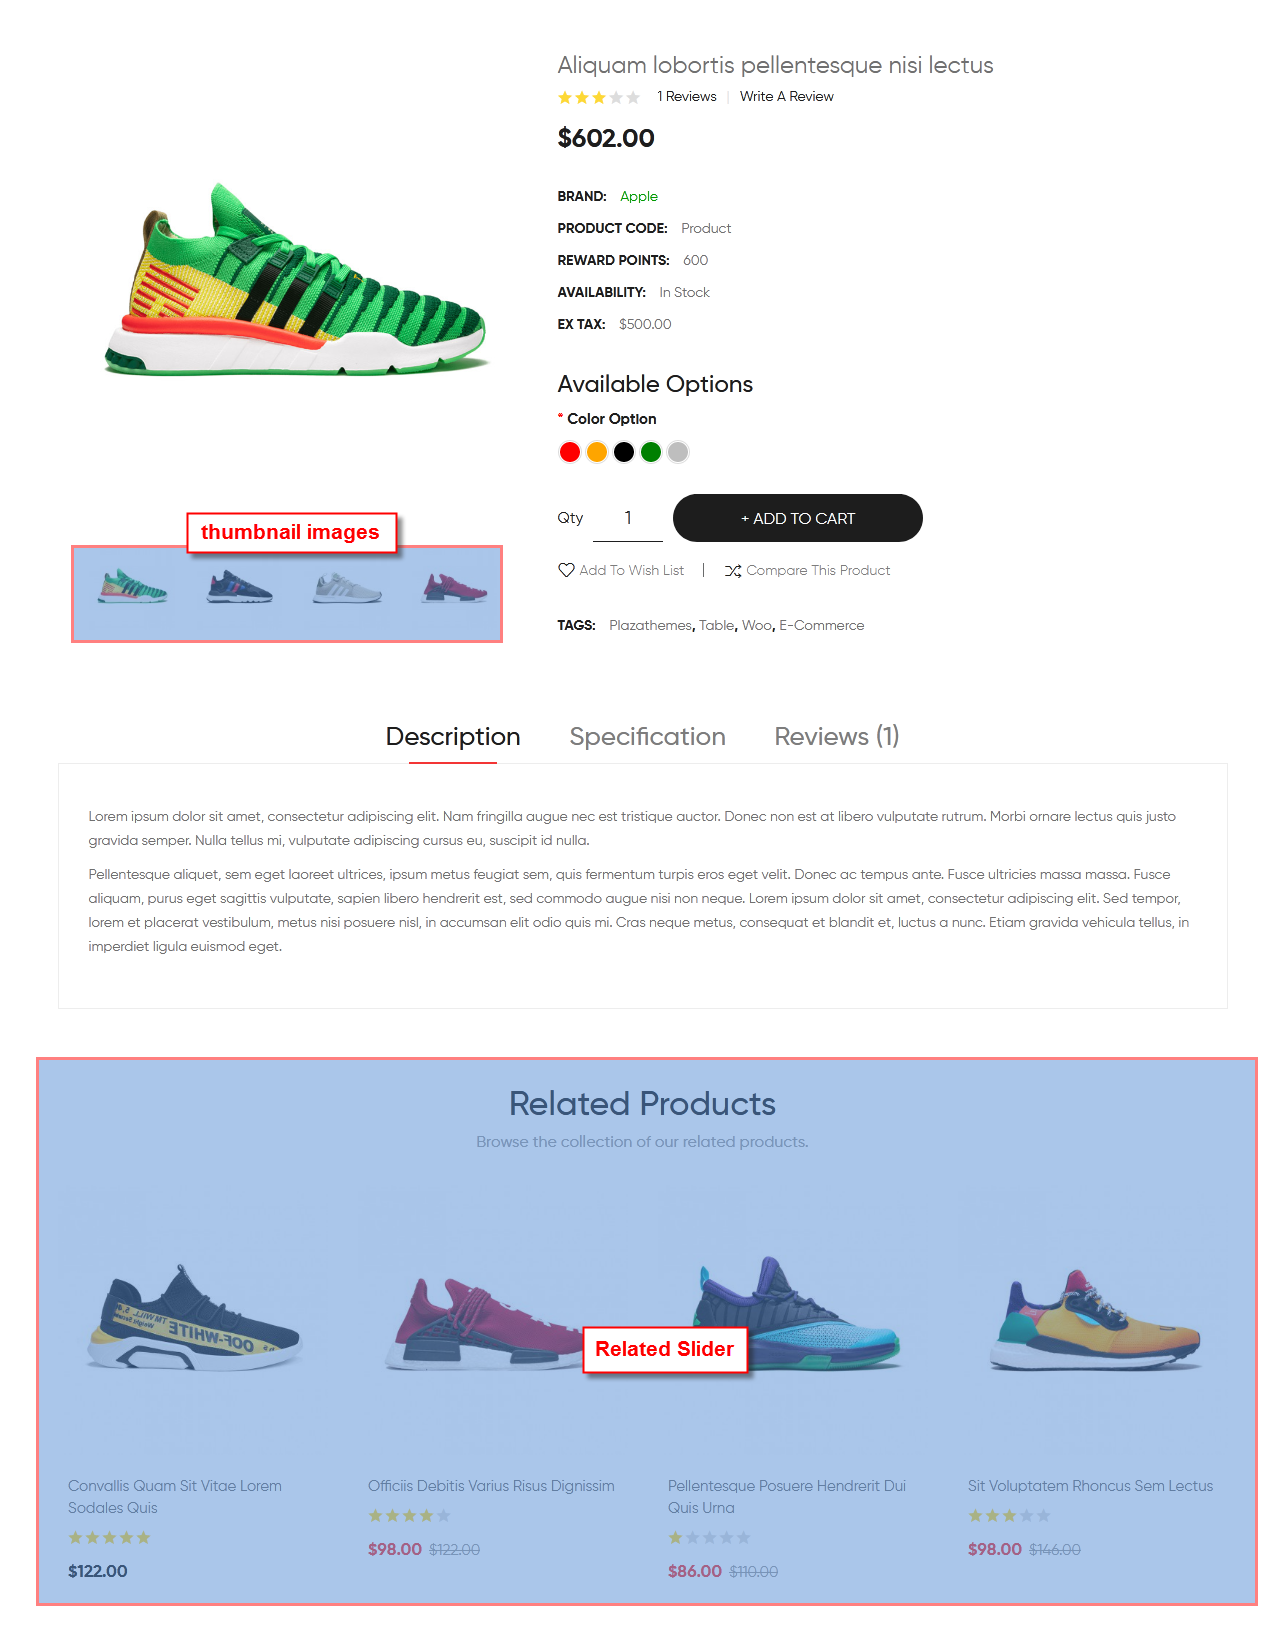
=> To customize two modules, please modify this file : \catalog\view\theme\[name_theme]\template\product\product.twig
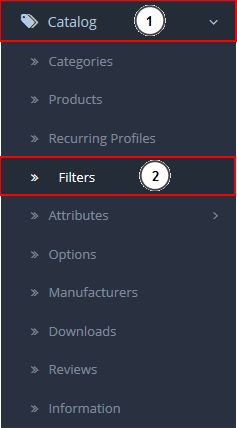
How to filter products on category page

How to set up and manage products filters in category page :
-
Log into the admin panel of your site. From the top menu select Catalog -> Filters:
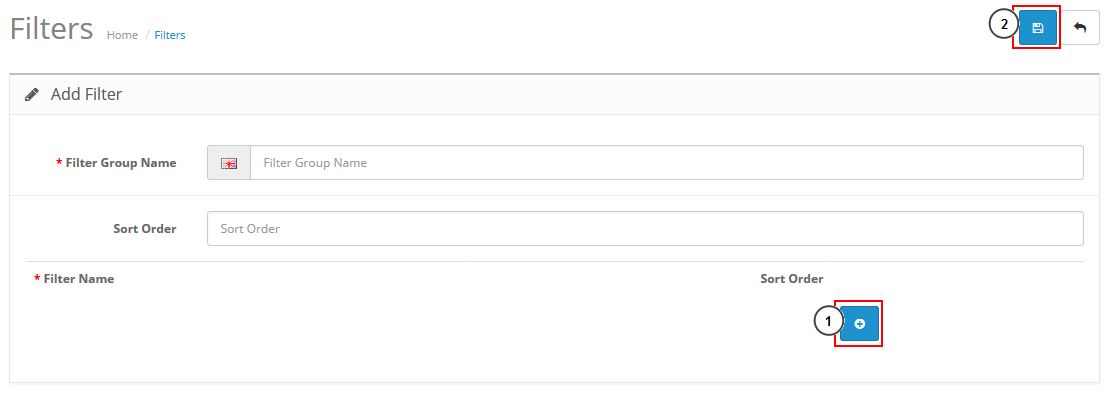
-
Next, click the Add New button on the right to add the filters. Product Filters are added in the same way as product options. Save the changes by clicking Save at the top right:
-
Go to the top menu Catalog -> Products. Click Edit on one of the products, on the manage product screen choose the Links tab and look for the Filters section
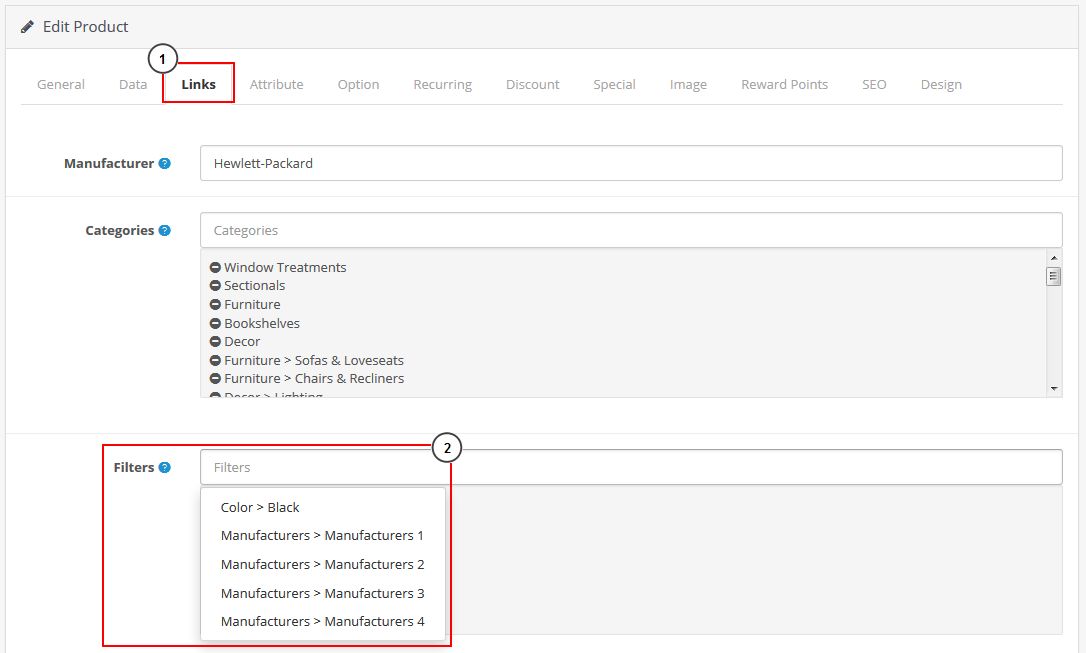
-
The Filter box is a standard auto complete box. Simply type in a part of the filter name. Add as many filters you wish the product to belong to. Save your changes when finished
-
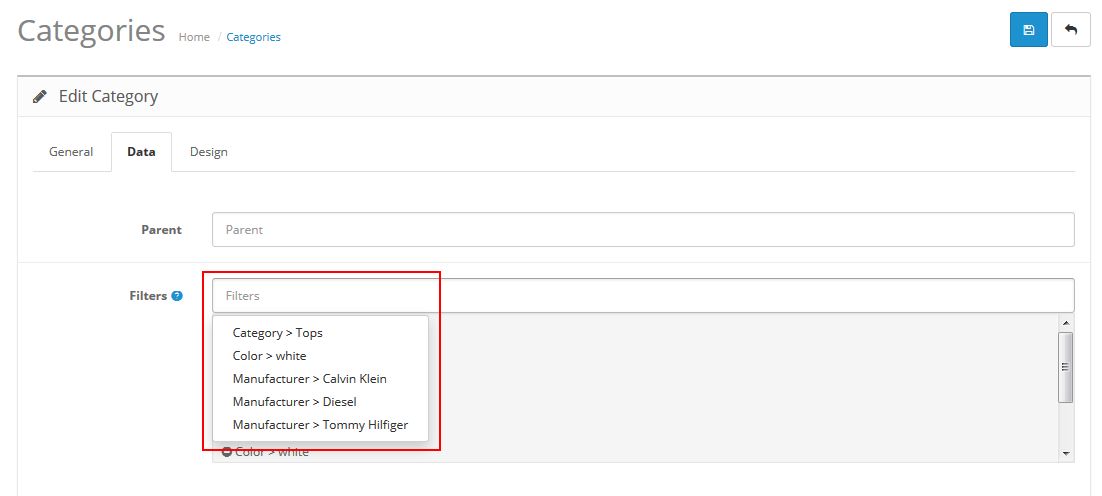
Go to Catalog -> Categories. Click Edit on the categories which products have filters assigned to. Choose the Data tab and look for the Filters section. Type in a part of the filter name to add the same filters added to your categories. Save your changes when finished:
-
When you are done, go to the category page and you will see the new filter box
How to upload rotator image
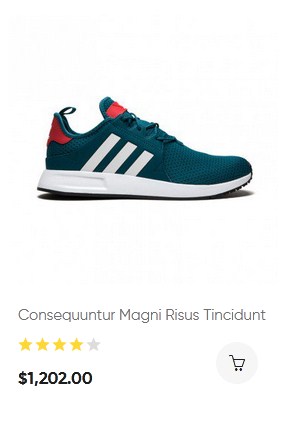
Example :
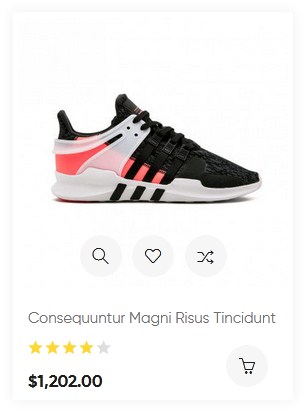
When hover :
Login your opencart admin
Go to Catalog -> Products -> At Product Name , choose Edit button
at the product you want to upload rotator image -> Click tab Image -> Add Image 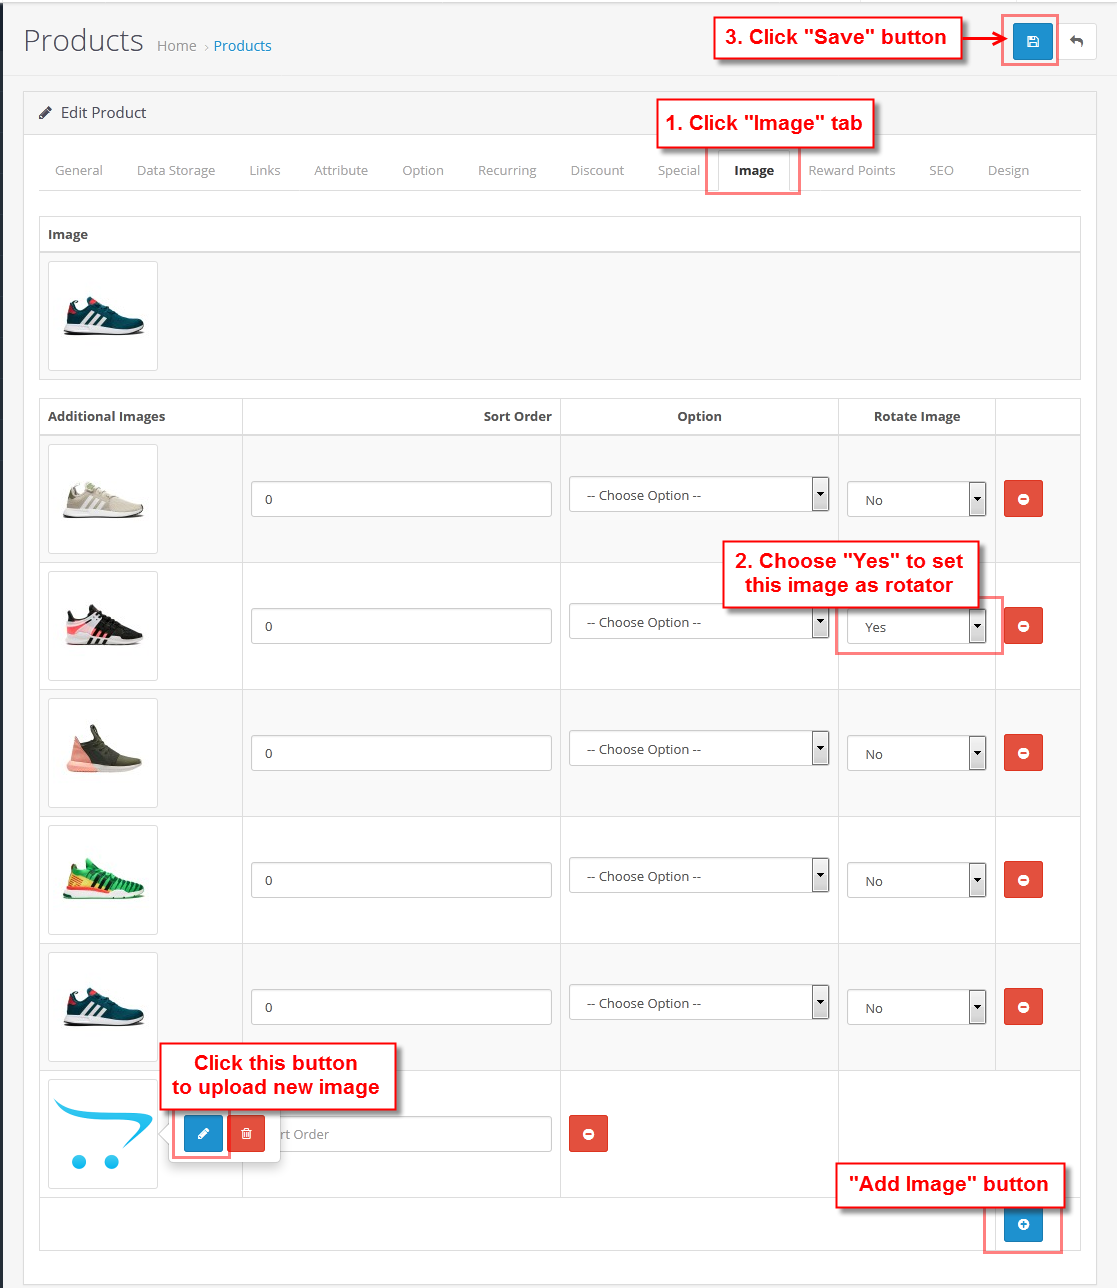
General Settings of PlazaThemes Dashboard
This is our theme Dashboard. You can configure all settings, features and modules about the theme (exclude default features of OpenCart) at here.
Log into the admin panel of your site, click PlazaThemes Dashboard
There are features and modules:
-
Testimonials - This theme doesn't utilize this feature.
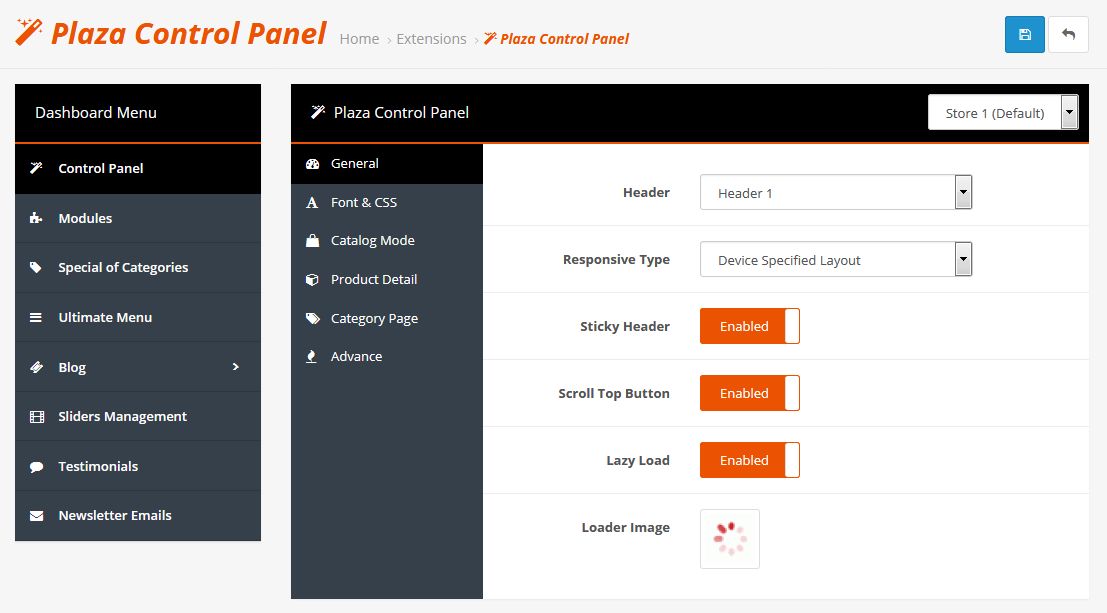
Plaza Control Panel
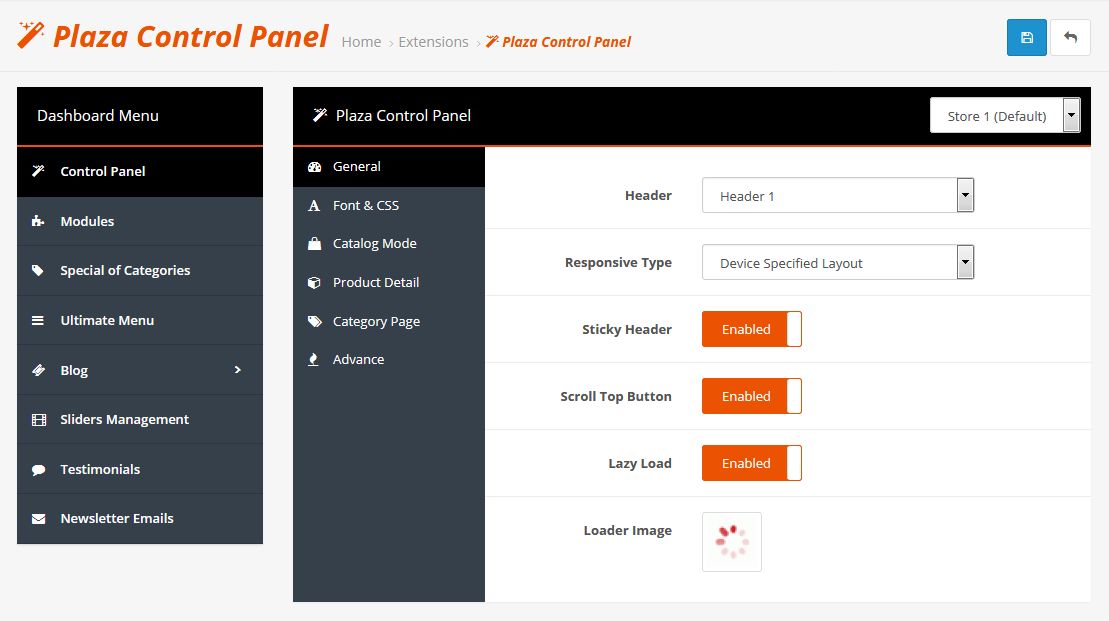
You can choose store and configure for store are chosen

GENERAL
There are options:
-
Header: Choose Header you want to config.
-
Responsive Type: Choose type of mobile layout
Responsive Layout: The tablet, mobile layout following the layout of desktop already. You don't need configure Layout.
-
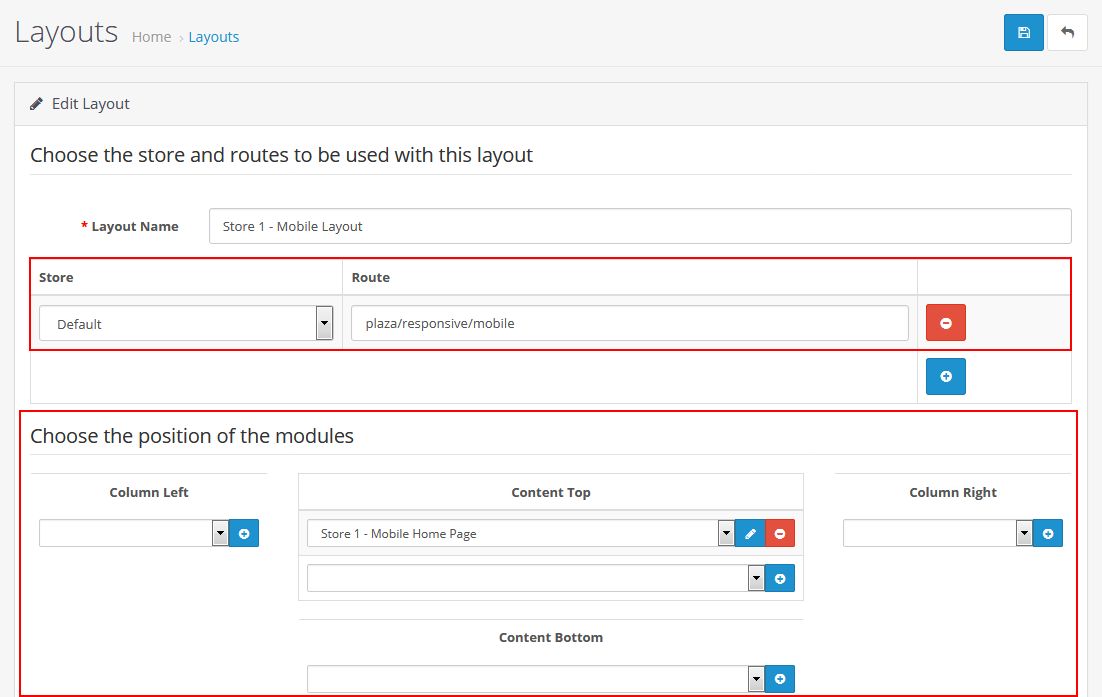
Device Specified Layout: The tablet, mobile layout can be configured and customize.
You can use this option to design your mobile layout
Admin -> Design -> Layouts
Click Add New button

You should configure layout by set Store, Route and Choose modules to layout. You should see more at here
- Store: Choose Store for use mobile layout.
- Route: You have to input route "plaza/responsive/mobile" for Mobile, route "plaza/responsive/tablet" for Tablet
- Assign modules to the positions
-
Sticky Header: Enable / Disable Sticky Header
-
Scroll Top Button: Enable / Disable Scroll Top Button
-
Lazy Load: Enable / Disable Lazy Load
-
Loader Image: Choose Ajax Loader Image
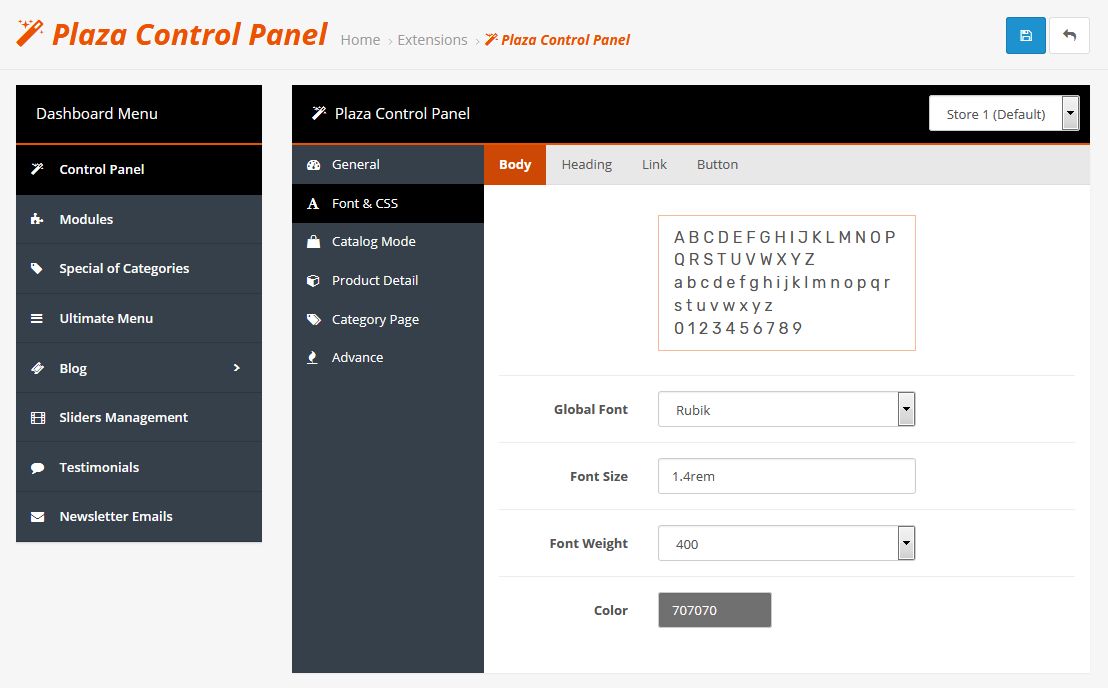
FONT & CSS
-
Body
-
Heading Title
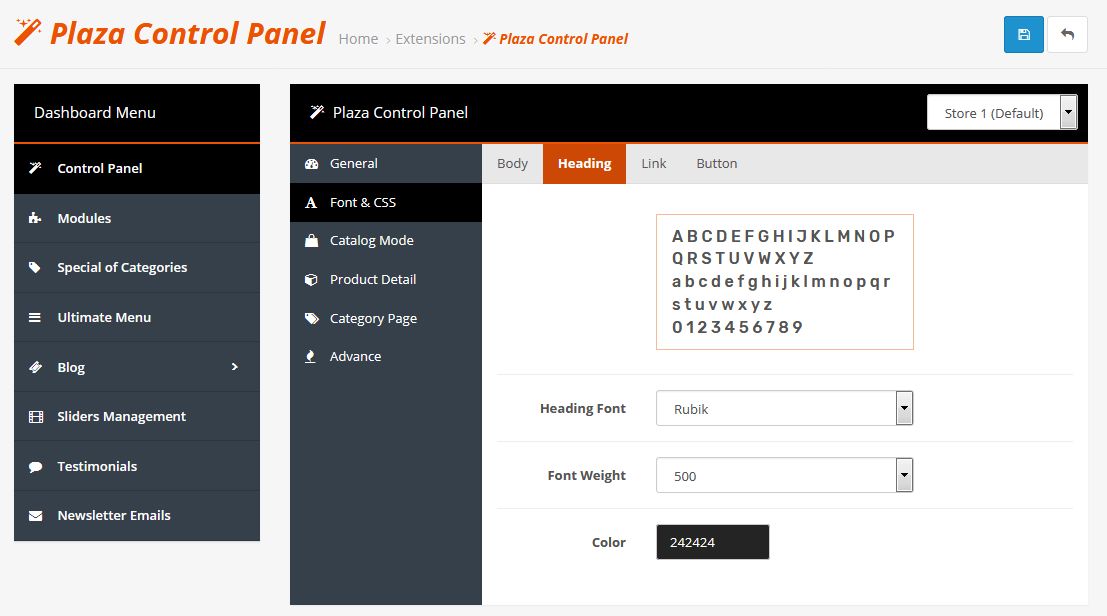
-
Link
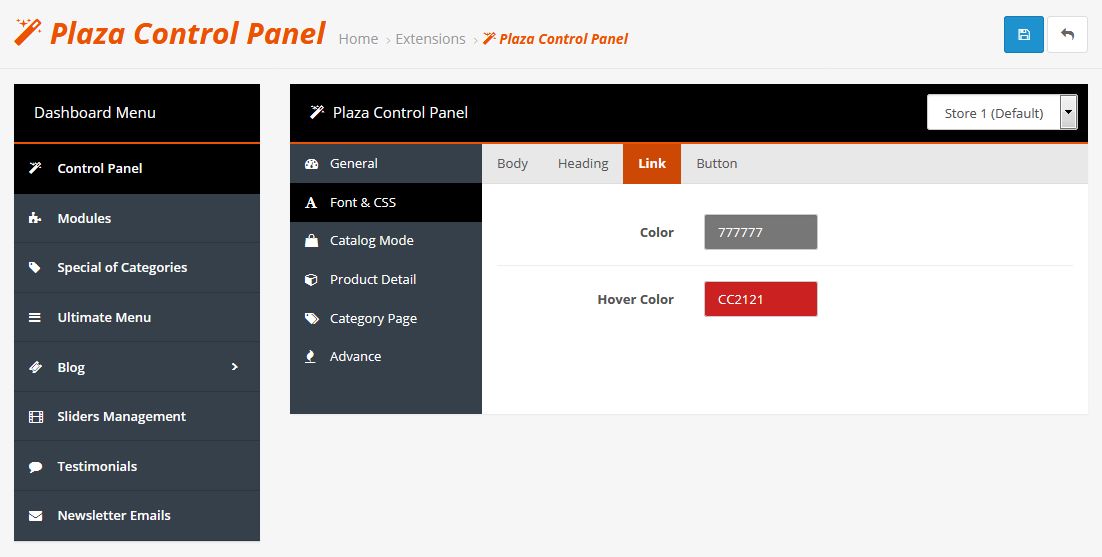
-
Button
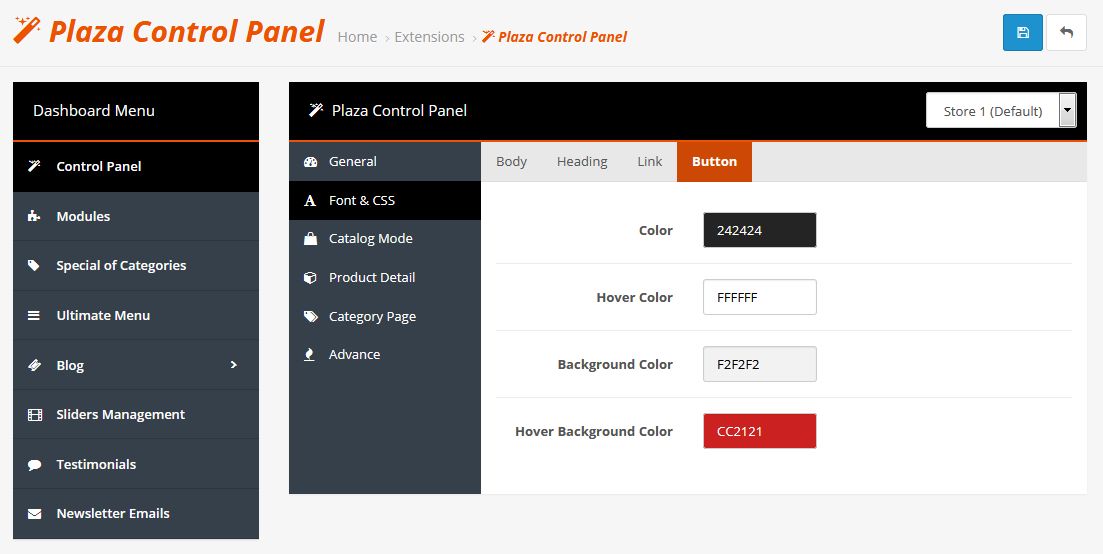
FONT & CSS
-
Body
-
Heading Title
-
Link
-
Button
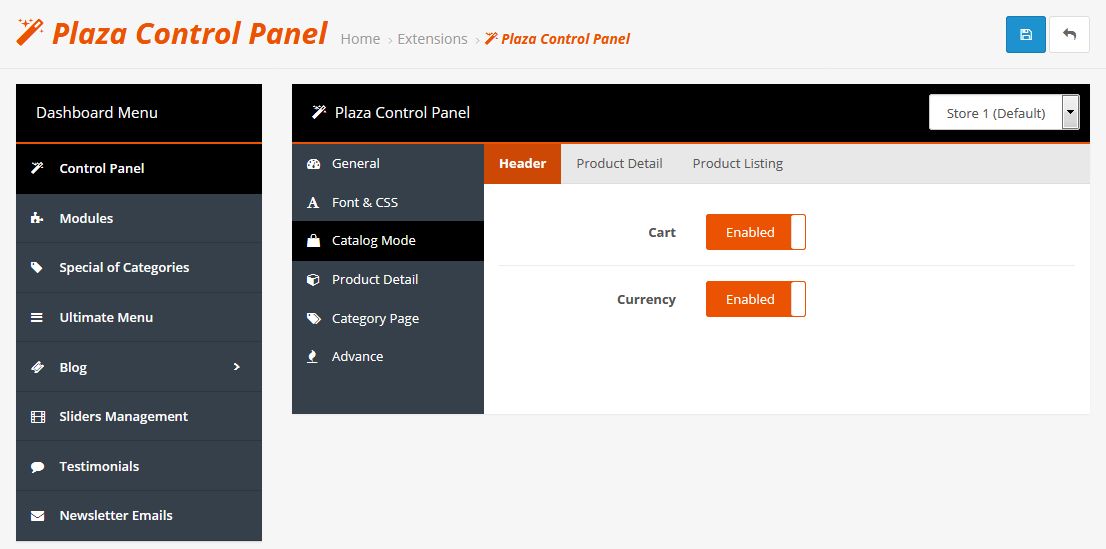
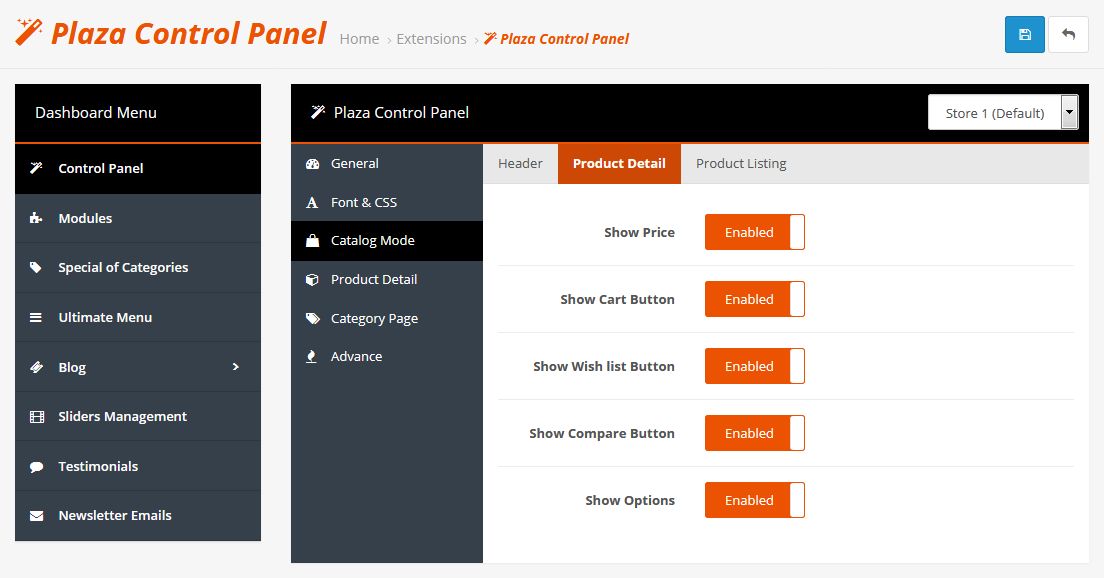
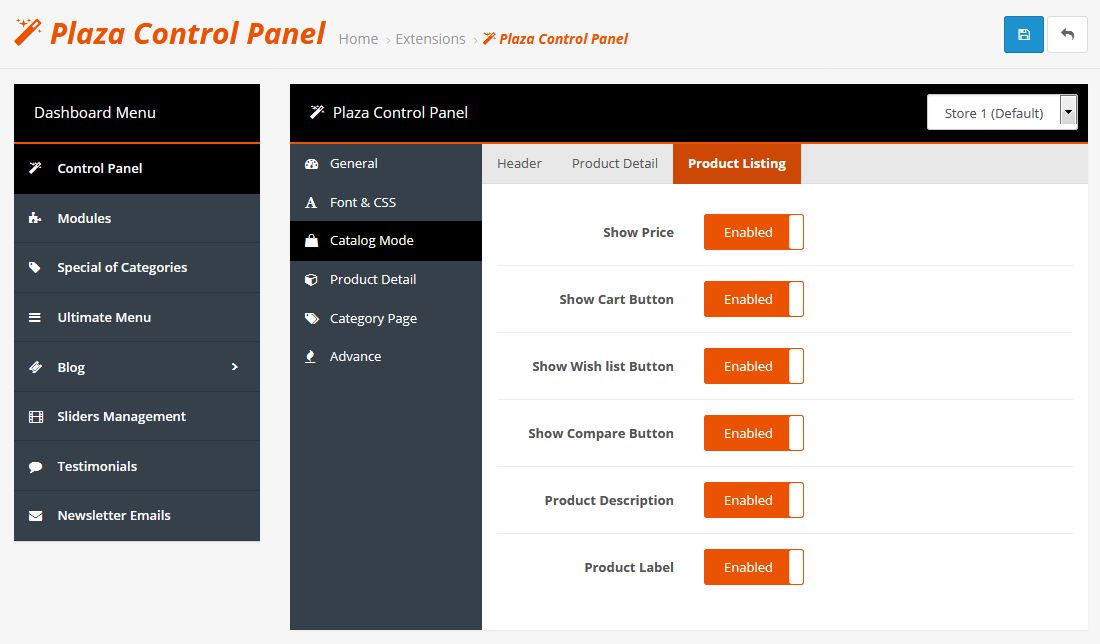
CATALOG MODE
You can configure Catalog Mode of each part of your store.
-
Header
-
Product Detail
-
Product Listing
PRODUCT DETAIL
You can configure settings for Product Page.
-
Related Products: Enable / Disable Related Products in Product Page.
-
Social Icons: Enable / Disable Social links in Product Page.
-
Price Tax: Enable / Disable product's price tax.
-
Product Tags: Enable / Disable product's tags.
-
Image Zoom Settings

Image Zoom: Enable / Disable Image Zoom.
-
Type: Set Zoom's type is Inner or Outer
Inner Zoom
Outer Zoom
Space: When zoom's type is "Outer", set space between Thumbnail Image and Zoom Image
Zoom Title: Enable / Disable product name on zoom image.
-
Color Swatches Settings:
These options are used for Products that have options (the options must have type "Select" or "Radio").
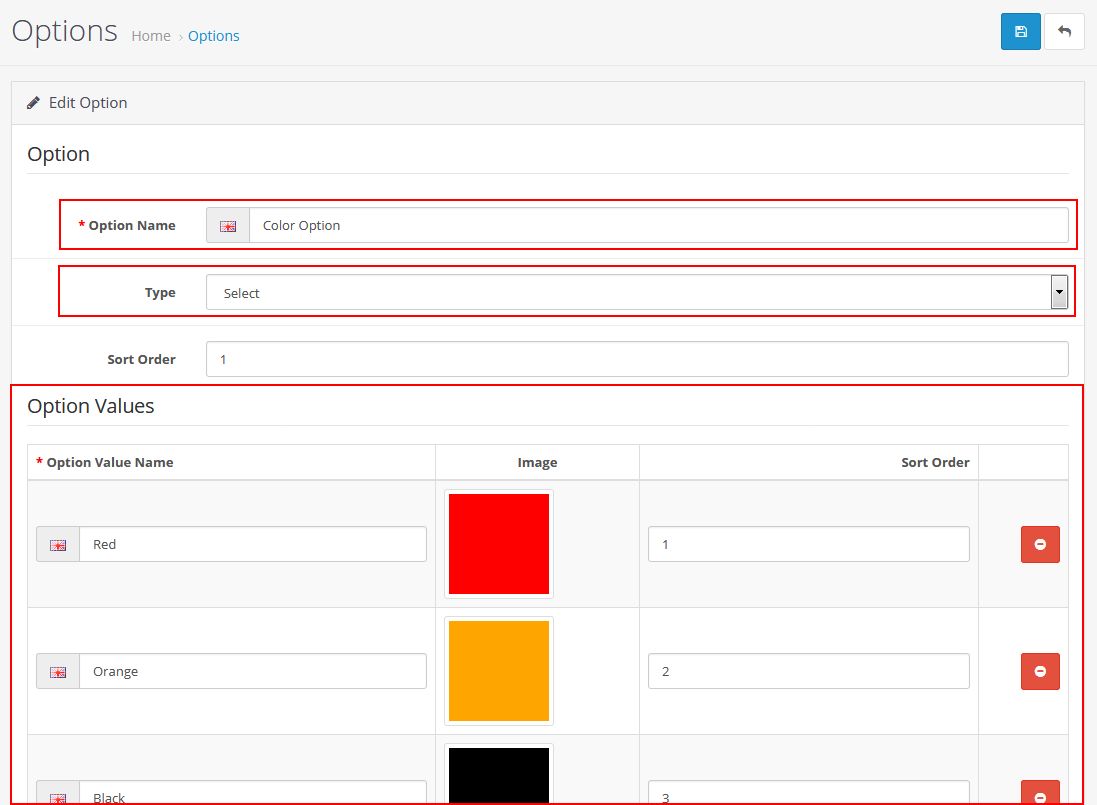
Configure Options: Go to Admin -> Catalog -> Options
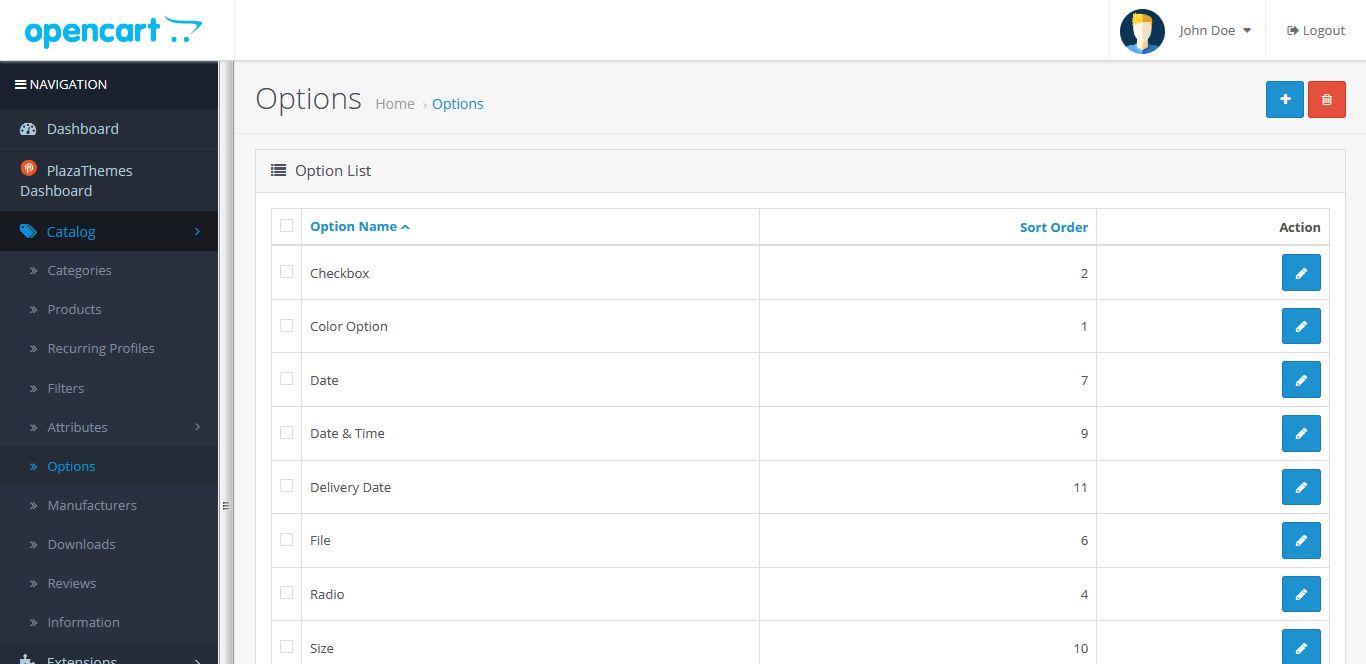
You can add new options or edit existed options.

This is the Options form
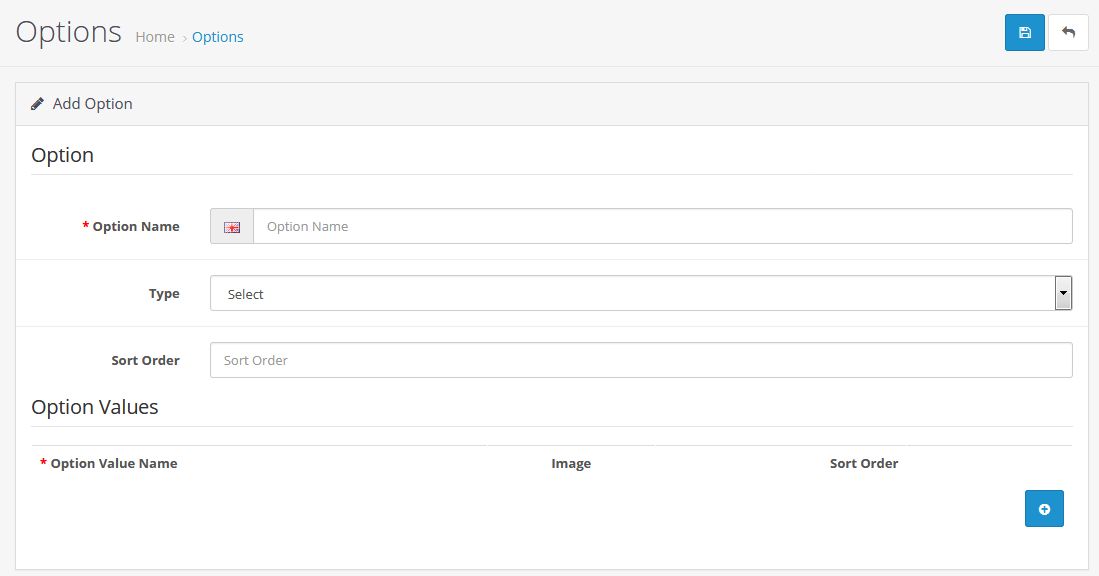
You should configure option by fill your data:
-
Option Name: Set name of Option.
-
Type: You must choose Select or Radio to use it for Color Swatches.
-
Sort Order: Set order of option.
-
Option Values: Set values of this options.
You can setup values like this:
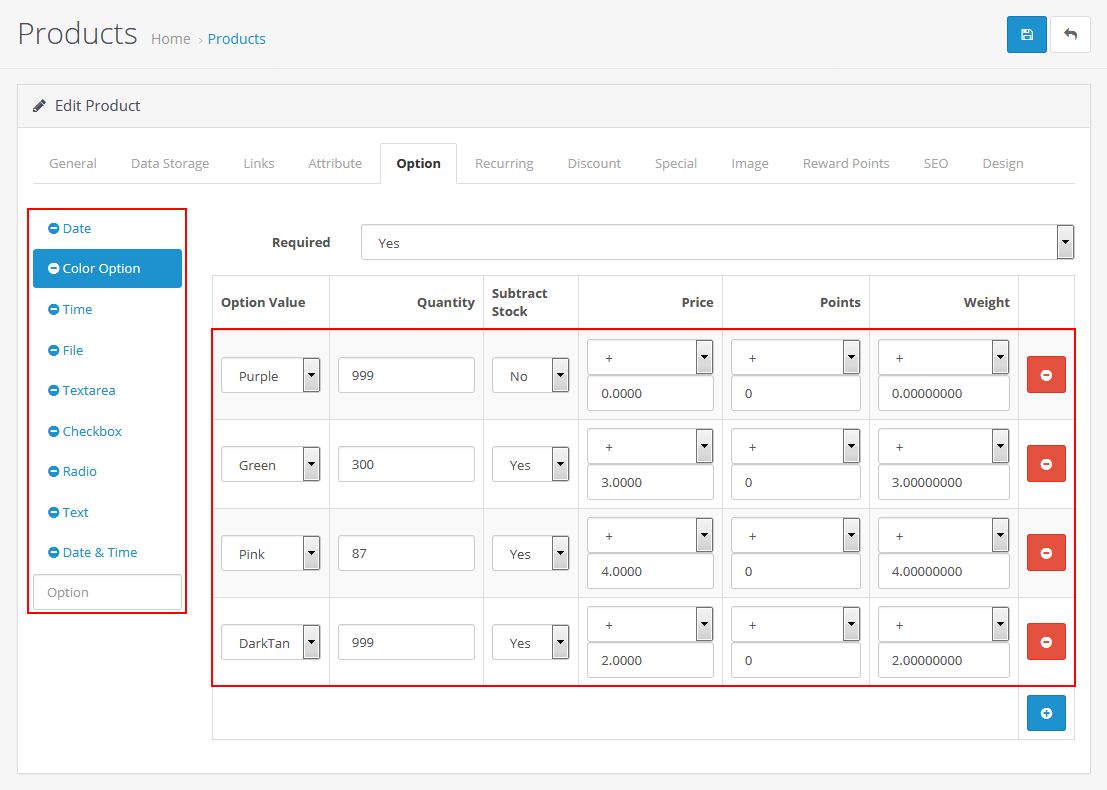
Configure Product Options:
Go to Admin -> Catalog -> Products -> Add New or Edit product
Click Option Tab in Product form
You should configure options for product like this:
Click Image Tab in Product form
You should configure product's images for product's options like this:
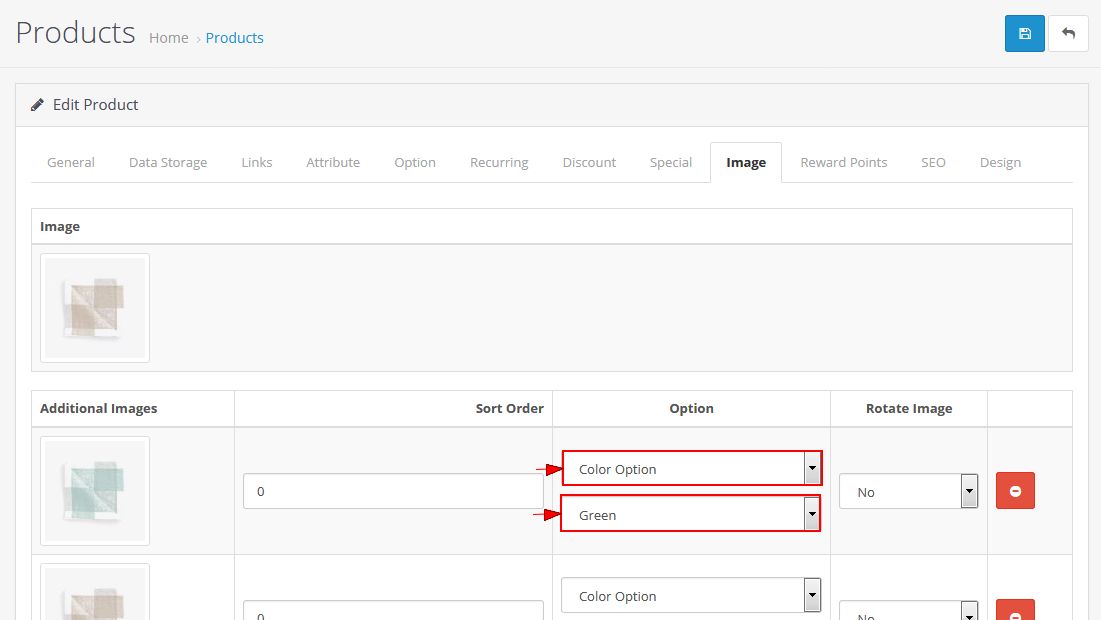
Now, you have configured Product, Options and Images.
You have to configure Color Swatches settings of Product Detail in Control Panel
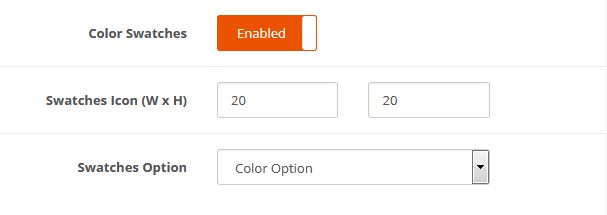
-
Color Swatches: Enable / Disable Color Swatches
-
Swatches Icon: Set width - height of option images at Option part in Product page
-
Swatches Option: Choose option to use swatches
-
CATEGORY PAGE
You can configure settings for Category Page.

-
Category Image: Show / Hide category's image.
-
Category Description: Show / Hide category's description.
-
Children Categories: Show / Hide Children category and Refine Search.
-
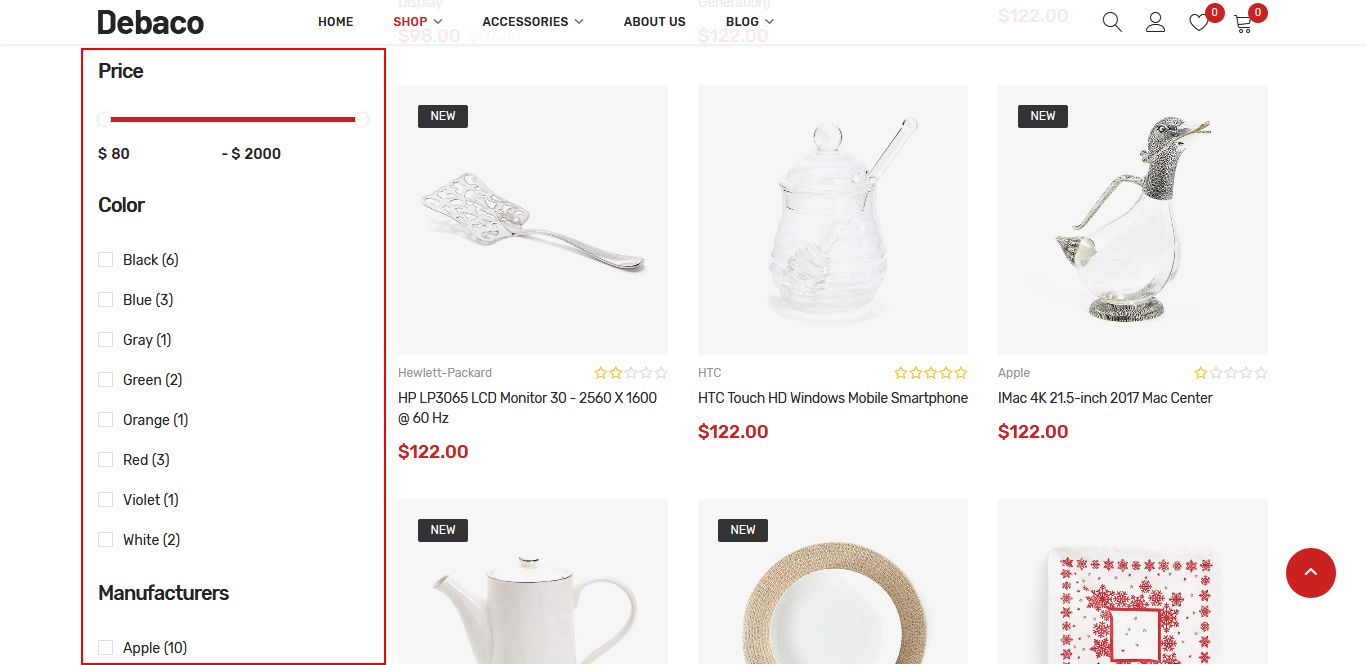
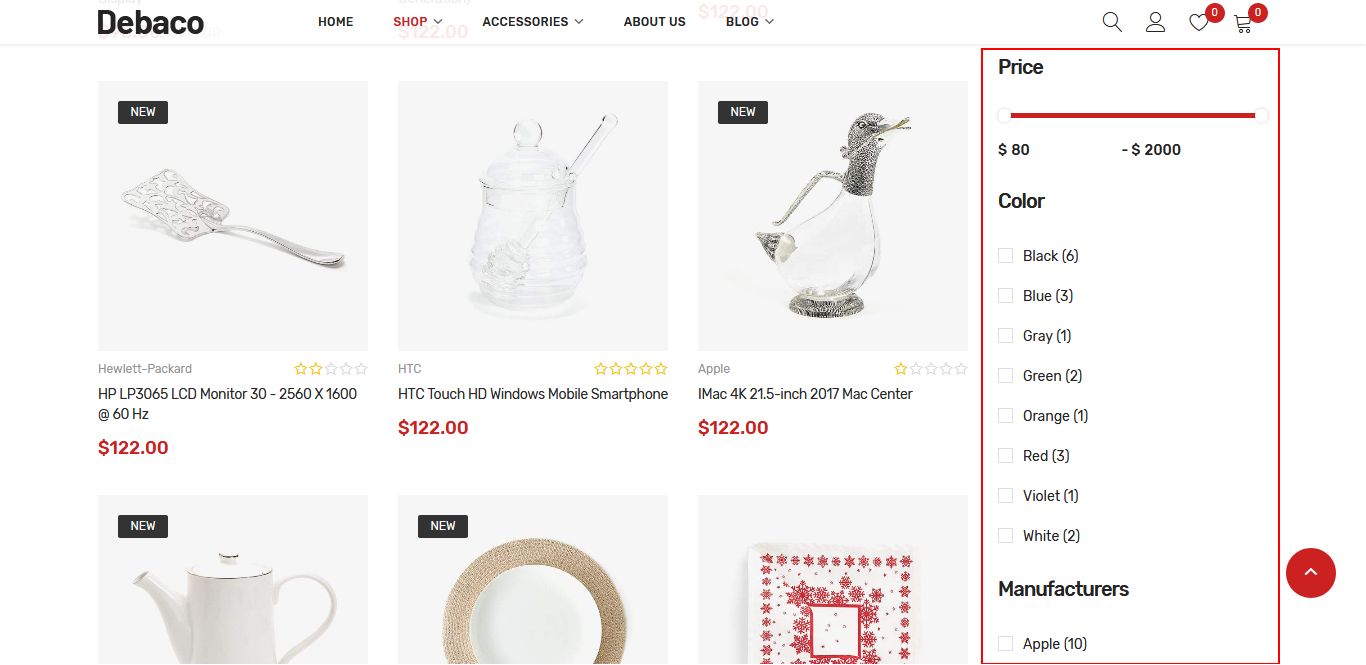
Filter
Filter is the default of OpenCart. You should use it to filter product in category page. See more at Filter to learn how to add filters.
Filter: Enable /Disable Filter on Category page.
-
Position of Filter: Select Left/Right to set position of filter
-
Quick View: Enable / Disable Product Quick view.
-
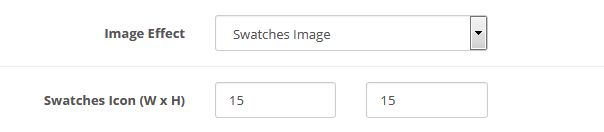
Image Effect
None: No Effect.
-
Hover Image: Show other image when hover product.
-
Swatches Image: Show color options to click to change product image.
You have to configure Swatches Icon to set width - height of option images.
-
Advance View: Enable / Disable to show Advance View on Category page.
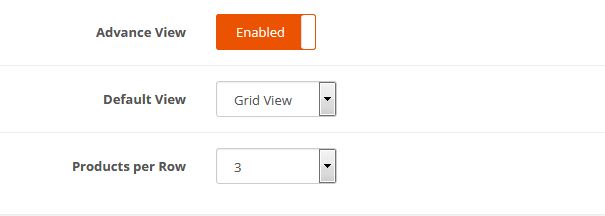
Default View: Choose View Type of the first load page - Grid View or List View.
Product per Row: Choose products number of Grid View at the first load page.
ADVANCE
Some Advance configuration may help you more to configure theme.
-
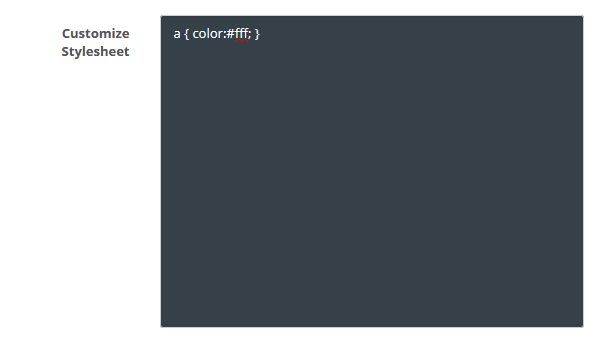
Customize Stylesheet: Fill your custom CSS Stylesheet lines.
Example: add CSS code.
-
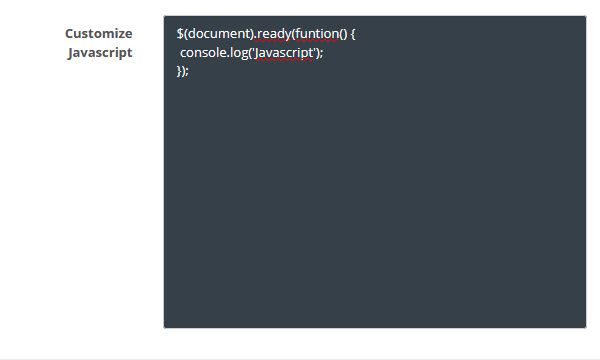
Customize Javascript: Fill your custom Javascript code.
Example: add Javascript code.
Extensions & Modules on PlazaThemes Dashboard
Login your opencart admin
Go to PlazaThemes Dashboard -> Modules
Find modules you want to config -> Edit -> Config according to you.
Modules in Junno
Ultimate Menu
Plaza Ultimate Menu module helps to create and display effectively multiple menu types (horizontal, vertical & mobile menu) and various display styles. You can create a huge sitemap-like menu with links to every page.
Login your opencart admin
-
Go to PlazaThemes Dashboard -> Ultimate Menu then choose menu you want to edit
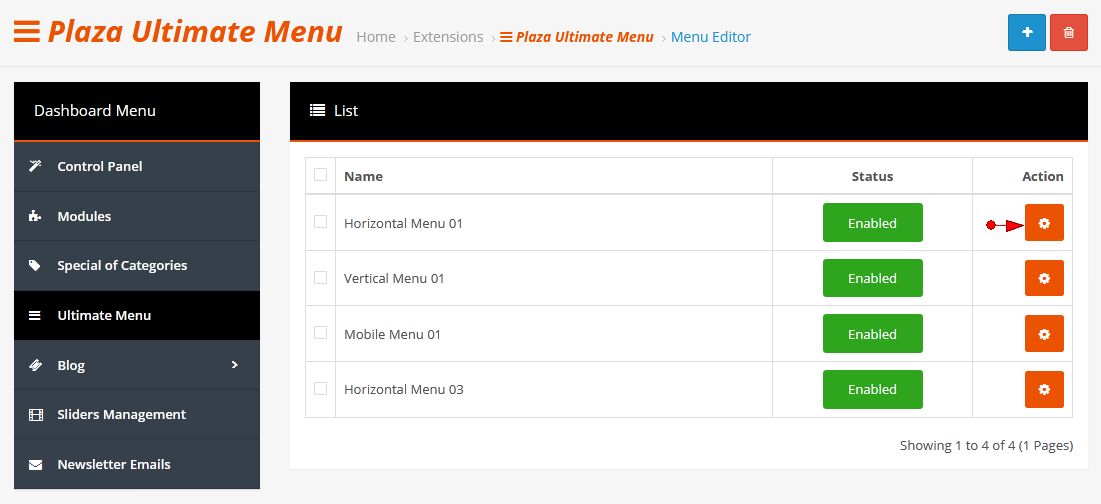
-
Select menu item to config
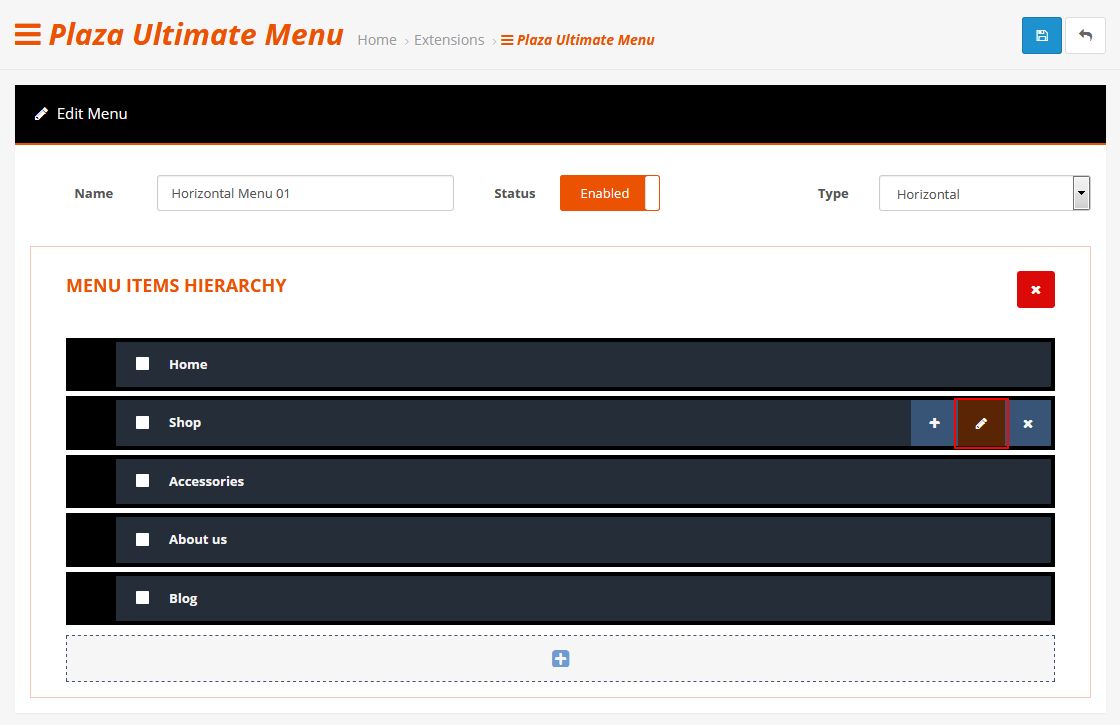
Configure parameters as you want:
-
General tab - This tab contains the general settings for this menu item.

Name - Type name of menu item
Status - Set Enabled to show the menu item
Title - Fill title of this menu item. To hide the menu item title, check the ‘Hide Title’ option. This is useful for displaying social icons in your menu (where only the icon is needed)
Link - Fill menu item link. The disable link option will be kept.
Menu Type - Select menu type: Mega Menu or Flyout Menu
Width - Set a width for the mega menu drop down
Item Align - Menu items are aligned to the left of the menu by default. To align a single menu item to the right (e.g. for social icons), set the Item Align option to ‘Right’.
Icon - Upload icon for this menu item.
Order - Set order for this menu item.
-
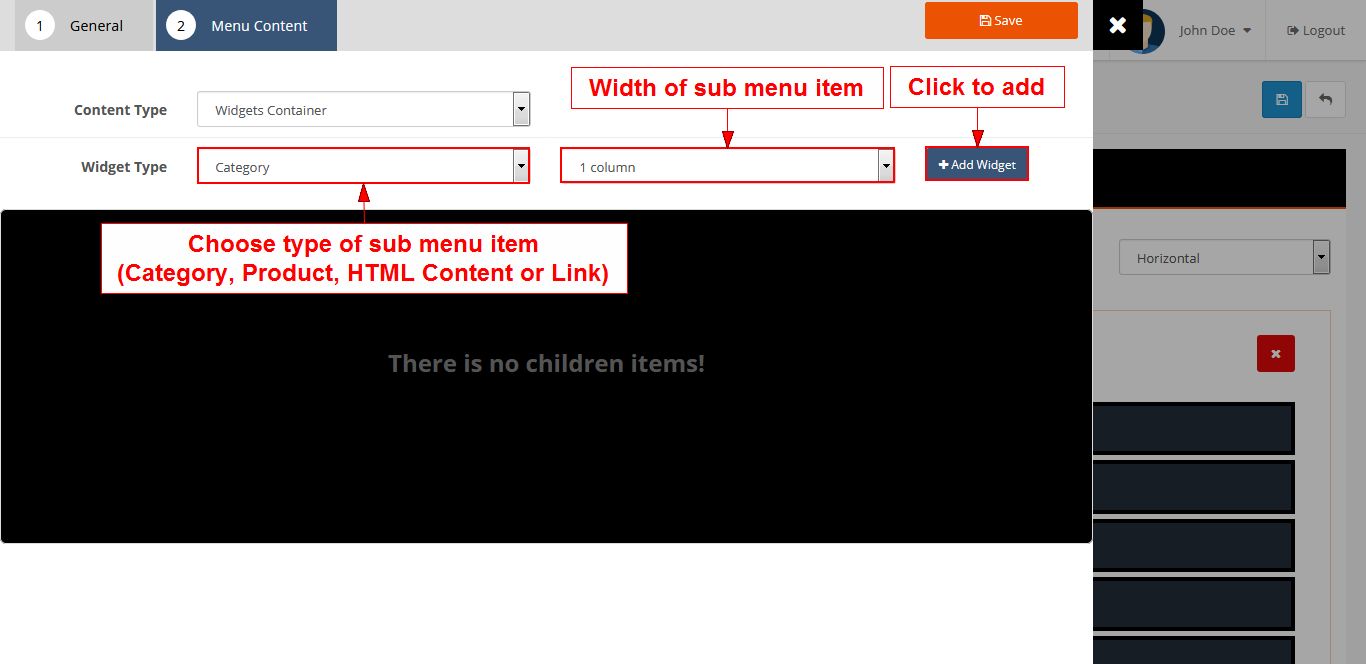
Menu Content tab - This configuration is only used for Mega Menu type

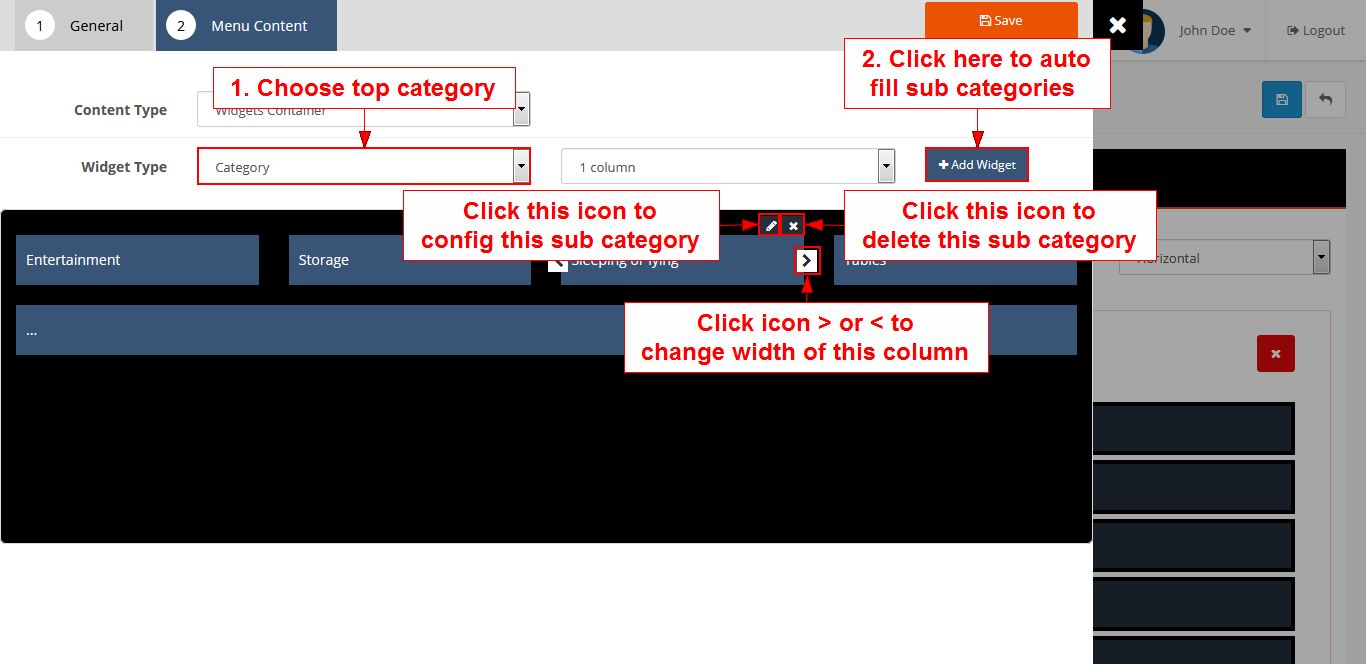
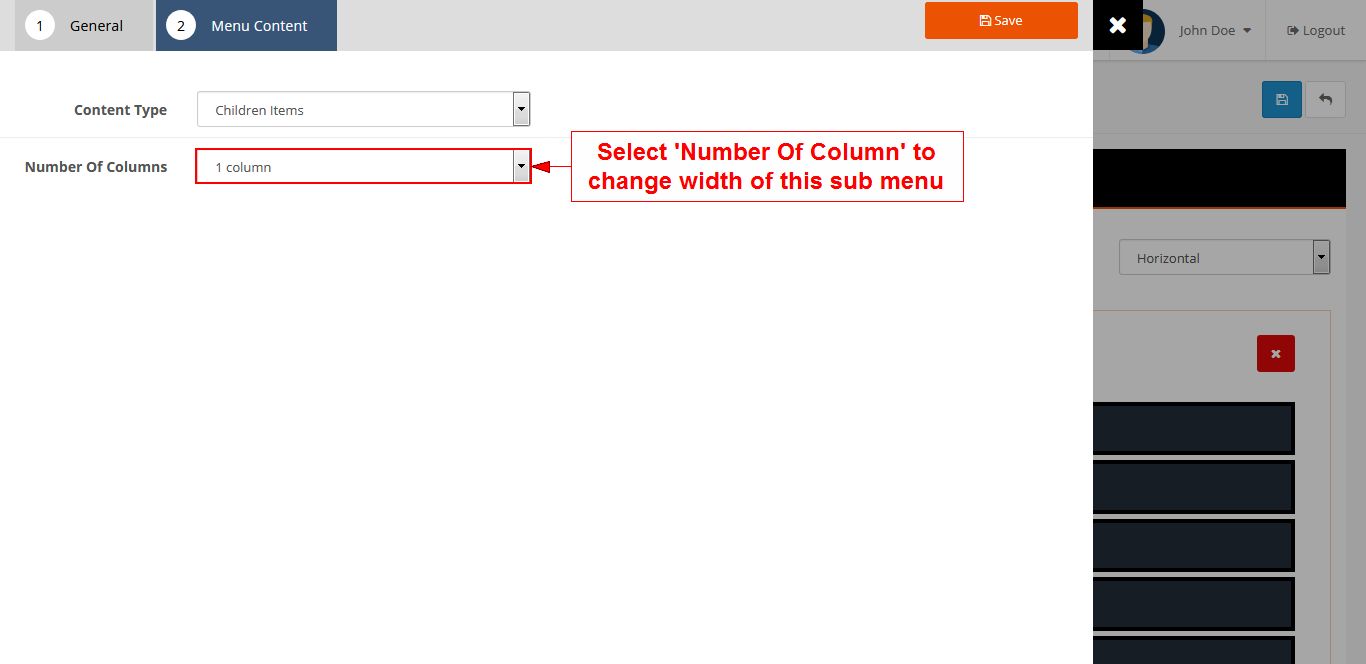
Sub Menu Content Type - Select sub menu content type: Widget Container, Category or Children Items. If you choose Children Items, the menu content will show children items of this menu item
+ Widget Container type
+ Category type
+ Children Items type
Click Save button
-
Click Save button to done
Special of Categories
Show special categories on frontend.
- Go to PlazaThemes Dashboard -> Special of Categories

- Click Edit button on each category to set that category as special on homepage.
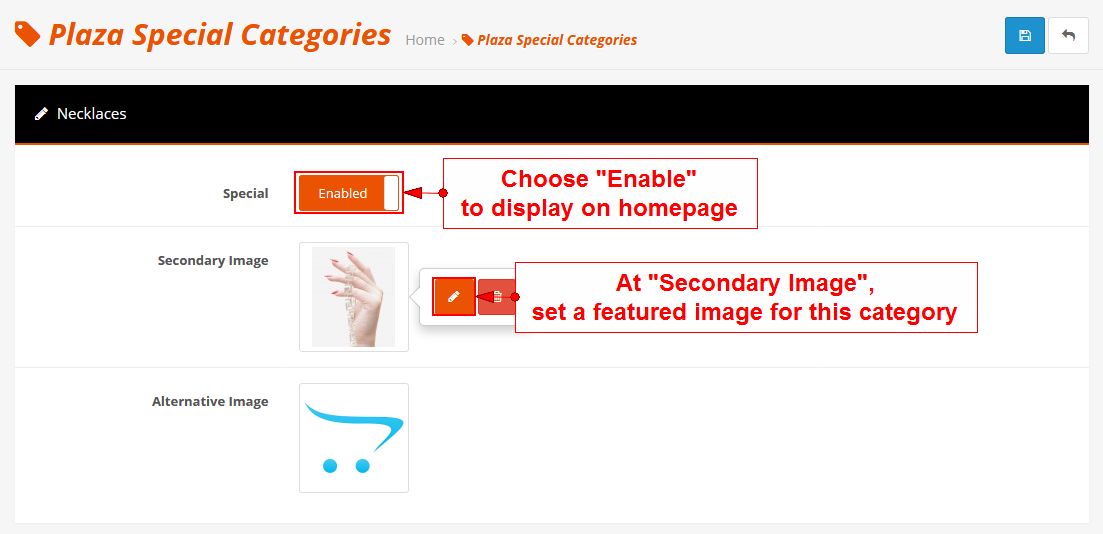
- Now, you should configure Plaza Special Categories module.
Blog
You can configure blog posts, category and the Blog has SEO optimization.
- Go to PlazaThemes Dashboard -> Blog -> Posts to create new or edit the blog posts.
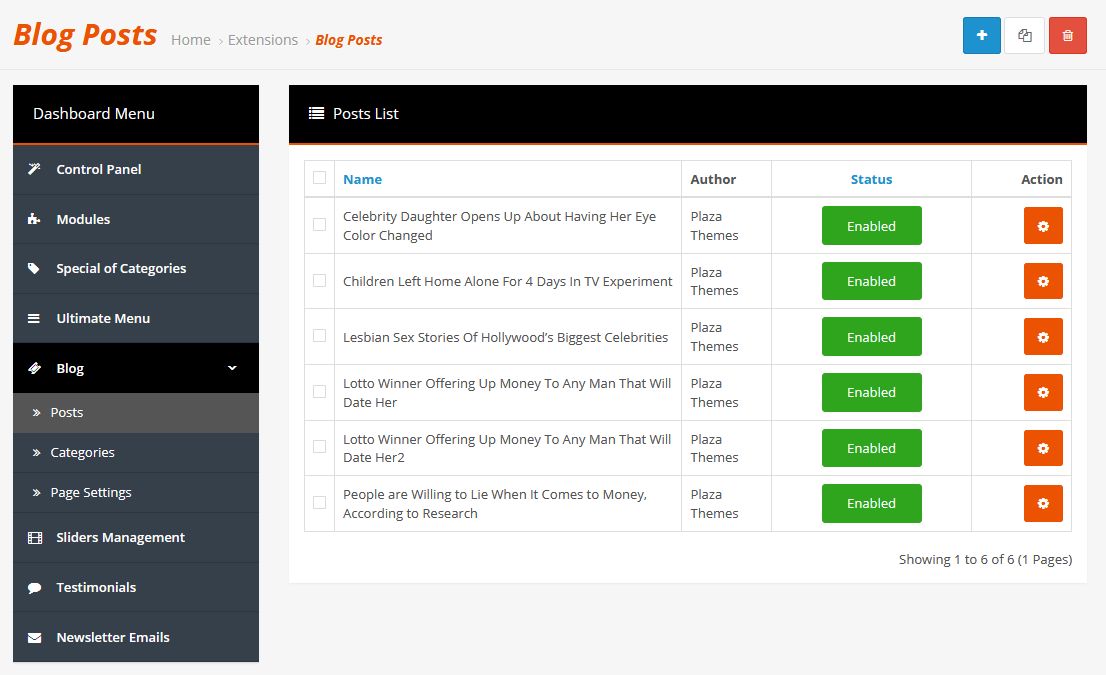
- Click Add New button or Edit post. Fill your data and Save.

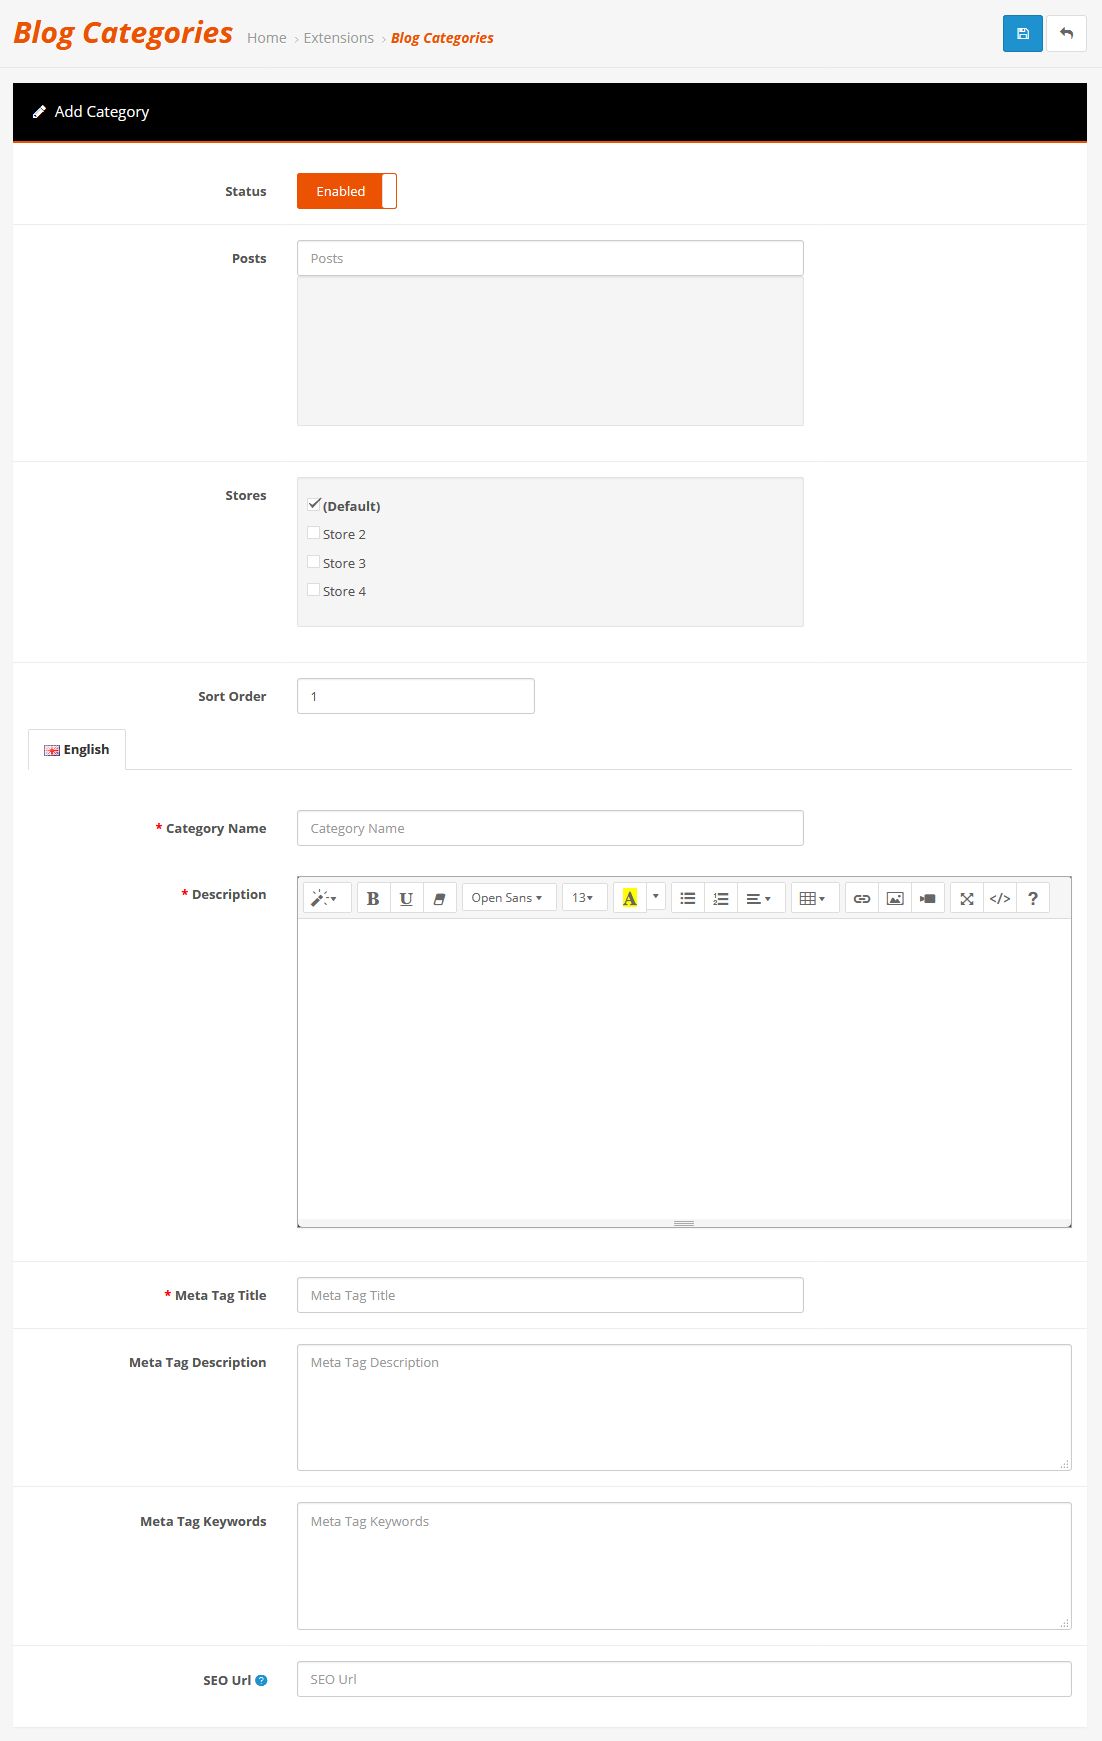
- Go to PlazaThemes Dashboard -> Blog -> Categories to create new or edit the blog categories.
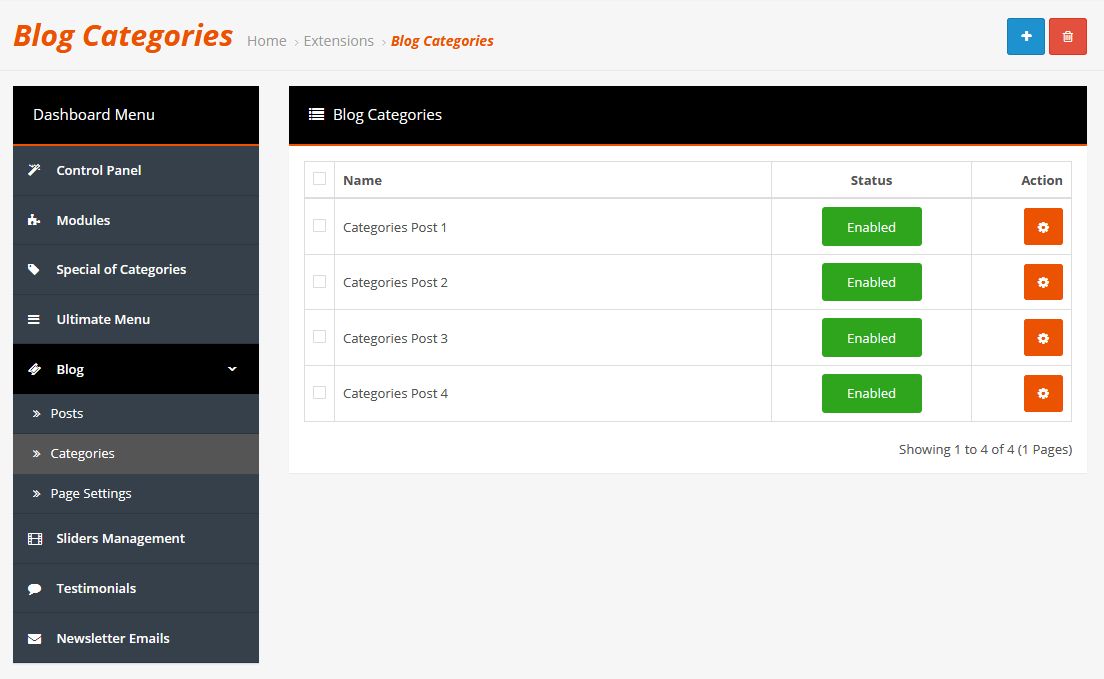
- Click Add New button or Edit blog category. Fill your data, set Post for this category and Save.
- Go to PlazaThemes Dashboard -> Blog -> Page Settings to configure Blog page.
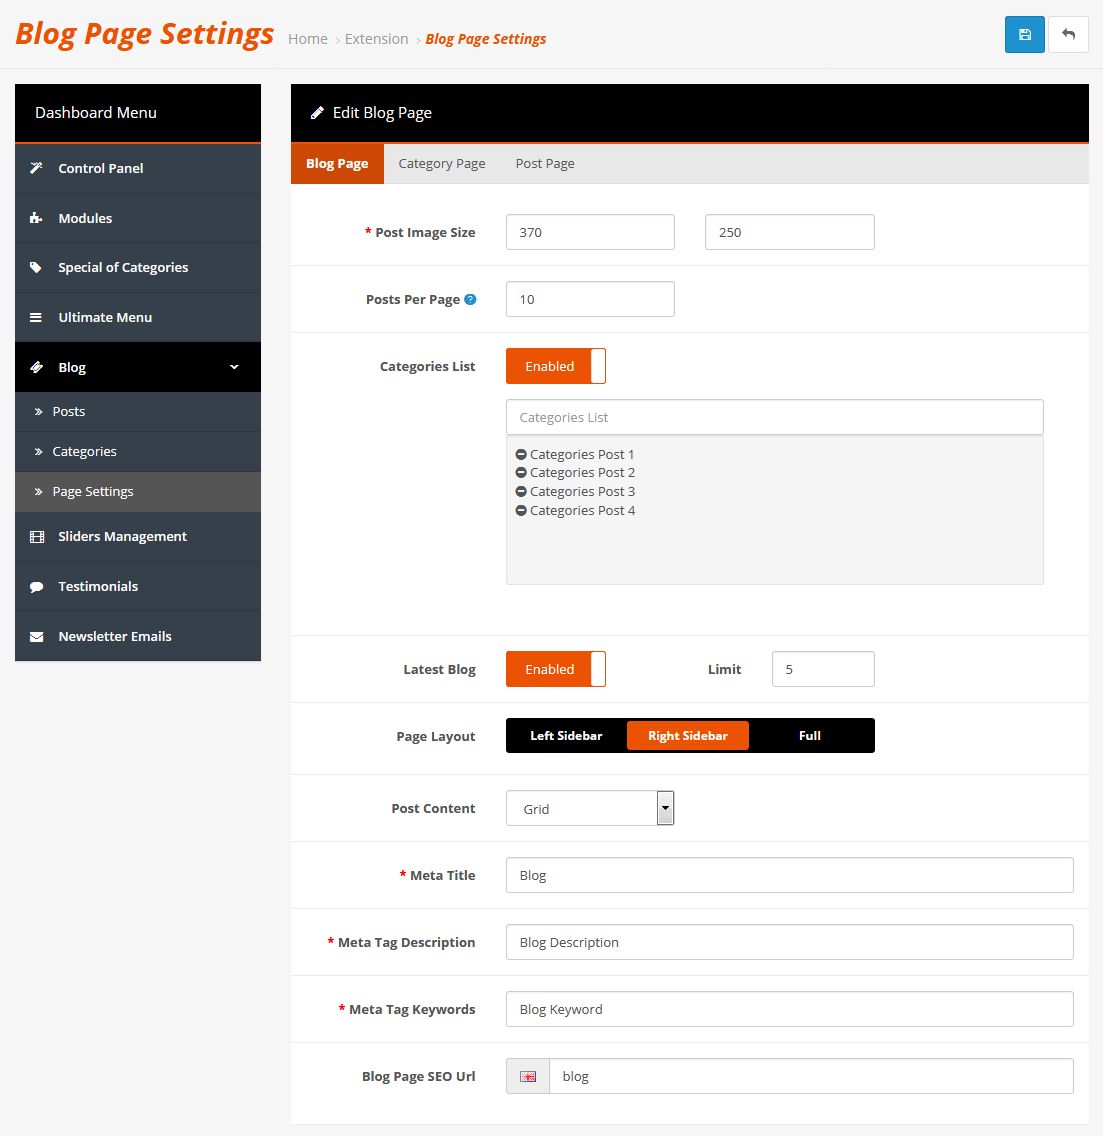
- Now, you should configure PlazaThemes Blog module to show on your site.
Slider Management
PlazaThemes Slider to make banners slider on frontend.
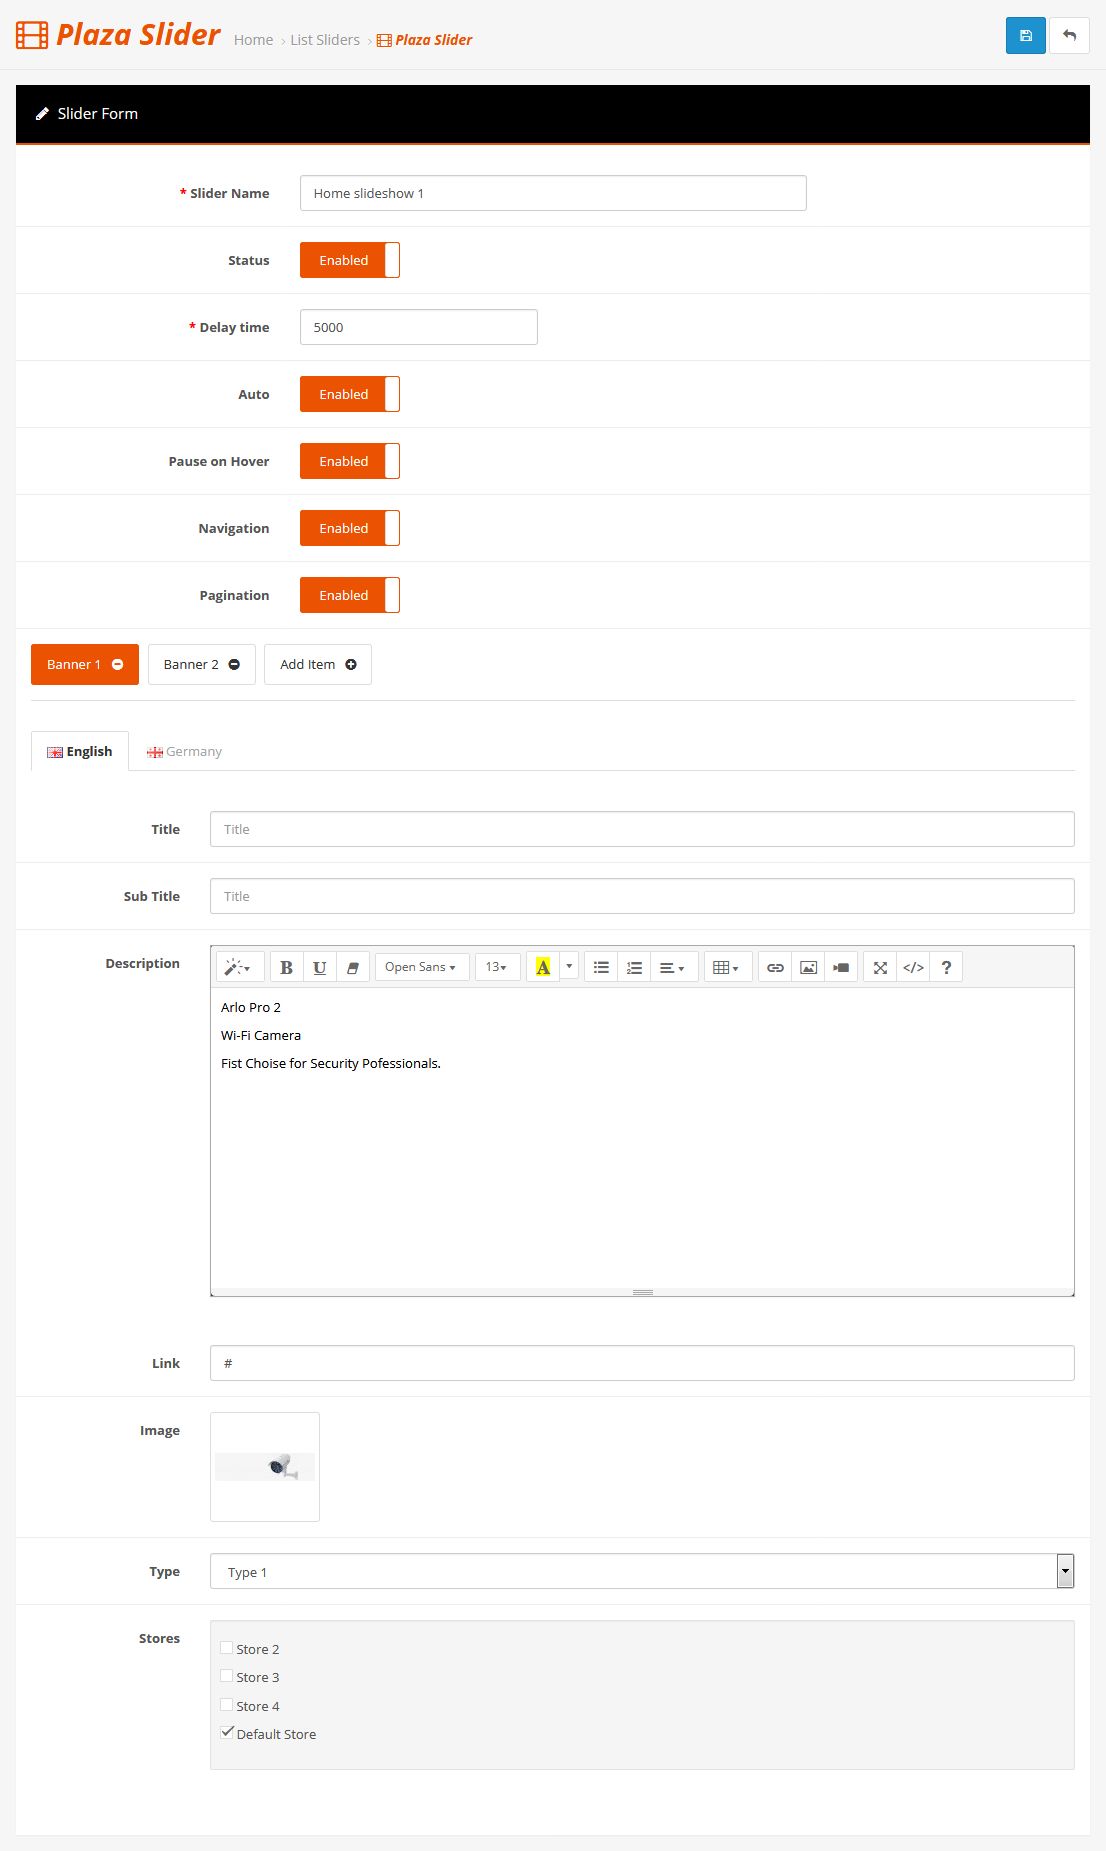
- Go to PlazaThemes Dashboard -> Slider Management to create or edit Slider.
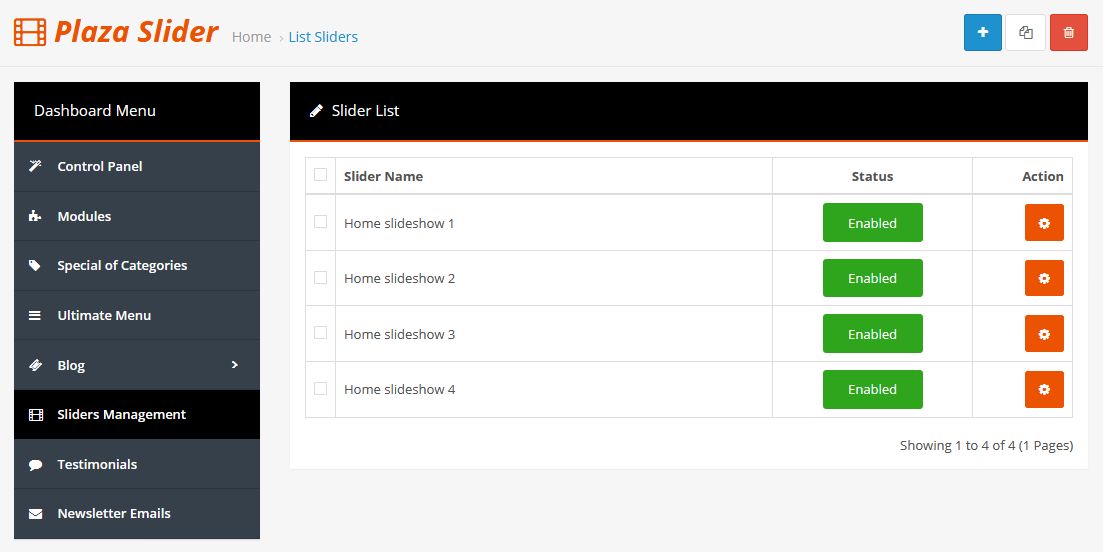
- Click Add New button or Edit existing slider. Fill data & Save
- You have configured the Slider. Now, you should configure Plaza Slider module.
Testimonials
You can add new and edit testimonials.
- Go to PlazaThemes Dashboard -> Testimonials to create or edit testimonials.
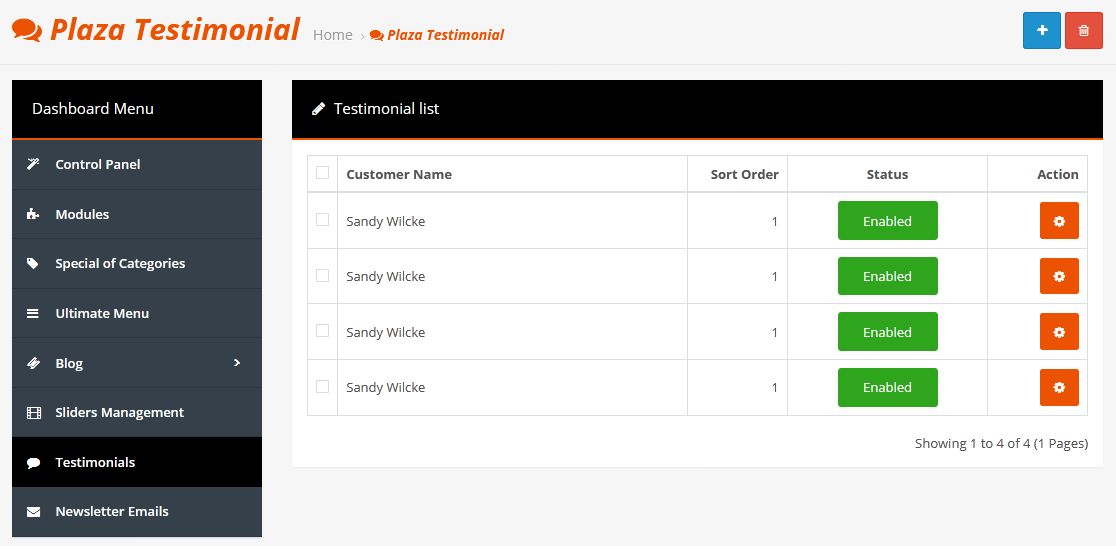
- Click Add New button or Edit existing testimonials. Fill data & Save
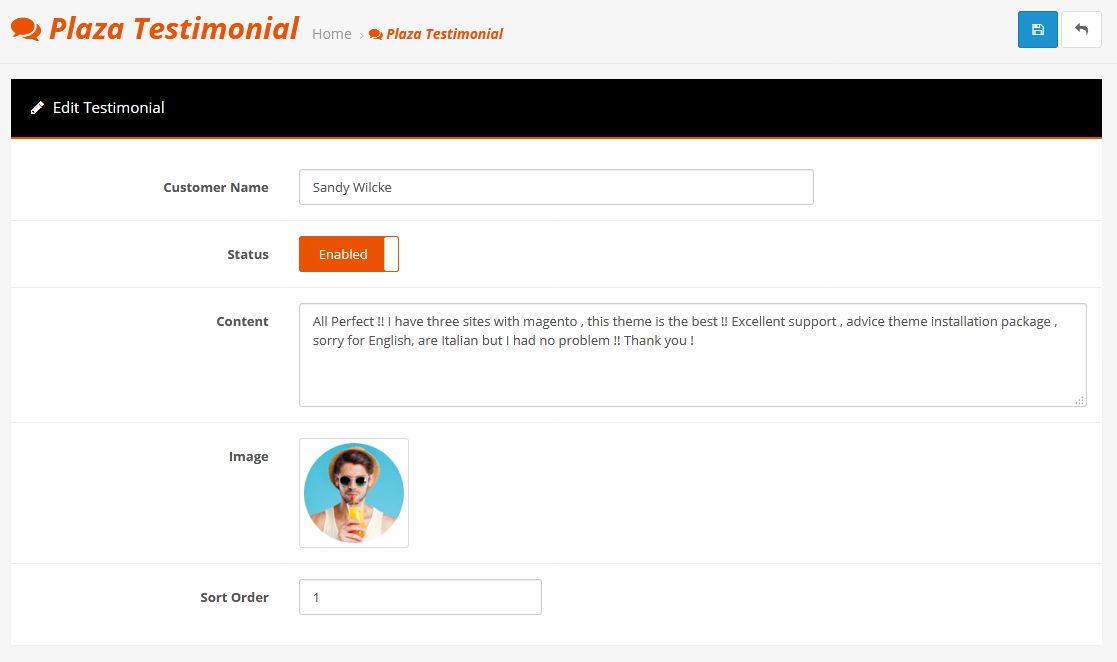
- You have configured the testimonials. Now, you should configure Plaza Testimonial module.
Newsletter Emails
Newsletter to be used for subscribing to receive updates on new arrivals, special offers and other discount information.
- Go to PlazaThemes Dashboard -> Newsletter Emails to see all newsletter emails have been subscribed on frontend.
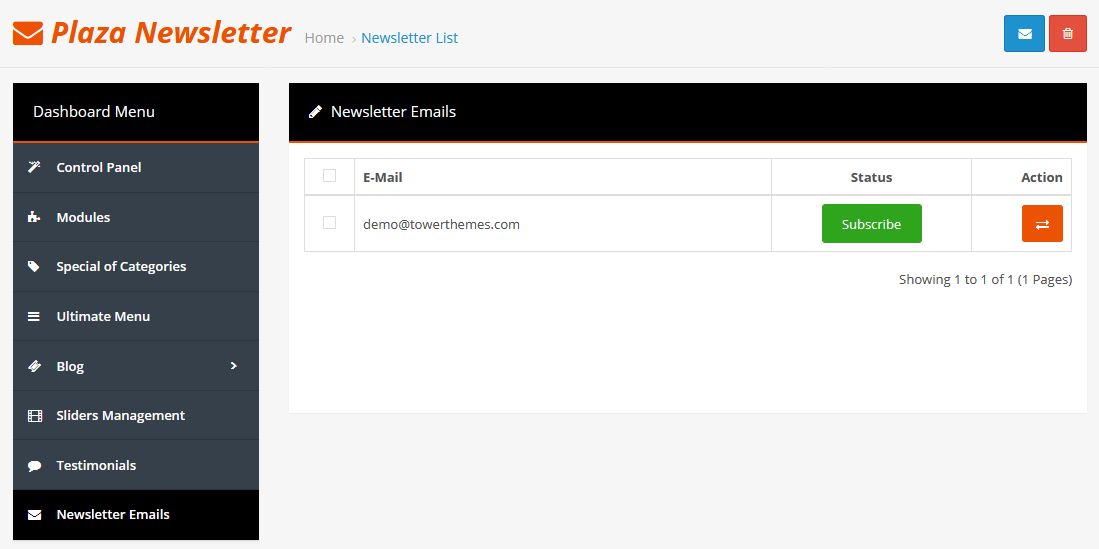
- Click Mail button
 to prepare email for Newsletter.

- Fill your settings, your mail info and click Send to send mail to email address that have been subscribed.
- Make sure that mail configuration is correct.
- You have configured the Newsletter. Now, you should configure Plaza Newsletter module.
Configure Extensions
Read official OpenCart documentation for install, Editing and Setup a module.
- For Official Documentation - Click Here
- For Tutorials - Click Here
and also, See & follow Our Below module information.
There are two ways to configure Extensions of this Theme:
Option 1:
Login admin then go to PlazaThemes Dashboard -> Modules -> Plaza Products -> Select module you want to config.
Example
Login admin then go to PlazaThemes Dashboard -> Modules -> Plaza Ultimate Menu - Horizontal Menu 01 -> Edit button
-
We got :
Configure parameters that you need
- Click Save button to save your changes.
Option 2:
Login admin then go to Extensions -> Extensions -> Choose the extension type -> Modules -> Select module you want to config.
Example
Login admin then go to Extensions -> Extensions -> Choose the extension type -> Modules -> Plaza Ultimate Menu - Horizontal Menu 01 -> Edit button
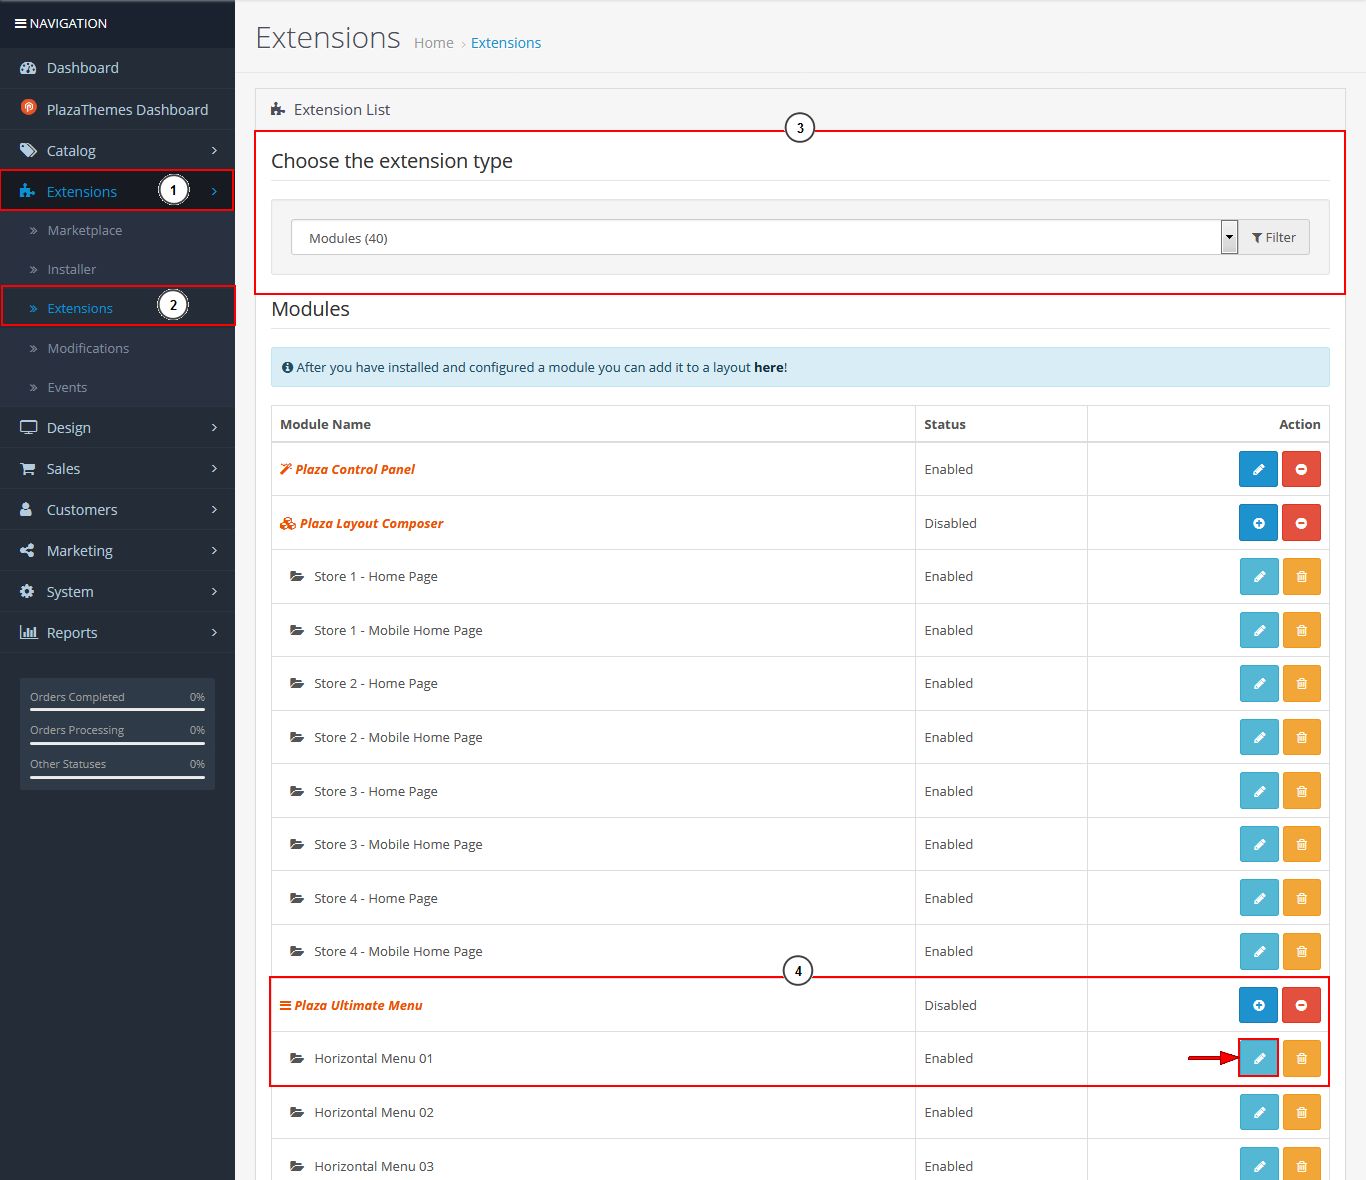
-
We got :
Configure parameters that you need
- Click Save button to save your changes.
Config Plaza Control Panel
You can configure and customize layout by Plaza Control Panel. Following this guide .
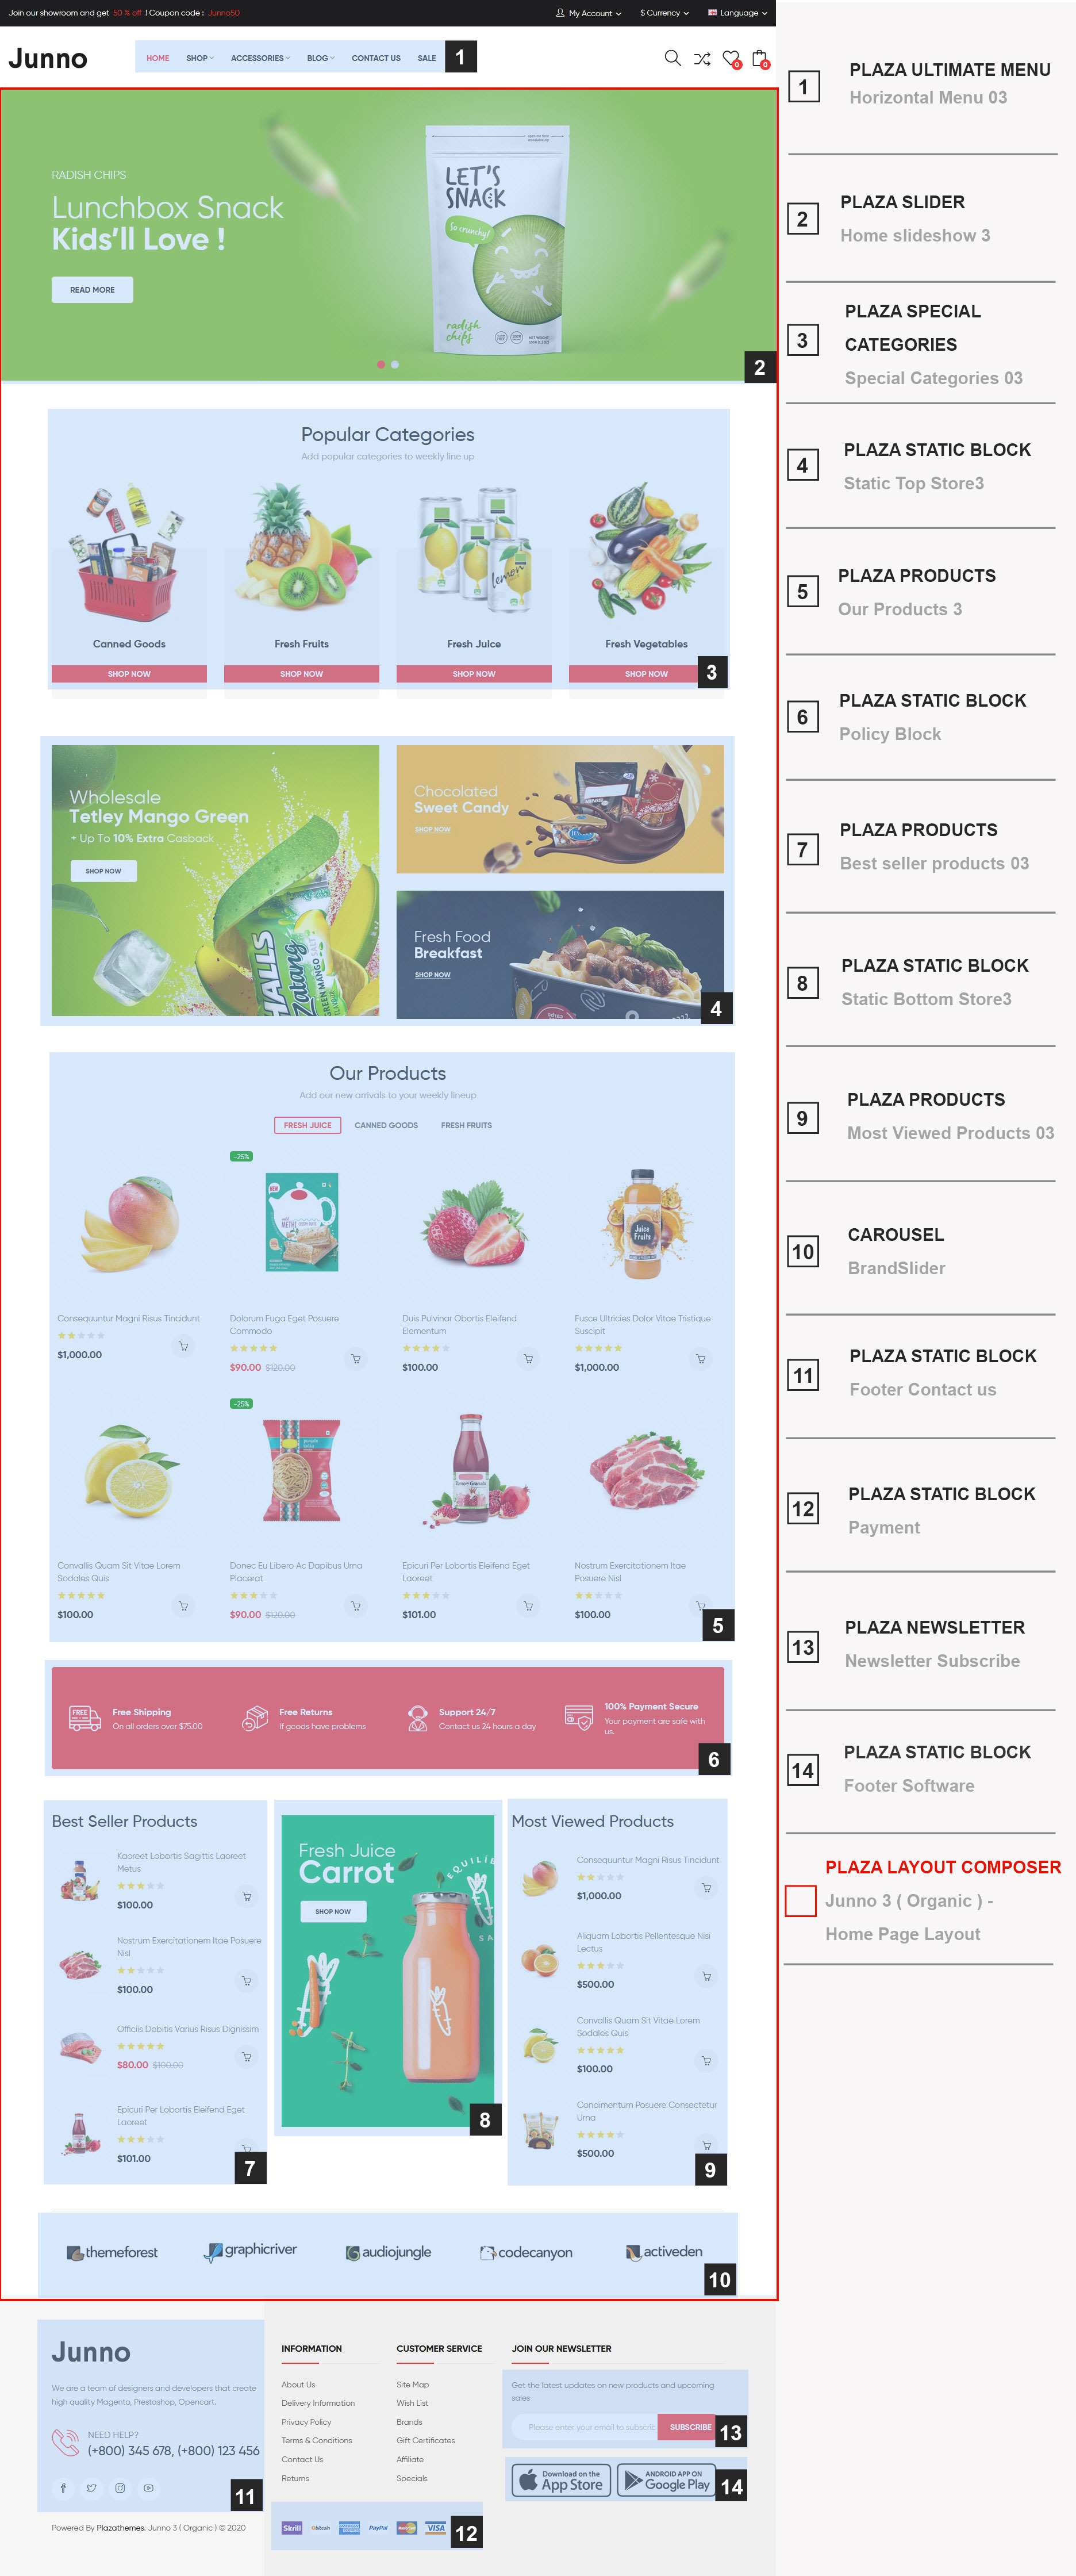
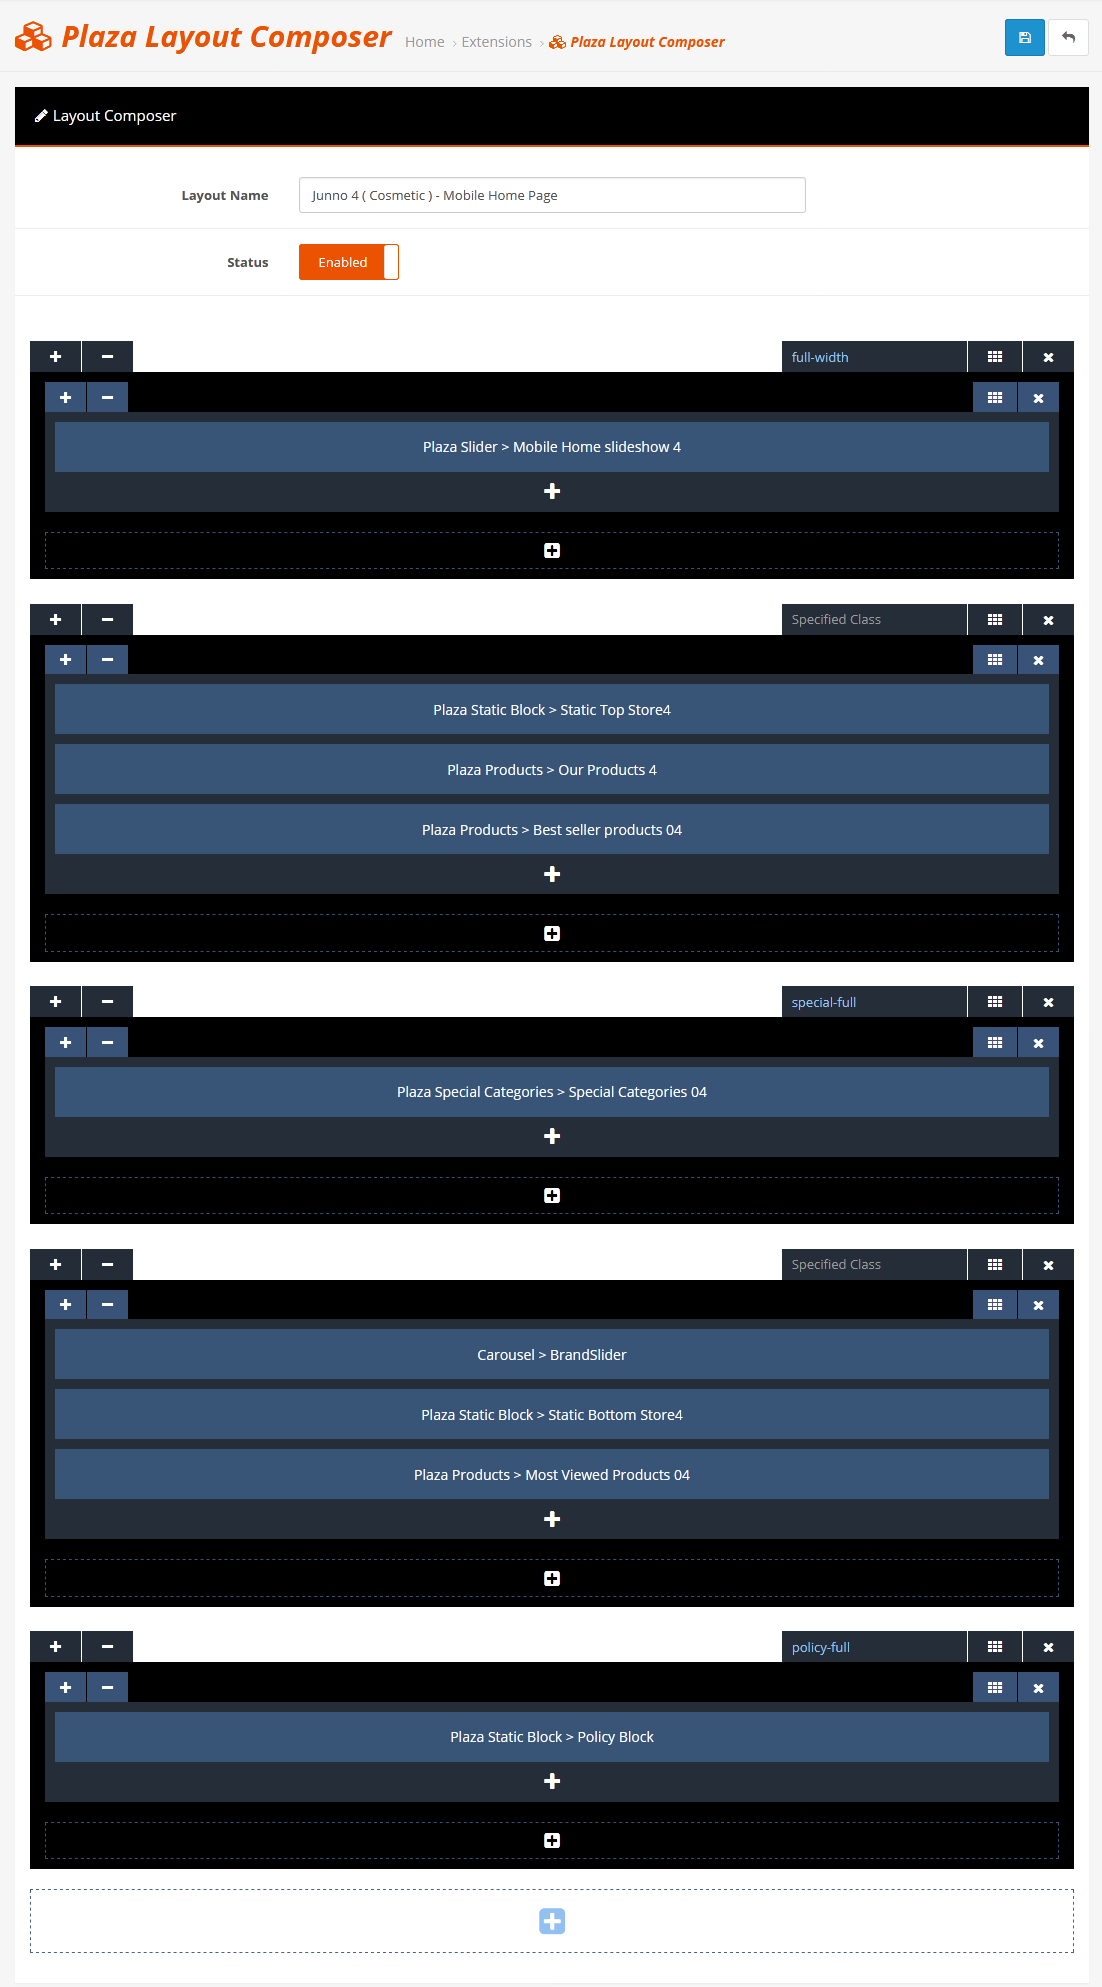
Config Plaza Layout Composer
Plaza Layout Composer is an OpenCart 3.0.x extension which help you can design layout, position, modules follow your mind. It is a module basically, so it is easy to install and use. And of course, Plaza Layout Composer is very useful for your website.
Please see at Plaza Layout Composer to know about how to add modules, edit modules,.. in this module.
Plaza Layout Composer for each home:
***Junno Cosmetic: Plaza Layout Composer - Junno 1 ( Shoes ) - Home Page

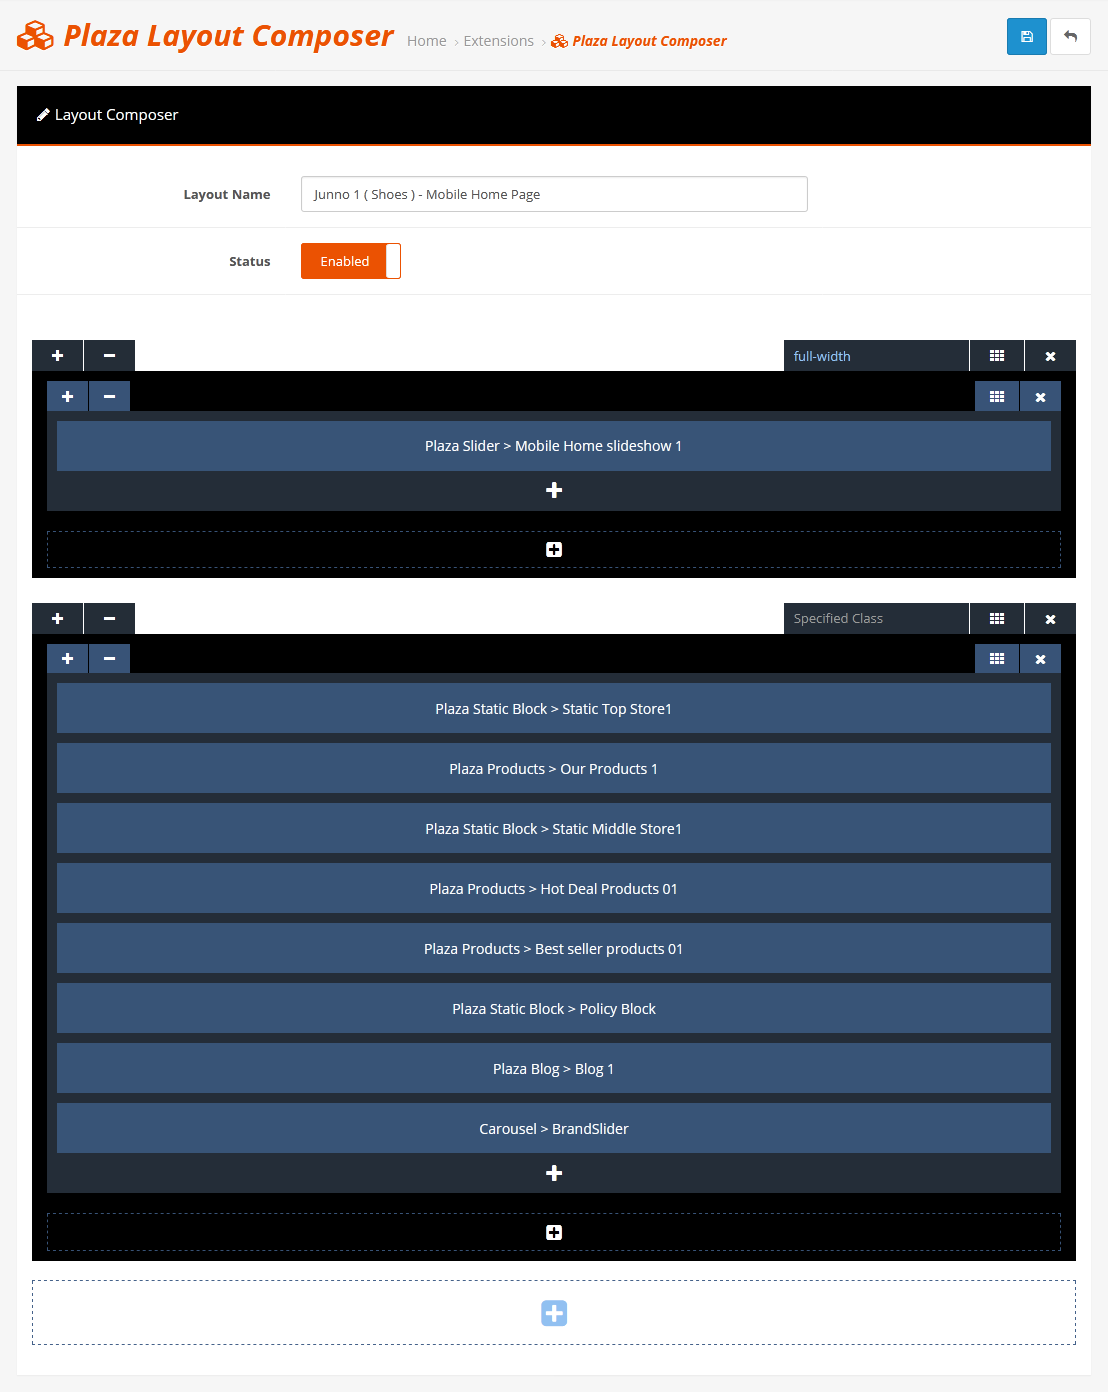
***Junno Cosmetic: Plaza Layout Composer - Junno 1 ( Shoes ) - Mobile Home Page
***Junno Furniture: Plaza Layout Composer - Junno 2 ( Digital ) - Home Page

***Junno Furniture: Plaza Layout Composer - Junno 2 ( Digital ) - Mobile Home Page

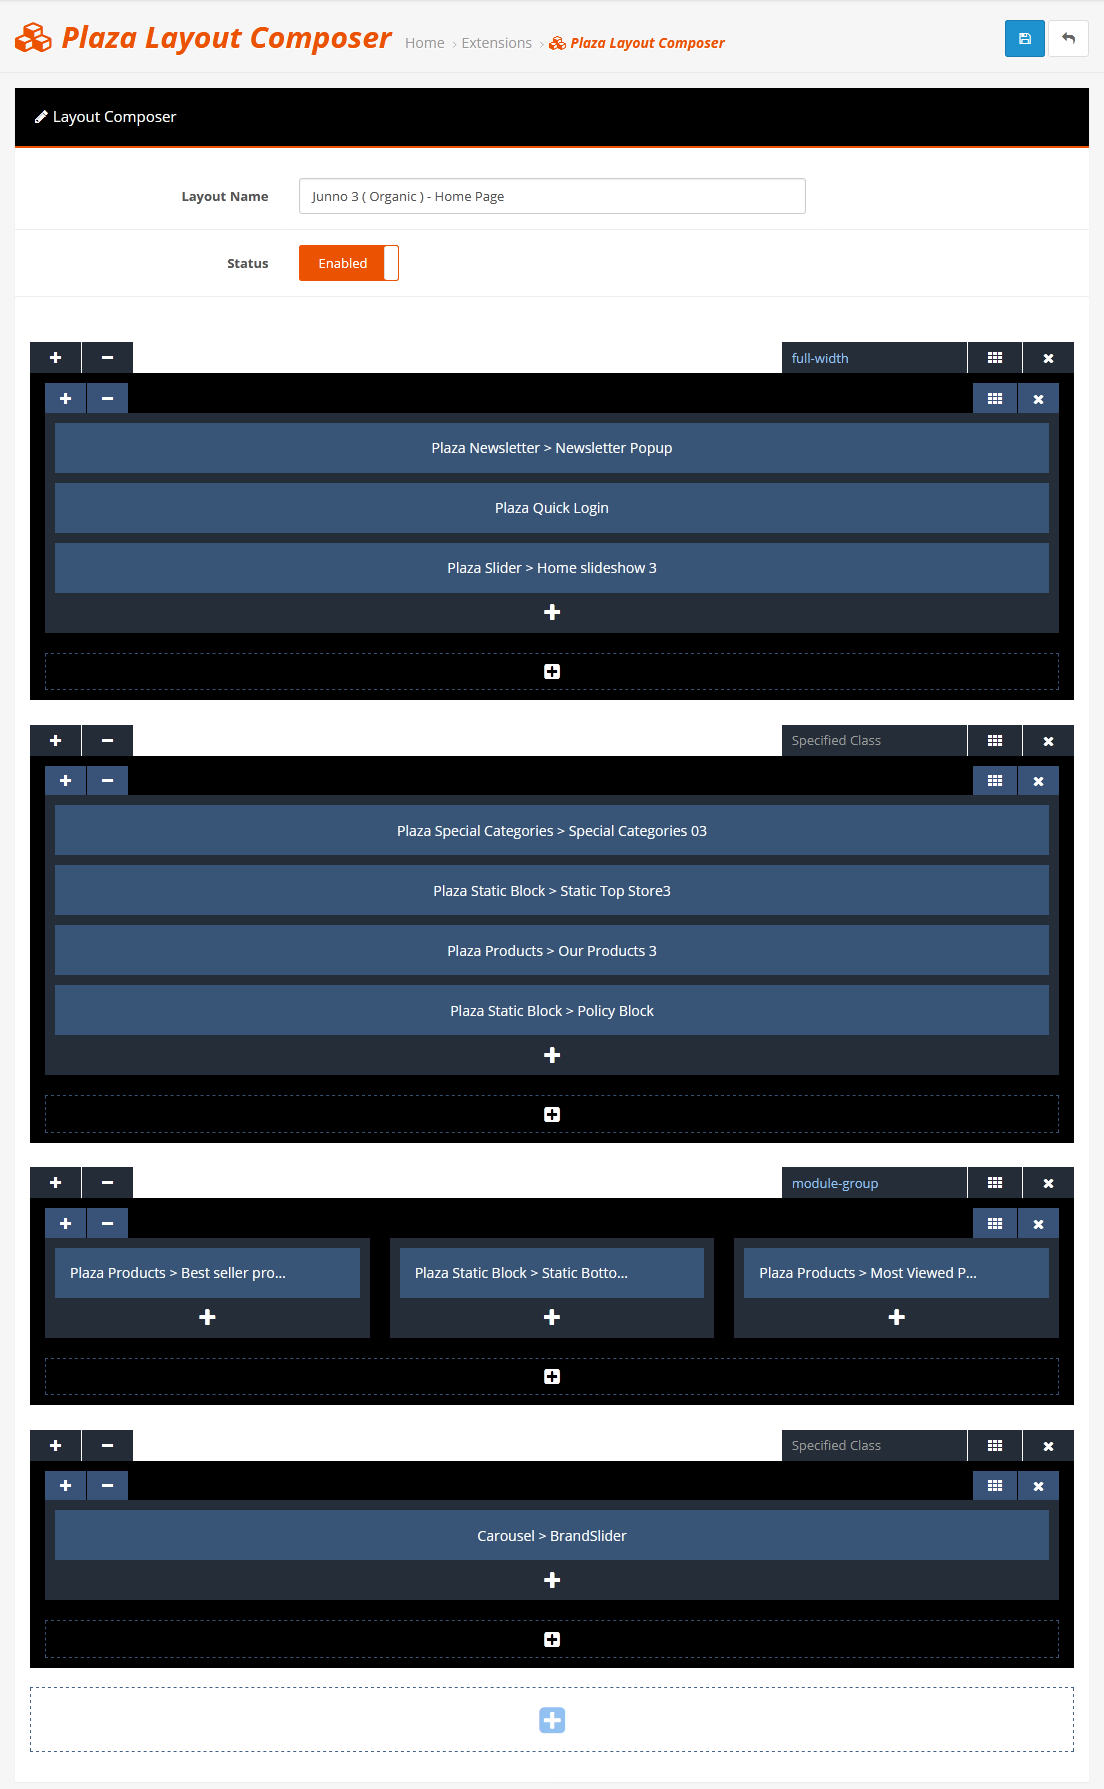
***Junno Watch: Plaza Layout Composer - Junno 3 ( Organic ) - Home Page
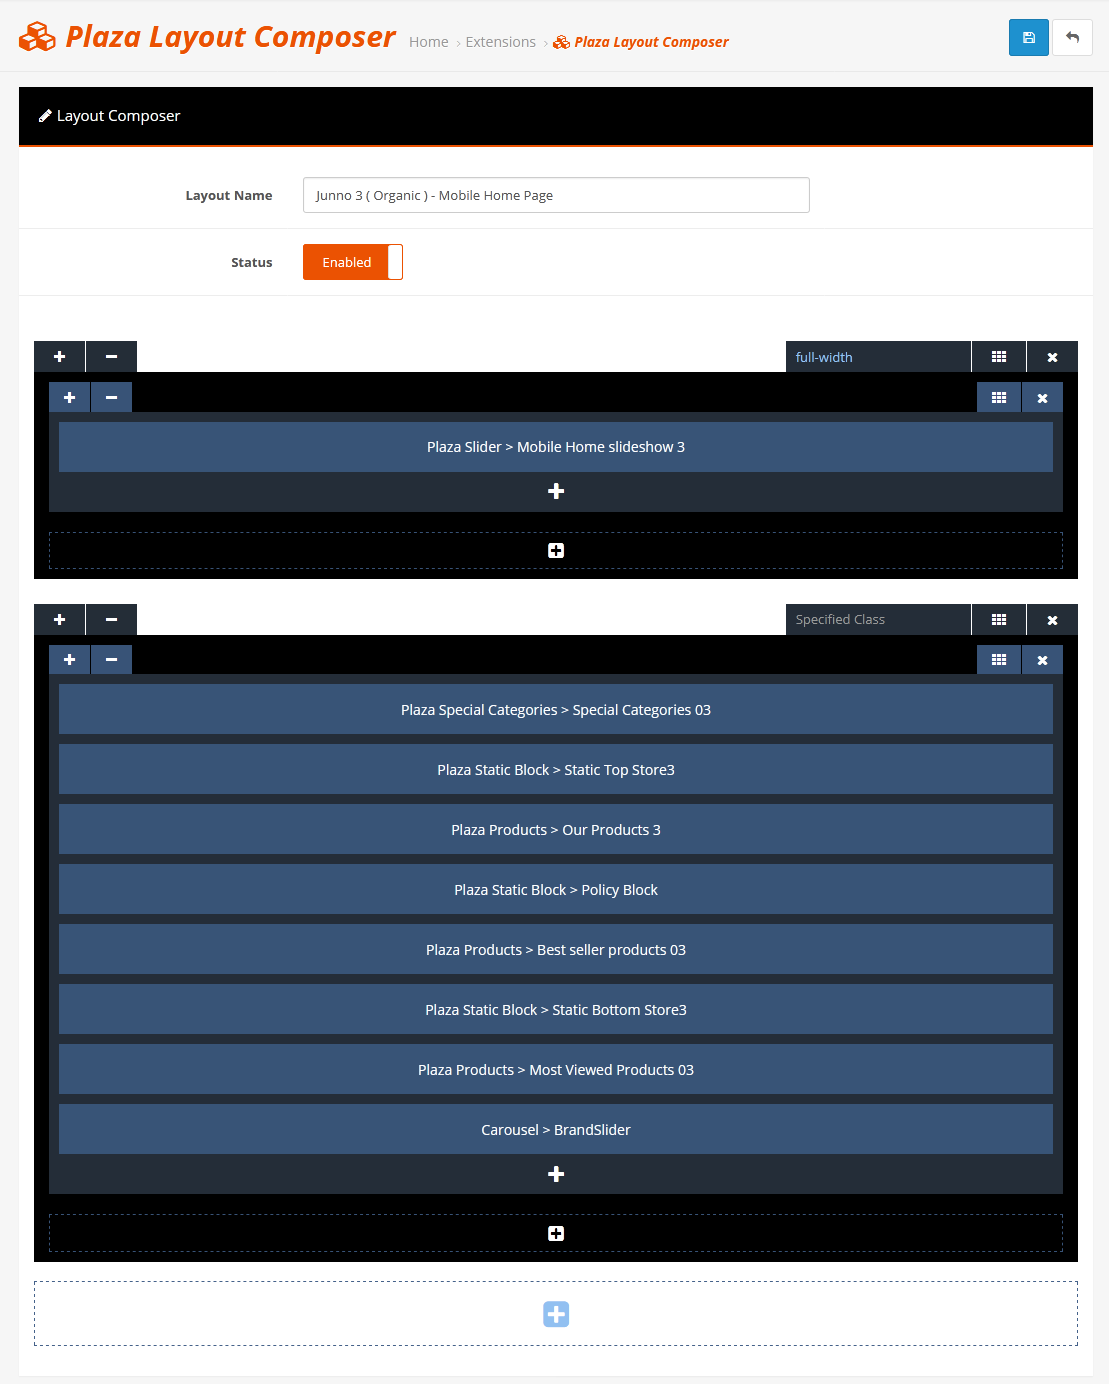
***Junno Watch: Plaza Layout Composer - Junno 3 ( Organic ) - Mobile Home Page
***Junno Digital: Plaza Layout Composer - Junno 4 ( Cosmetic ) - Home Page

***Junno Digital: Plaza Layout Composer - Junno 4 ( Cosmetic ) - Mobile Home Page
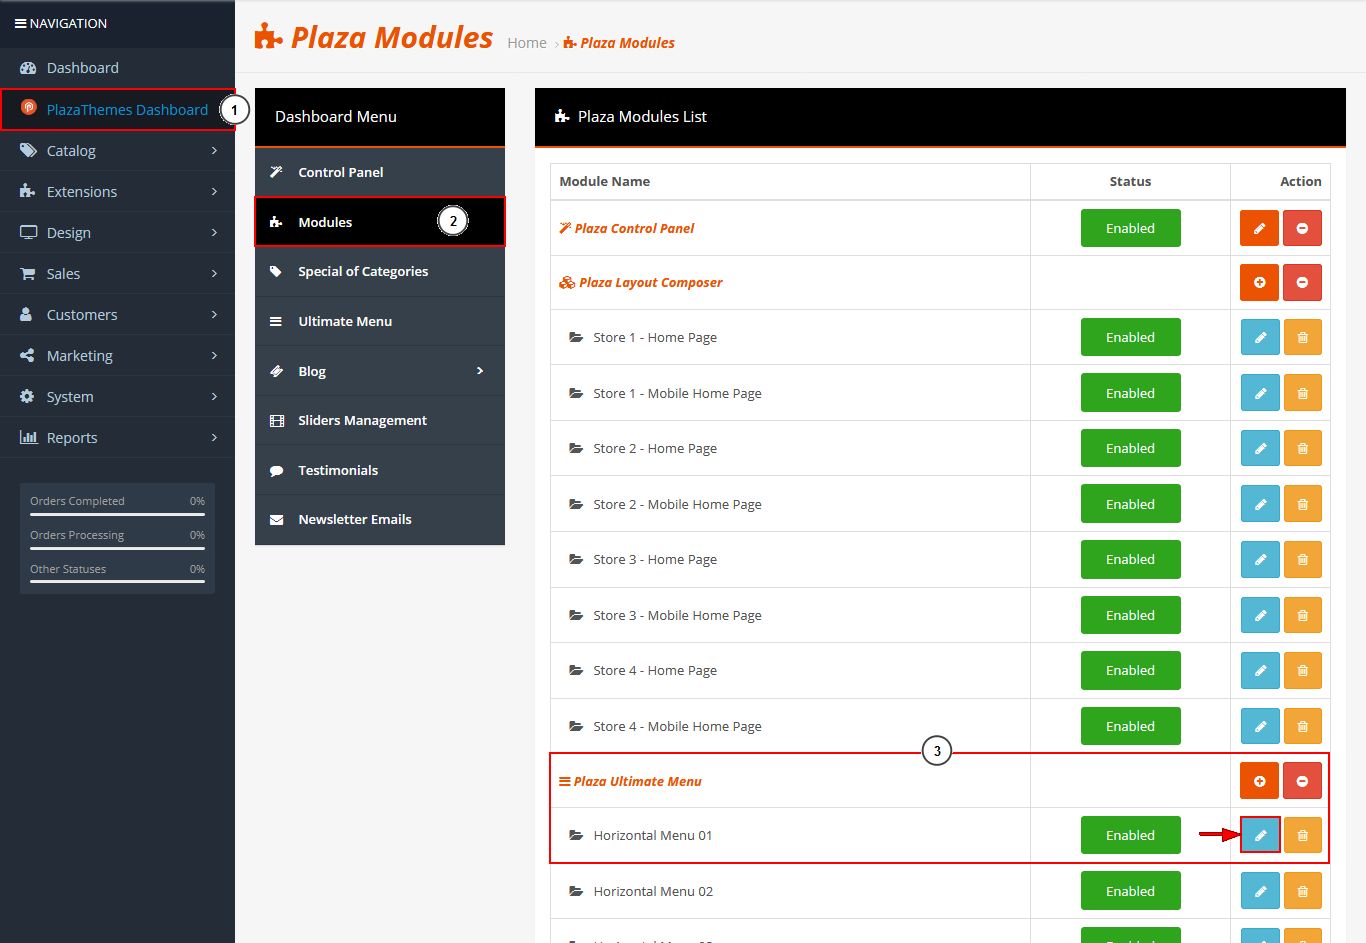
Config Plaza Ultimate Menu
Plaza Ultimate Menu module helps to create and display effectively multiple menu types (horizontal, vertical & mobile menu) and various display styles. You can create a huge sitemap-like menu with links to every page.

Login your opencart admin
Go to PlazaThemes Dashboard -> Modules -> Plaza Ultimate Menu - Horizontal Menu 01 (sub module of Plaza Ultimate Menu in each theme) -> Click Edit button
-
We got :
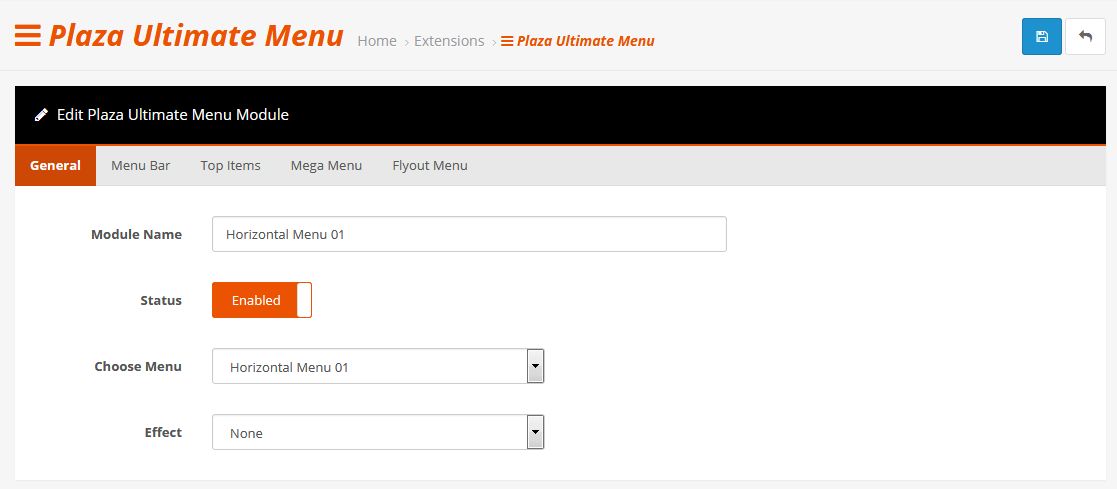
then config according to you.Configure parameters as below:
General tab - This section contains the basic settings for your Mega Menu theme.
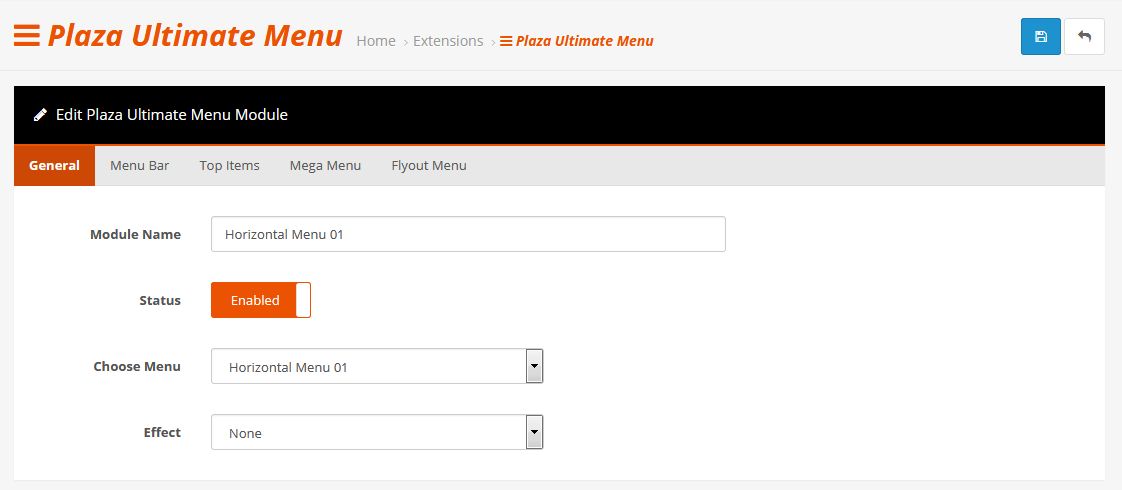
Module Name - Input name of sub Plaza Ultimate Menu
Status - Set Enabled to show the Plaza Ultimate Menu module.
Choose Menu - Select megamenu to published
Effect - Choose menu effect if you want
Menu Bar tab - If you want to display the mega menu items on mobile devices, you need to configure a few things.
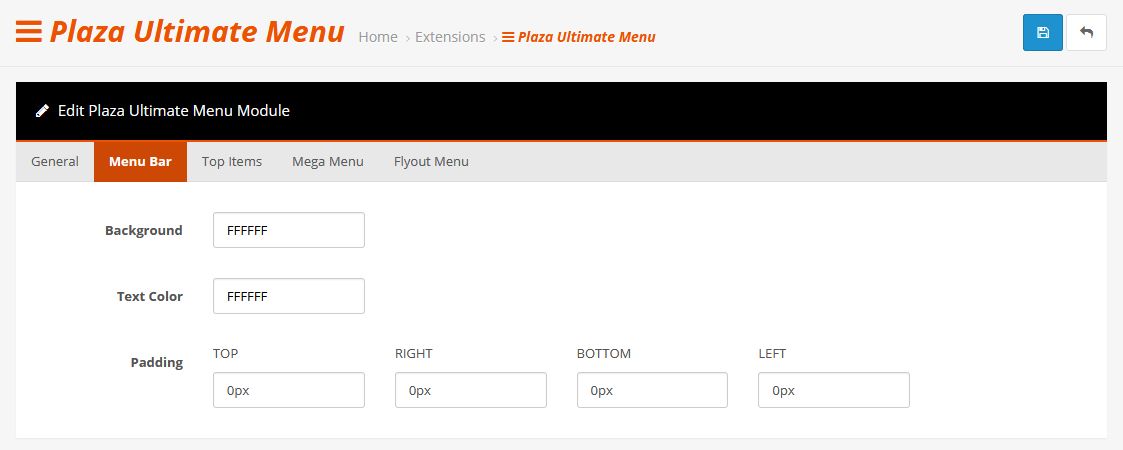
Background - Set background color of menu.
Text Color - Set text color of menu
Padding - Set padding for top, right, bottom, and left of the menu.
Top Items tab - The menu items that we see on the top, are dubbed as Top Level Items.
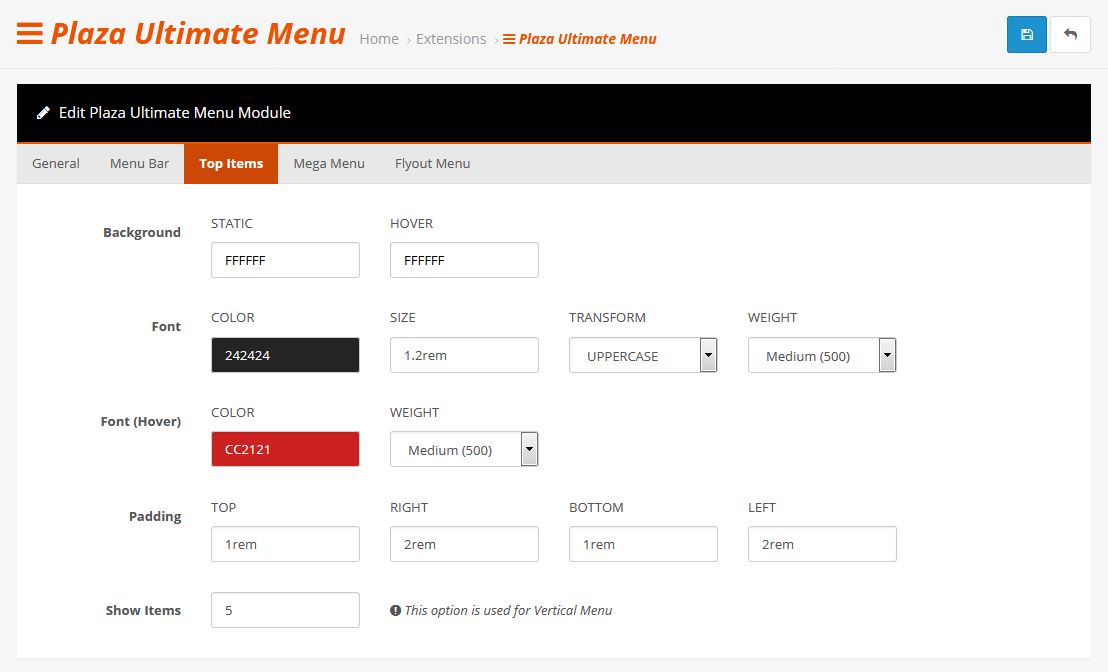
Background - Set color of background
Font - Configuration options include font color, font size, font weight, text transform
Font (Hover) - Set font color, font weight when hovering.
Padding - Set padding for top, right, bottom, and left of the top menu item.
Show Items - Set number of categories will be displayed.
Mega Menu tab - Use these settings to change the appearance of “mega menu” sub menus and their contents.
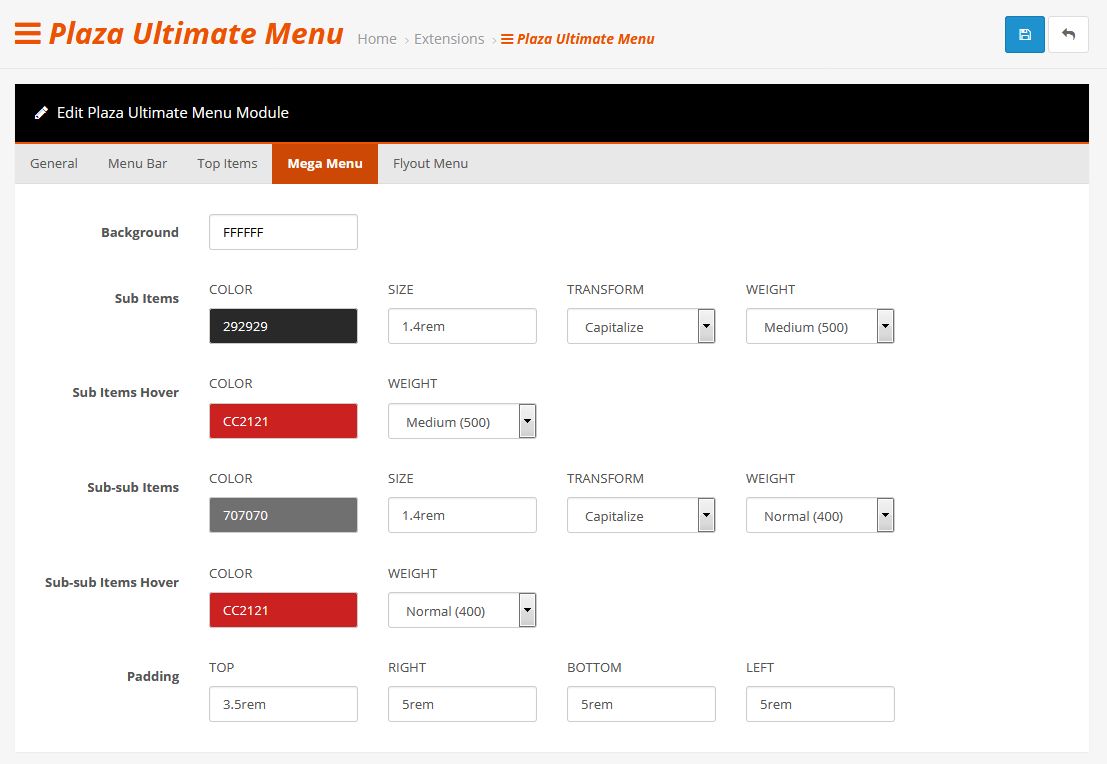
Background - Set background color of menu.
Sub Items - Set font style of menu item.
Sub Items Hover - Set font style of menu item when hover.
Sub-sub Items - Set font style of the sub-sub-menu item.
Sub-sub Items Hover - Set font style of the sub-sub-menu item when hover.
Padding - Set padding for top, right, bottom, and left of the menu.
Flyout Menu tab - Flyout menus show one level of menu items at a time, expanding as the user hovers or clicks each item.
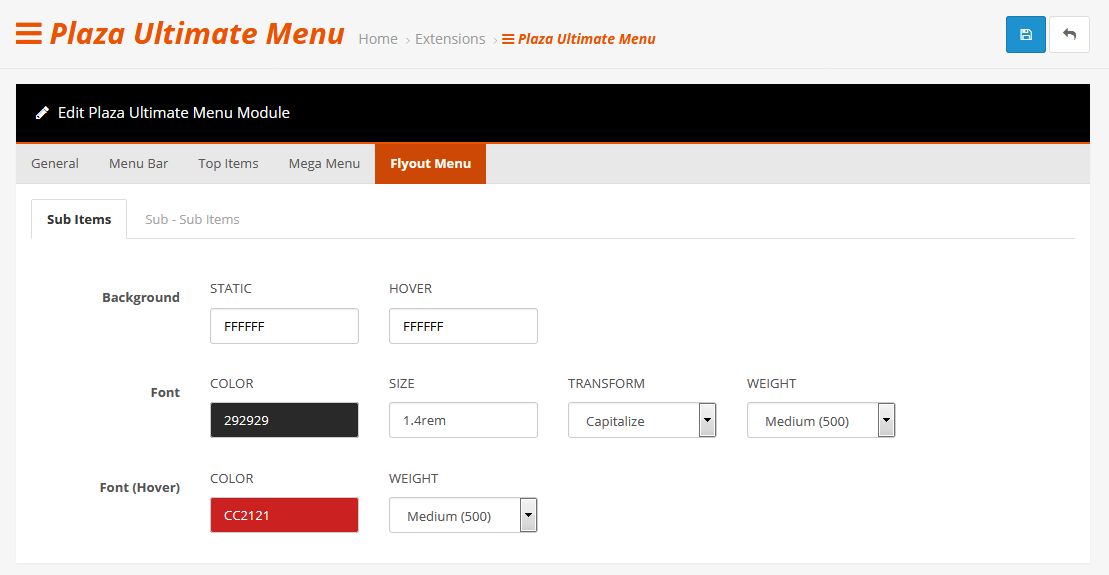
Choose tab Sub Items or Sub - Sub Items to config
Background - Set color of background
Font - Configuration options include font color, font size, font weight, text transform
Font (Hover) - Set font color, font weight when hovering.
Click Save to save this sub module
=> To customize this module, please modify this file : catalog\view\theme\[name_theme]\template\plaza\module\ptmenu.twig
Plaza Products
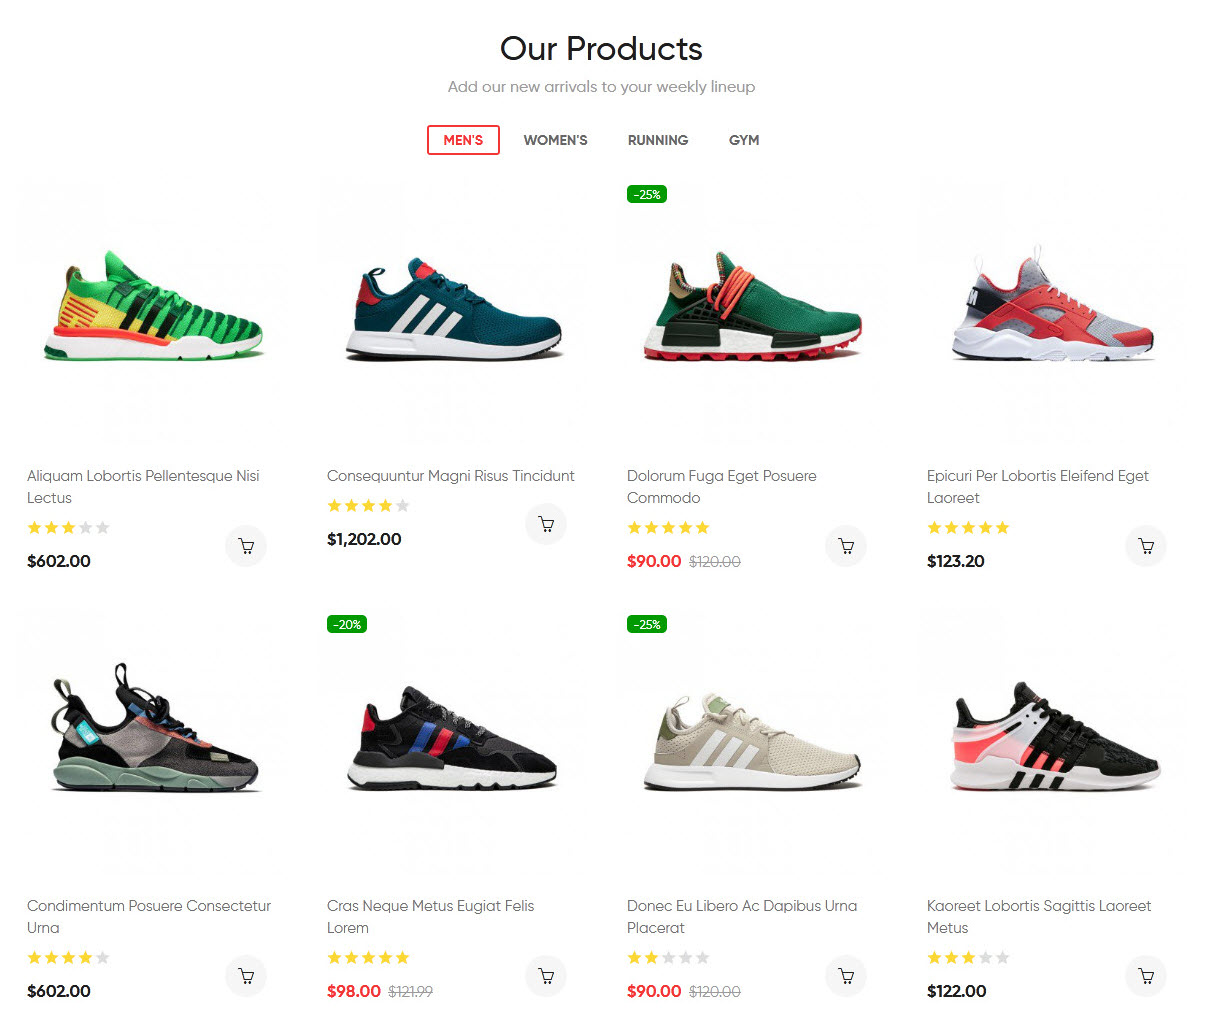
Configuration
Login your opencart admin
-
Go to PlazaThemes Dashboard -> Modules -> Plaza Products - Our Products 1 (sub module of Plaza Products in each theme) -> Choose Edit button
-
We got :
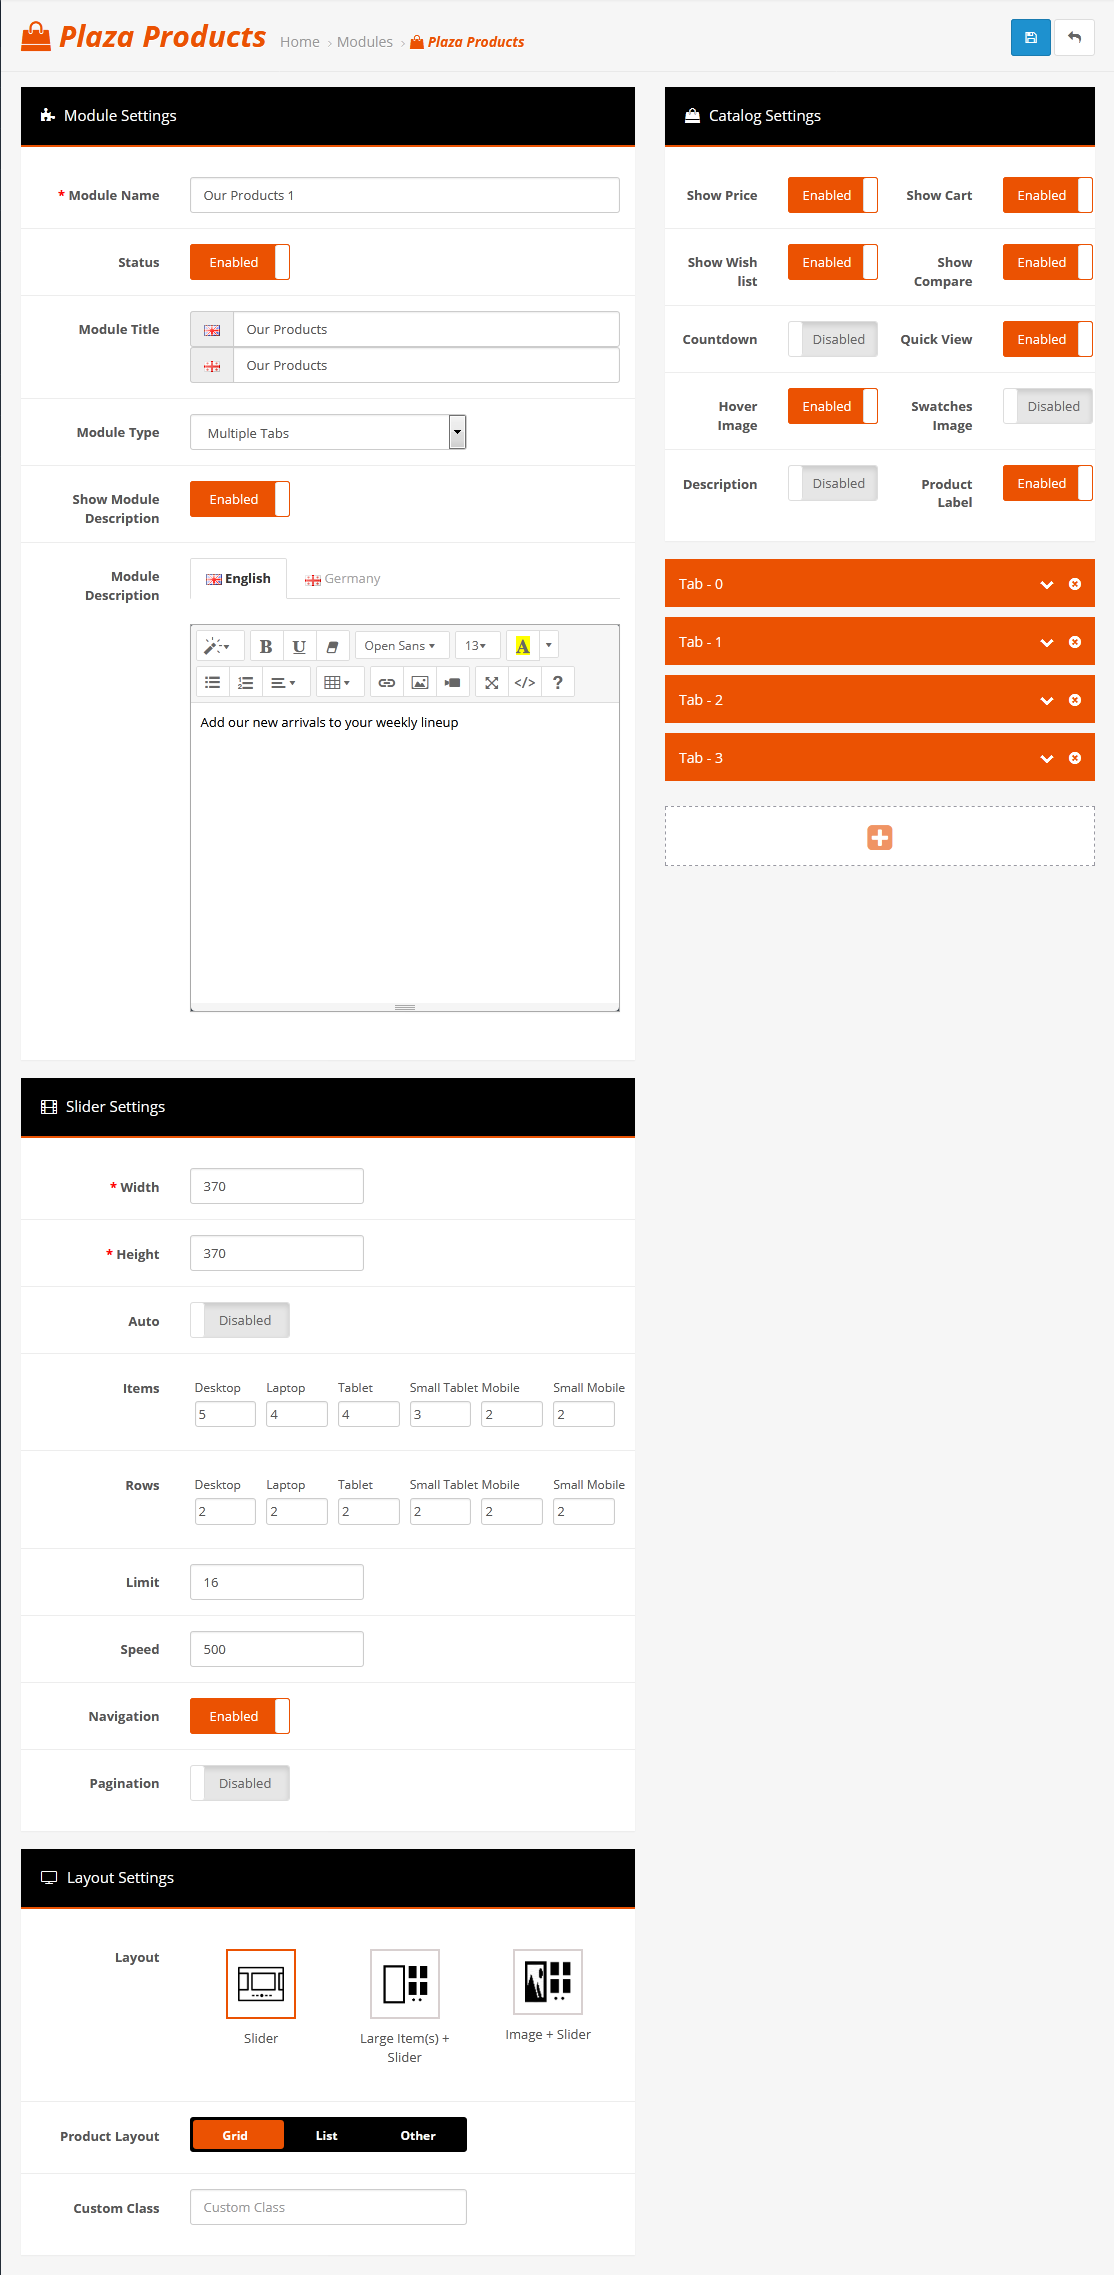
Config the parameters as below :
- Module Settings part
Module Name - Input name of sub Plaza Products.
Status - Set Enabled to use this sub module.
Module Title - Title of this module in each theme
Module Type - Select type of this module
Show Module Description - Set Enabled to display description
Module Description - Description of module
- Slider Settings part
Width - Set width of product image.
Height - Set height of product image
Auto - Enable / Disable auto play slider
Items - Set number of item will be displayed for each devices
Rows - Set number of row will be displayed for each devices
Limit - Number of items will be allowed.
Speed - Set a variable speed per slide (milliseconds)
Navigation - Enable / Disable navigation
Pagination - Enable / Disable pagination
- Layout Settings part
Layout - Select the type of content that will be displayed
Product Layout - Choose the layout that suits the type of content you're displaying.
Custom Class - Create custom classes to suit your needs
- Catalog Settings part - Enable/Disable e-commerce functionality of each products (price, cart, wishlist ...)
- Products Settings part - Choose type of products will be shown (specified, by category, special types)
- Image Settings part - Upload featured image for this module and set information about this image
=> To customize this module, please modify this file : catalog\view\theme\[name_theme]\template\plaza\module\ptproducts.twig
Config Plaza Static Block
Static Block module can make static blocks for your site.
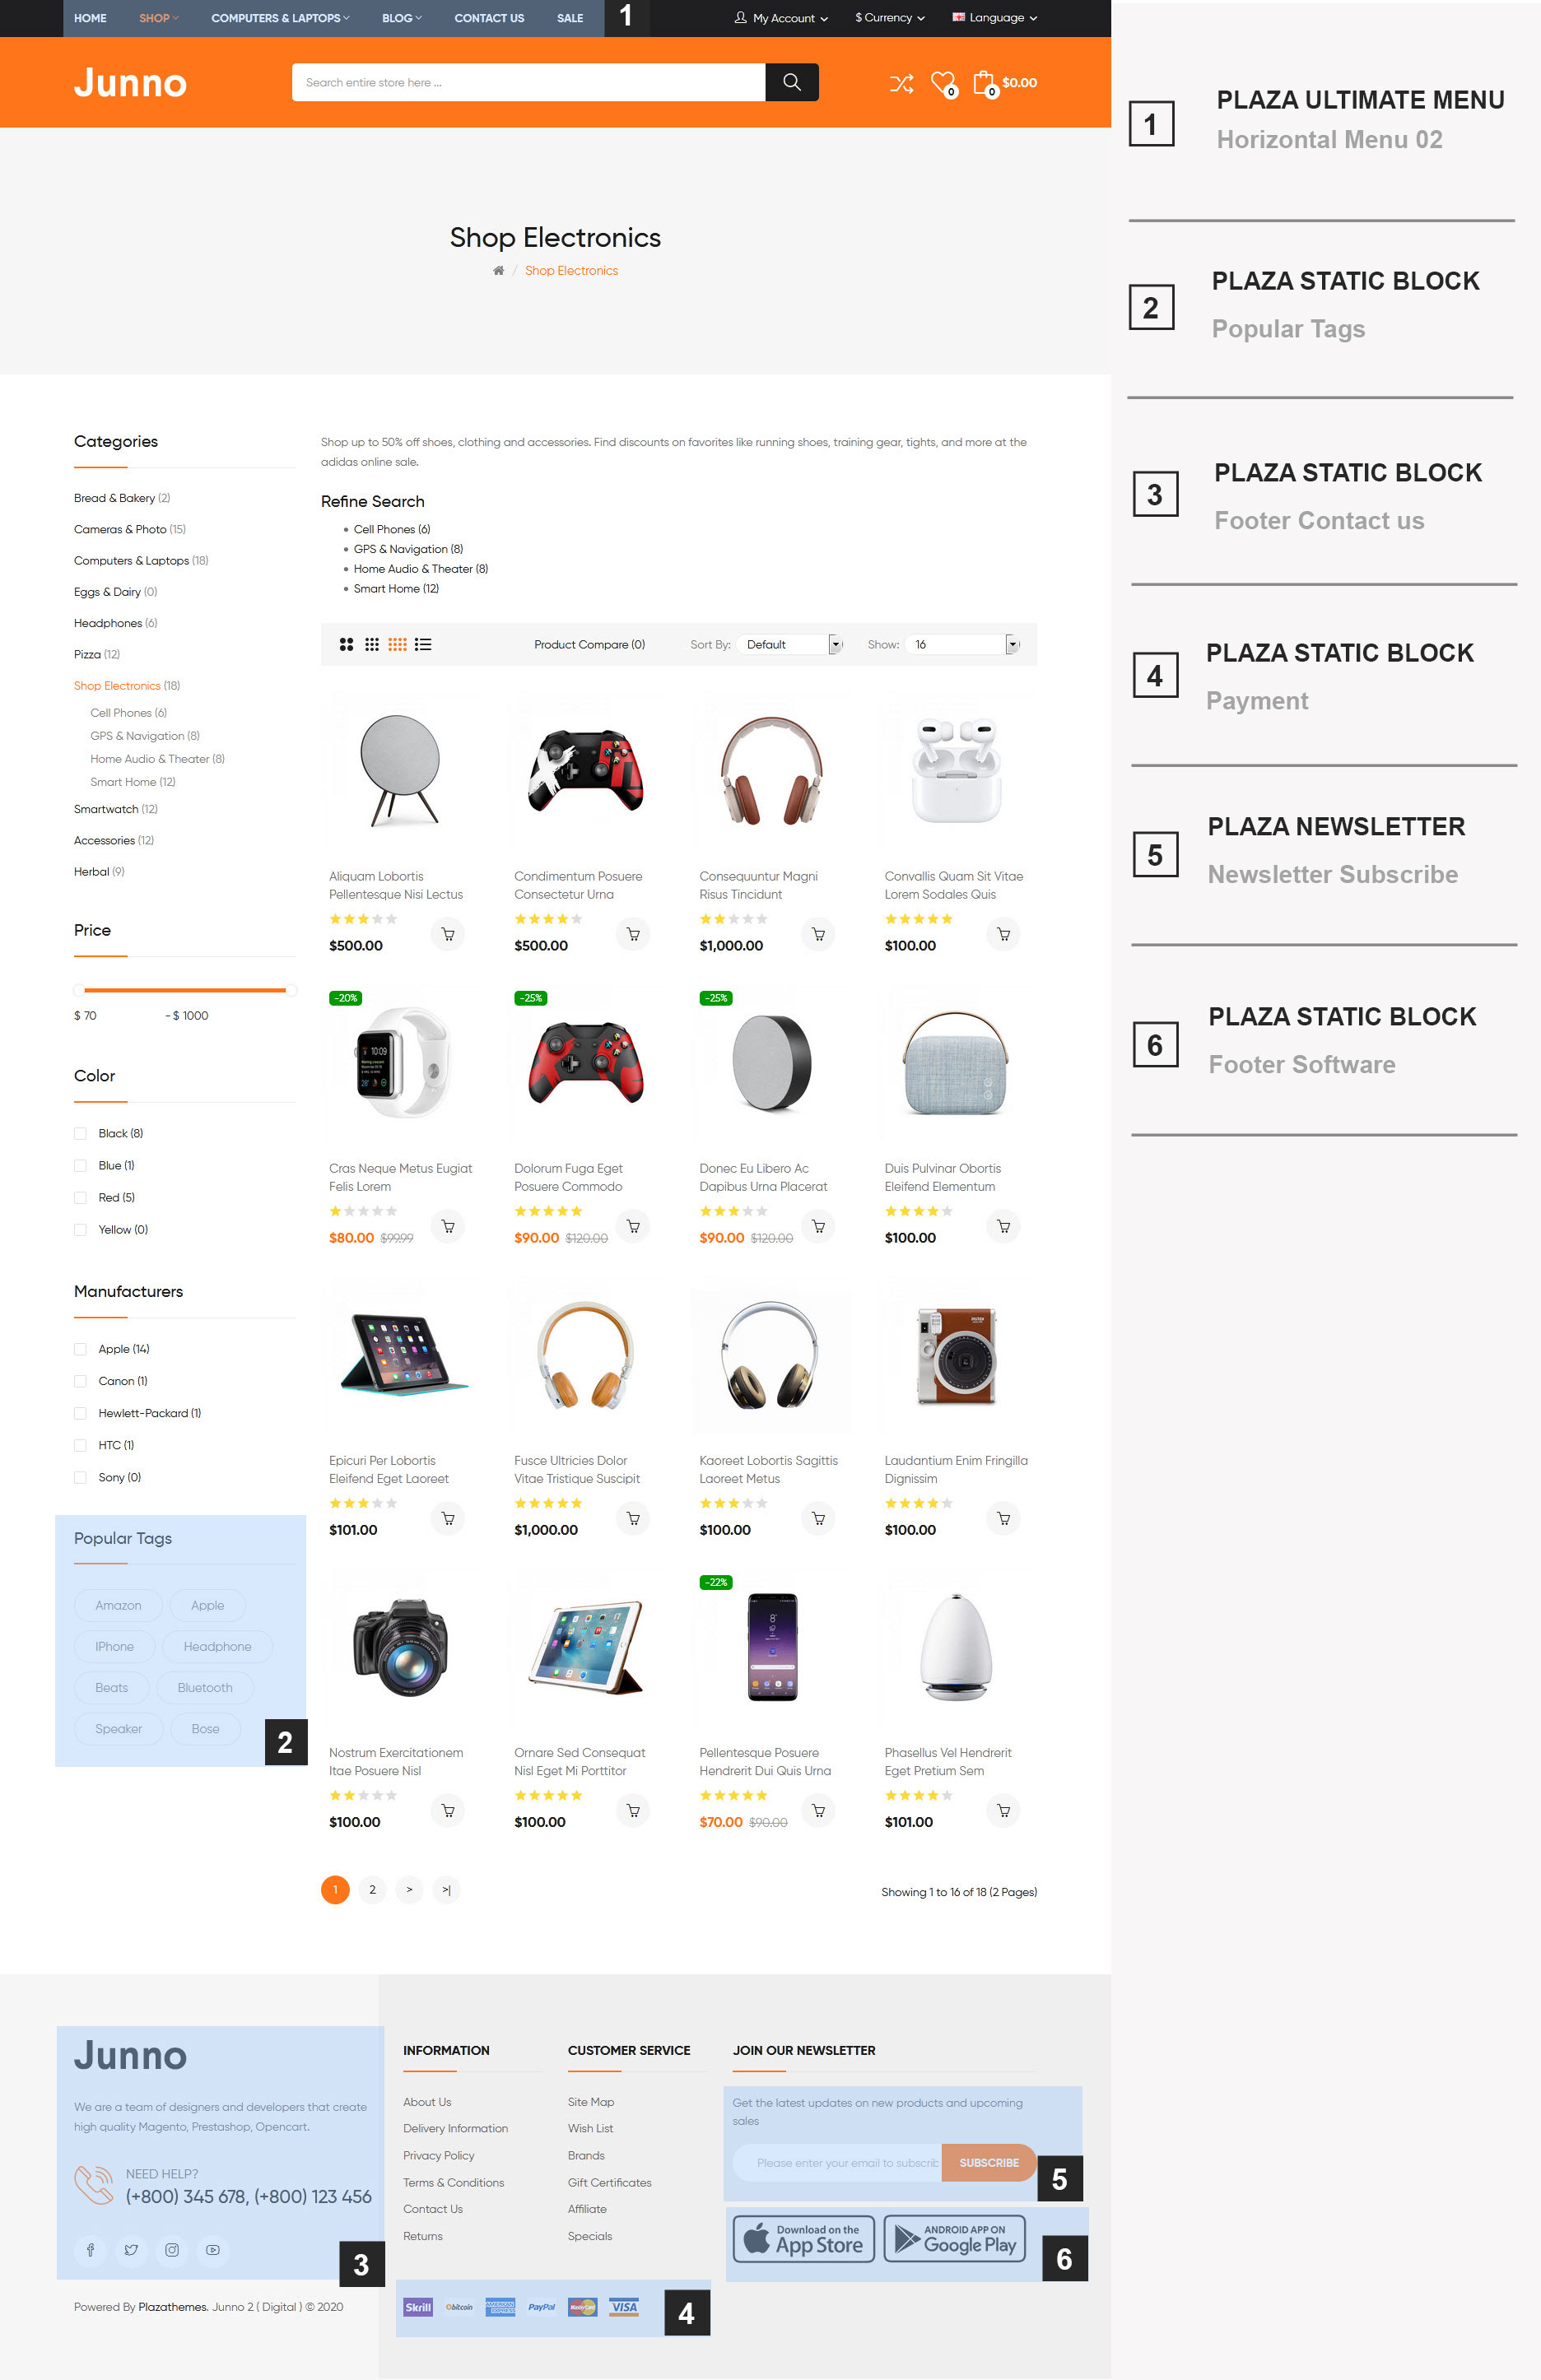
How to edit static blocks
Please see at images of layout to see names of Static Block
-
To edit a static block, please see in "Home page layout" image -> Find sub module of each Plaza Static Block
-
Login your opencart admin
Go to PlazaThemes Dashboard -> Modules -> Plaza Static Block -> Choose Cms Block you want to edit:

Edit Heading Title, Description ... of static block. Then click Code View (in description table) to show HTML of the static block
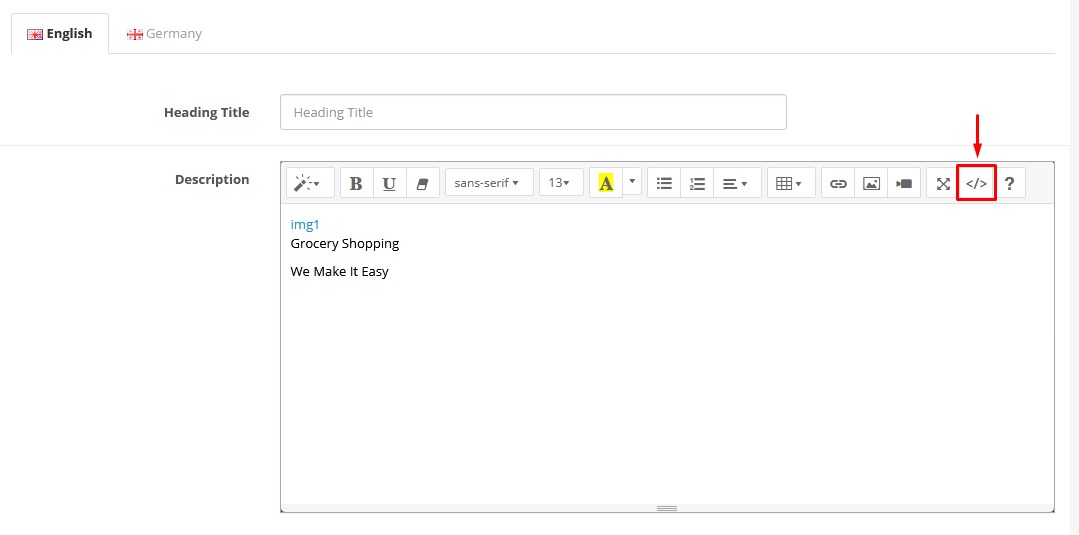
-> At here, to change link inside (src="our link") by (src="your link") or (data-original="our link") by (data-original="your link") (if that have line "data-original")
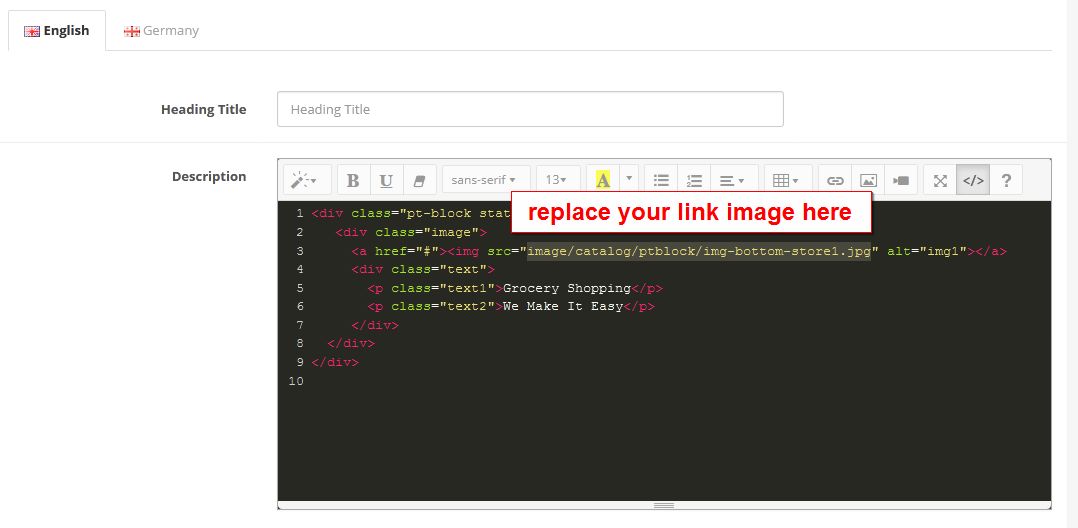
***One more thing, if you use default opencart 3.0.2.0, it have 1 bug. You can not save code cms block. To correct that error, after you have changed code in "Code View", please click once more time that "Code View" button. Then save.
-
Click Save button when finish.
Example:
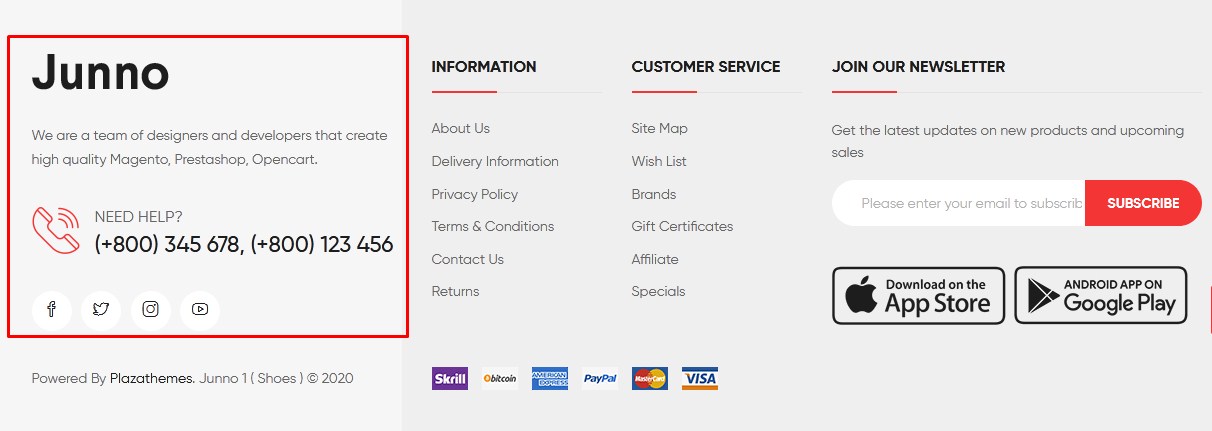
To edit the static block above in Junno Shoes , please do like steps below:
-
Please see at image of Junno Shoes
-
Find part you want to edit, name is : Plaza Static Block (Footer Contact us)
-
Login your opencart admin
Go to PlazaThemes Dashboard -> Modules -> Plaza Static Block - Footer Contact us -> Edit button
-> Edit Heading Title, Description, ... of this static block.
-
Click Save button when finish.
=> To customize this module, please modify this file : catalog\view\theme\[name_theme]\template\plaza\module\ptstaticblock.twig
Plaza Slider

*** This module performs images and texts in slideshow.
#Junno Shoes: You should cut background images with size 1920 x 720 pixels.
#Junno Shoes Mobile layout: You should cut background images with size 767 x 288 pixels.
#Junno Digital: You should cut background images with size 1920 x 610 pixels.
#Junno Digital Mobile layout: You should cut background images with size 767 x 244 pixels.
#Junno Organic: You should cut background images with size 1920 x 720 pixels.
#Junno Organic Mobile layout: You should cut background images with size 767 x 288 pixels.
#Junno Cosmetic: You should cut background images with size 1920 x 610 pixels.
#Junno Cosmetic Mobile layout: You should cut background images with size 767 x 244 pixels.
How To Change Slider Dimensions
- Login your opencart admin
- Go to PlazaThemes Dashboard -> Modules -> Plaza Slider - Home slideshow 1 (sub module of Plaza Slider in each theme) -> Click Edit button
-
We got:
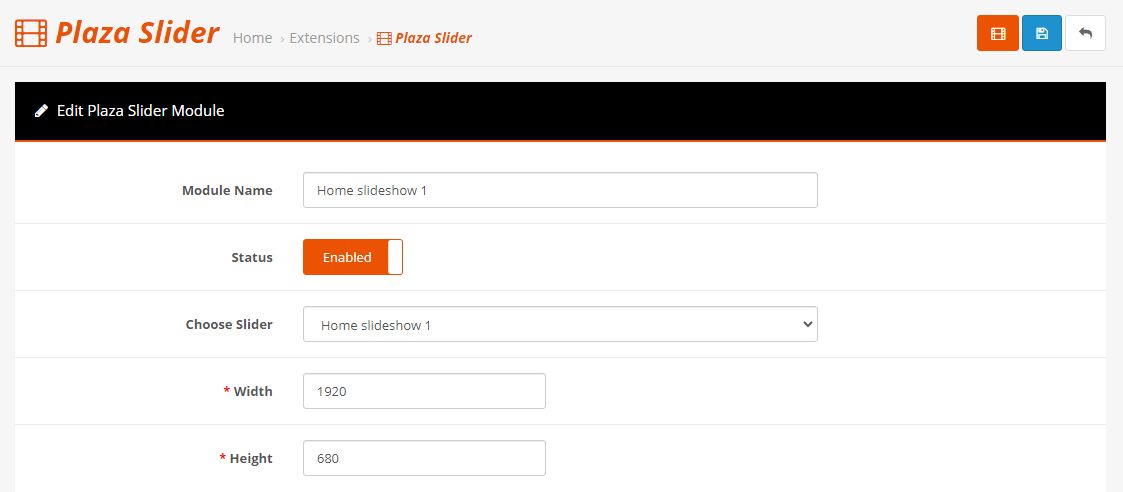
Configure parameters as below:
Module Name - Input name of sub Plaza Slider
Status - Set Enabled to show the Plaza Slider show module.
Choose Slider - Choose the slide show you want to use
Width - Set width of slide show
Height - Set height of slide show
-> Click Save to save this sub module
=> To customize this module, please modify this file : catalog\view\theme\[name_theme]\template\plaza\module\ptslider.twig
Config Plaza Special Categories
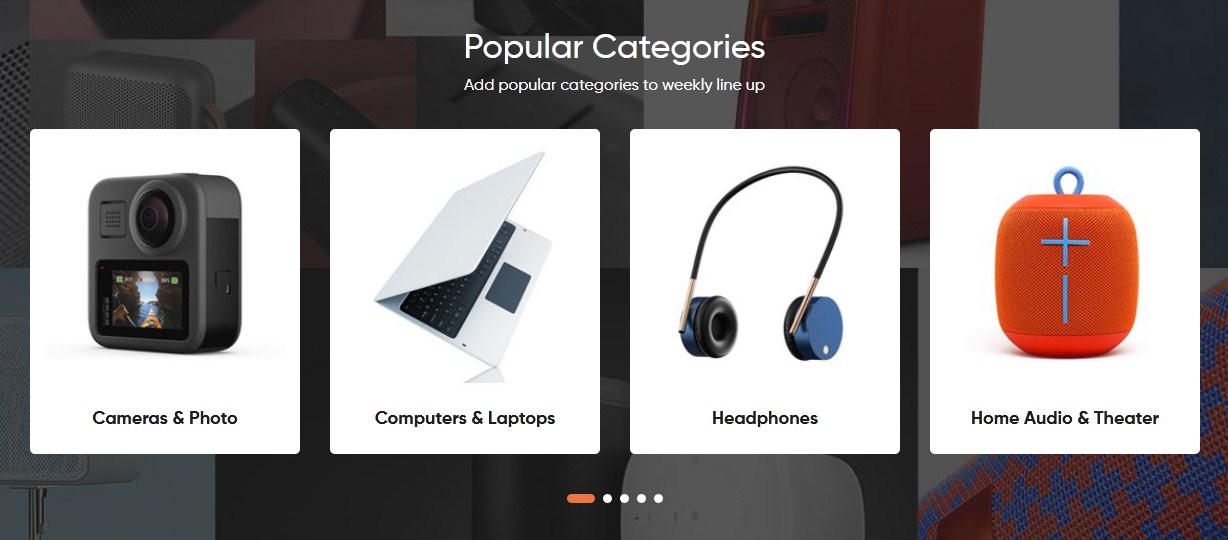
***This module show featured categories with their thumbnail images.
Login your opencart admin
-
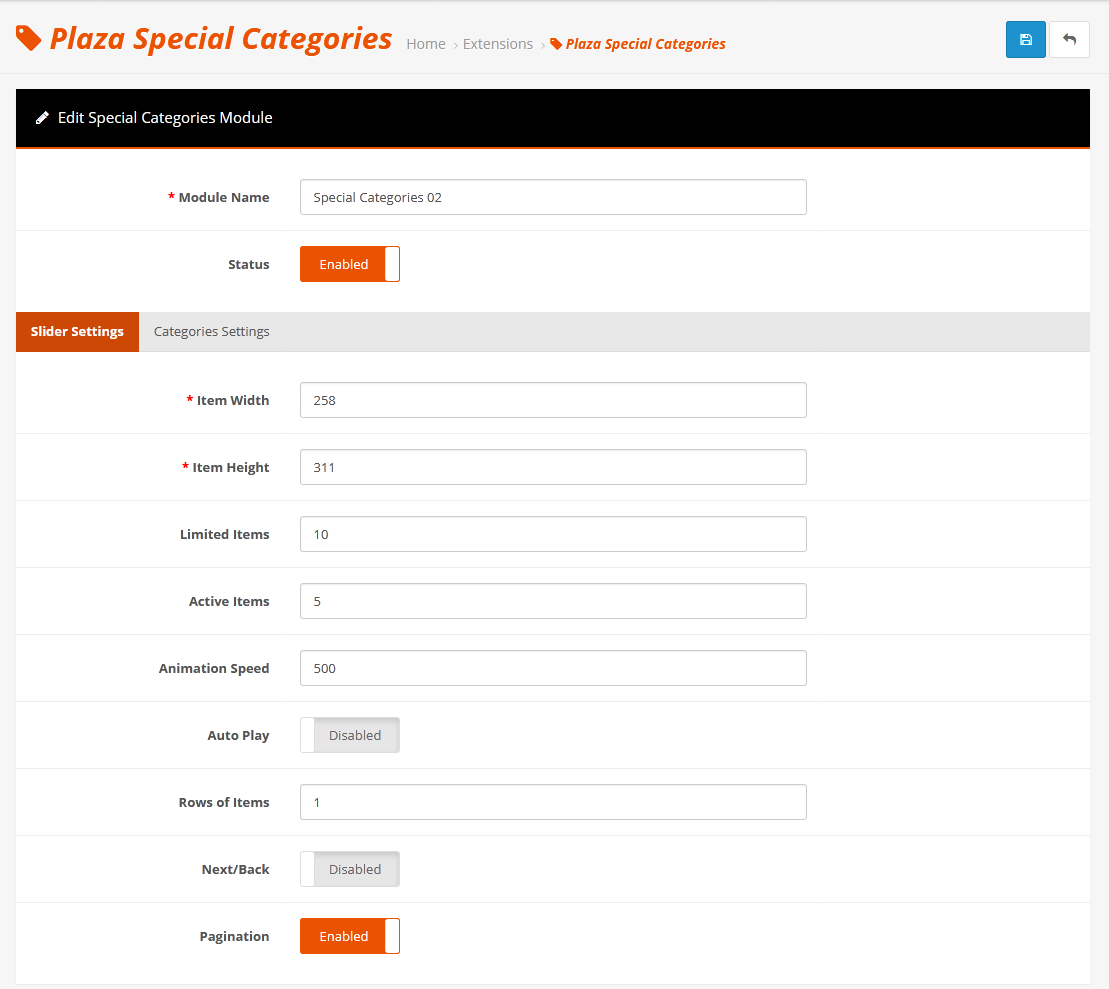
Go to PlazaThemesDashboard -> Modules -> Plaza Special Categories - Special Categories 02 (sub module of Plaza Special Categories in each theme) -> Click Edit button
-
We got :
 then config according to you.
Configure parameters as below:
Slider Settings tab - This section contains the basic settings for your Mega Menu theme.
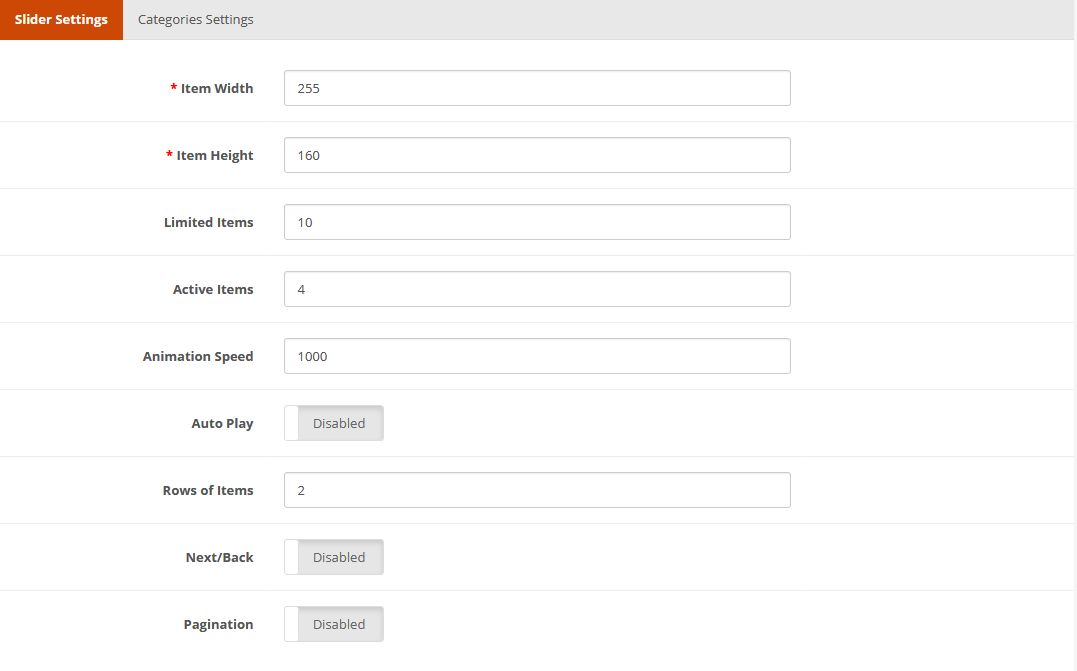
Item Width - Set width of thumnail image.
Item Height - Set height of thumbnail image
Limited Items - Number of items will be allowed.
Active Items - Set number of item will be displayed on homepage
Animation Speed - Set a variable speed per slide (milliseconds)
Auto Play - Enable / Disable auto play slider
Rows of Items - Set number of row will be displayed for each devices
Next/Back - Enable / Disable next/back button
Pagination - Enable / Disable pagination
Categories Settings tab - If you want to display the mega menu items on mobile devices, you need to configure a few things.
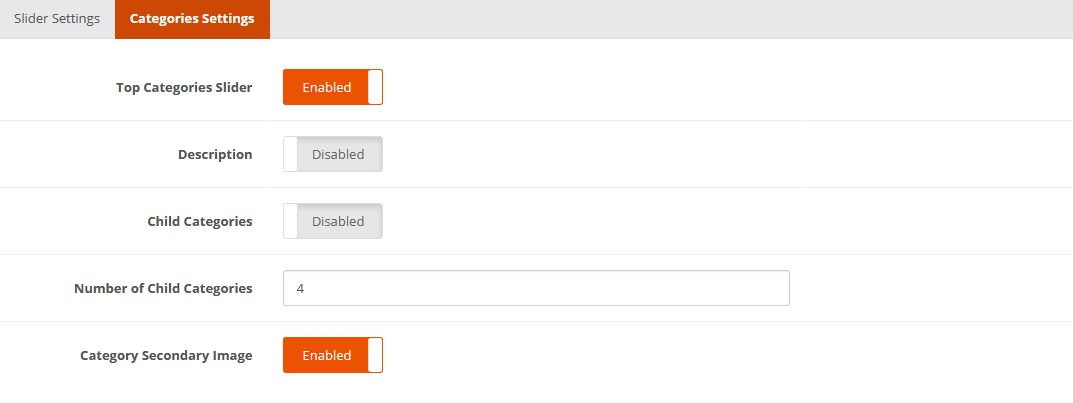
Top Categories Slider - Enable / Disable slider
Description - Show / Hide category's description
Child Categories - Show / Hide children category
Number of Child Categories - Number of children category will be allowed.
Category Secondary Image - Enable / Disable thumbnail images.
=> To customize this module, please modify this file : catalog\view\theme\[name_theme]\template\plaza\module\ptfeaturedcate.twig
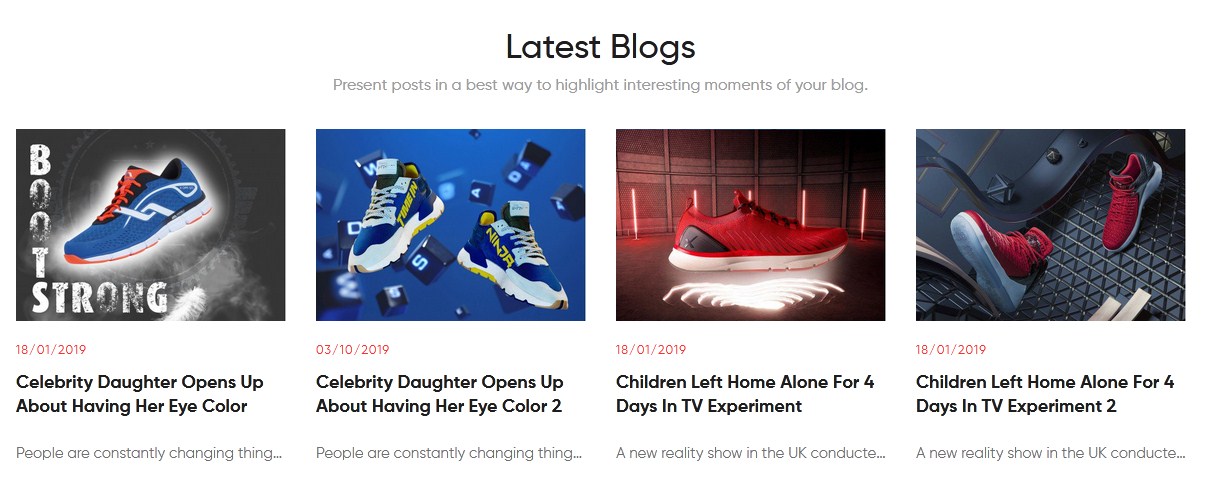
Plaza Blog
You can configure blog posts, category and the Blog has SEO optimization.
* How to config this module
Login your opencart admin
Go to PlazaThemesDashboard -> Modules -> Plaza Blog - Blog 1 -> Click Edit
-
We got :

Configure some parameters as below:
Module Name - Input name of sub module of Plaza Blog
Status - Set Enabled to use this sub module.
Post List - Choose list of posts you want to show in this sub module.
Width - Set width of post-image on homepage
Height - Set height of image on homepage
Auto - Enable / Disable auto play slider
Items - Set number of item will be displayed for each devices
Speed - Set a variable speed per slide (milliseconds)
Rows - Set number of row will be displayed for each devices
Navigation - Enable / Disable navigation
Pagination - Enable / Disable pagination
=> To customize this module, please modify these files :
- catalog\view\theme\[name_theme]\template\plaza\blog\category.twig
- catalog\view\theme\[name_theme]\template\plaza\blog\list.twig
- catalog\view\theme\[name_theme]\template\plaza\blog\post.twig
- catalog\view\theme\[name_theme]\template\plaza\blog\widget\cate_list.twig
- catalog\view\theme\[name_theme]\template\plaza\blog\widget\latest_blog.twig
Config Plaza Newsletter

Login your opencart admin
-
Go to PlazaThemesDashboard -> Modules -> Plaza Newsletter - Newsletter Subscribe, Plaza Newsletter - Newsletter Popup -> Edit
-
We got :
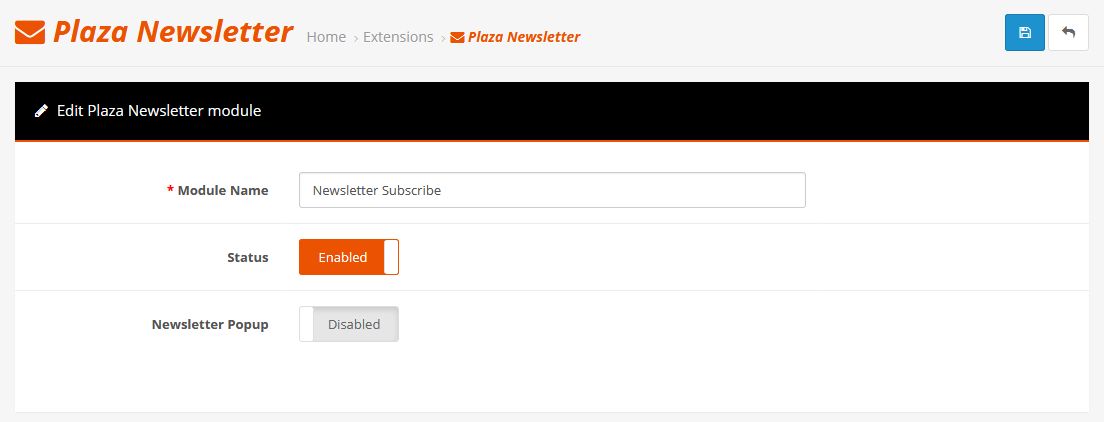
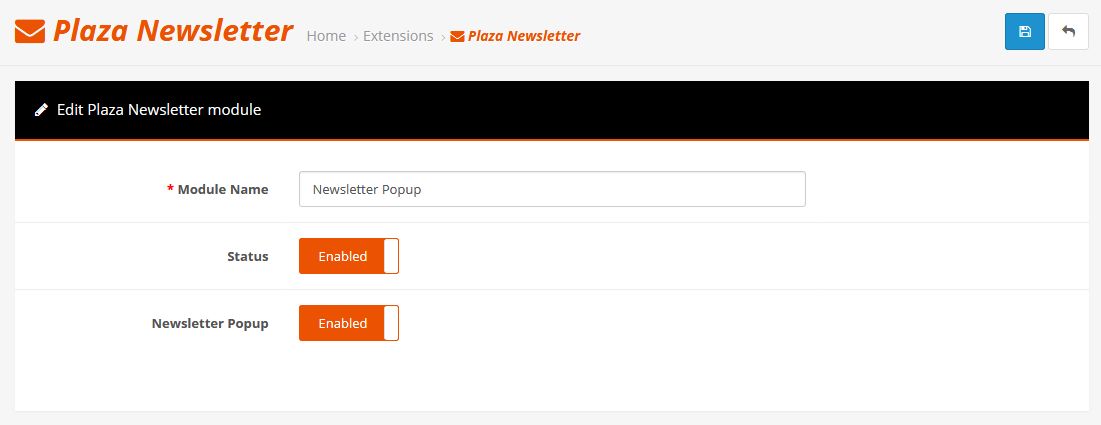
Config some parameters as below :
-
Name Module - Input name of sub module of sub Plaza Newsletter
-
Status - Set Enabled to use this sub module
-
Newsletter Popup - Set Enabled to set sub module as Newsletter popup, set Disabled if you don't want.
-
=> To customize this module, please modify this file: catalog\view\theme\[name_theme]\template\plaza\module\ptnewsletter.twig
Plaza Quick Login
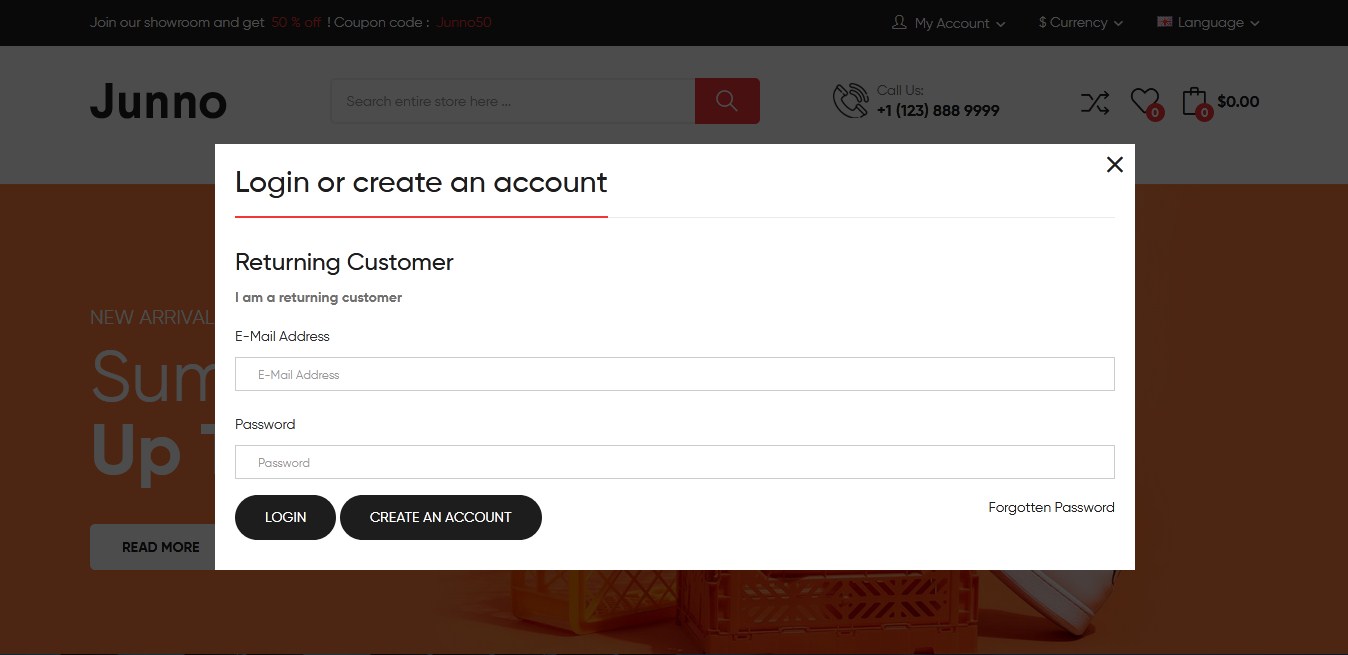
How to config this module
Login your opencart admin
-
Go to PlazaThemesDashboard -> Modules -> Plaza Quick Login -> Edit
-
We got :
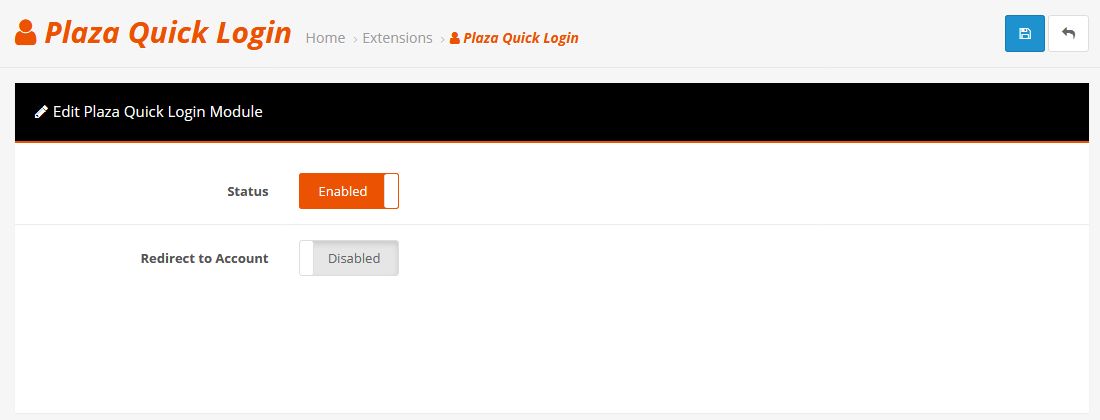
Config some parameters as below :
-
Status - Set Enabled to use this sub module
-
Redirect to Account - Set Enabled to redirect users after successful login.
-
=> To customize this module, please modify these files :
- catalog\view\theme\[name_theme]\template\plaza\quicklogin\login.twig
- catalog\view\theme\[name_theme]\template\plaza\quicklogin\register.twig
- catalog\view\theme\[name_theme]\template\plaza\quicklogin\success.twig
Plaza Ajax Search
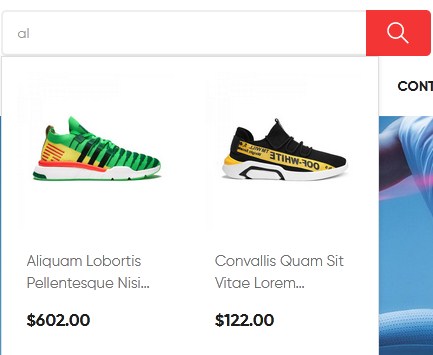
How to config this module
Login your opencart admin
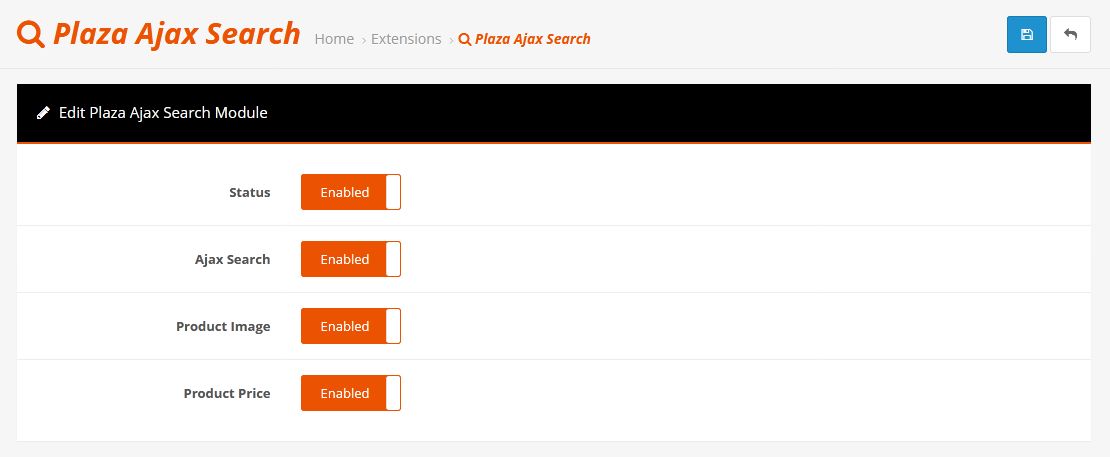
Go to PlazaThemesDashboard -> Modules -> Plaza Ajax Search -> Edit
-
We got :
Config some parameters as below :
-
Status - Set Enabled to use Plaza Ajax Search module
-
Ajax Search - Set Enabled to show ajax search
-
Product Image - Set Enabled to display product image
-
Product Price - Set Enabled to show price for the products
-
=> To customize this module, please modify these files :
- catalog\view\theme\[name_theme]\template\plaza\search\ocajaxlogin\ajaxresult.twig
- catalog\view\theme\[name_theme]\template\plaza\search\ocajaxlogin\form.twig
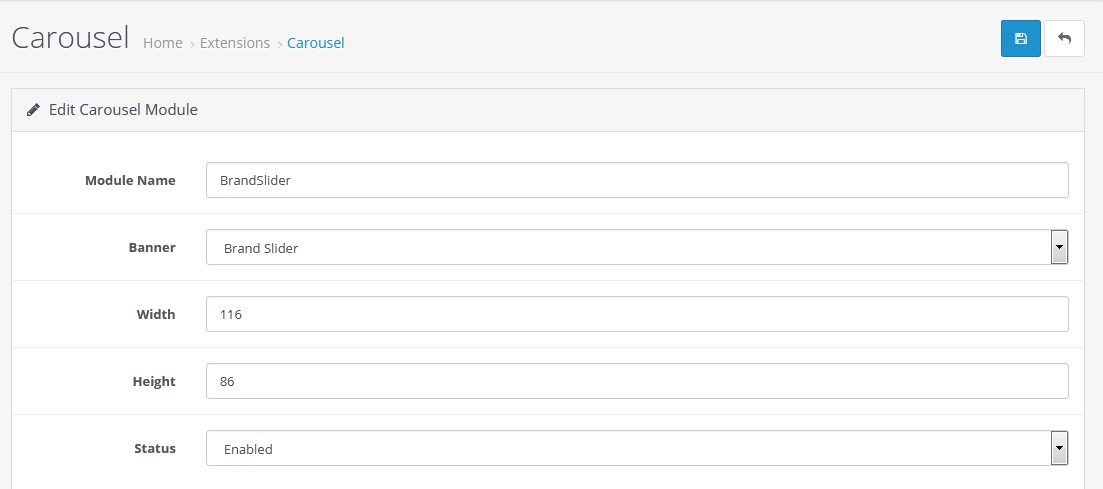
Config Carousel

***This module can show brand logos, manufacturers, branded products in slider.
1. Configuration
Login your opencart admin
Go to Extensions -> Extensions -> Choose the extension type -> Modules -> Carousel - BrandSlider -> Edit button
-
We got :
Config some parameters as below :
Module Name - Name of sub module of Carousel
Banner - Choose banner you want to show in this module.
Status - Set Enabled to use this sub module.
Width, Height - Item size will be displayed.
2. Edit Brand Logo
Login your opencart admin
-
Go to Design -> Banners -> Manufacturers
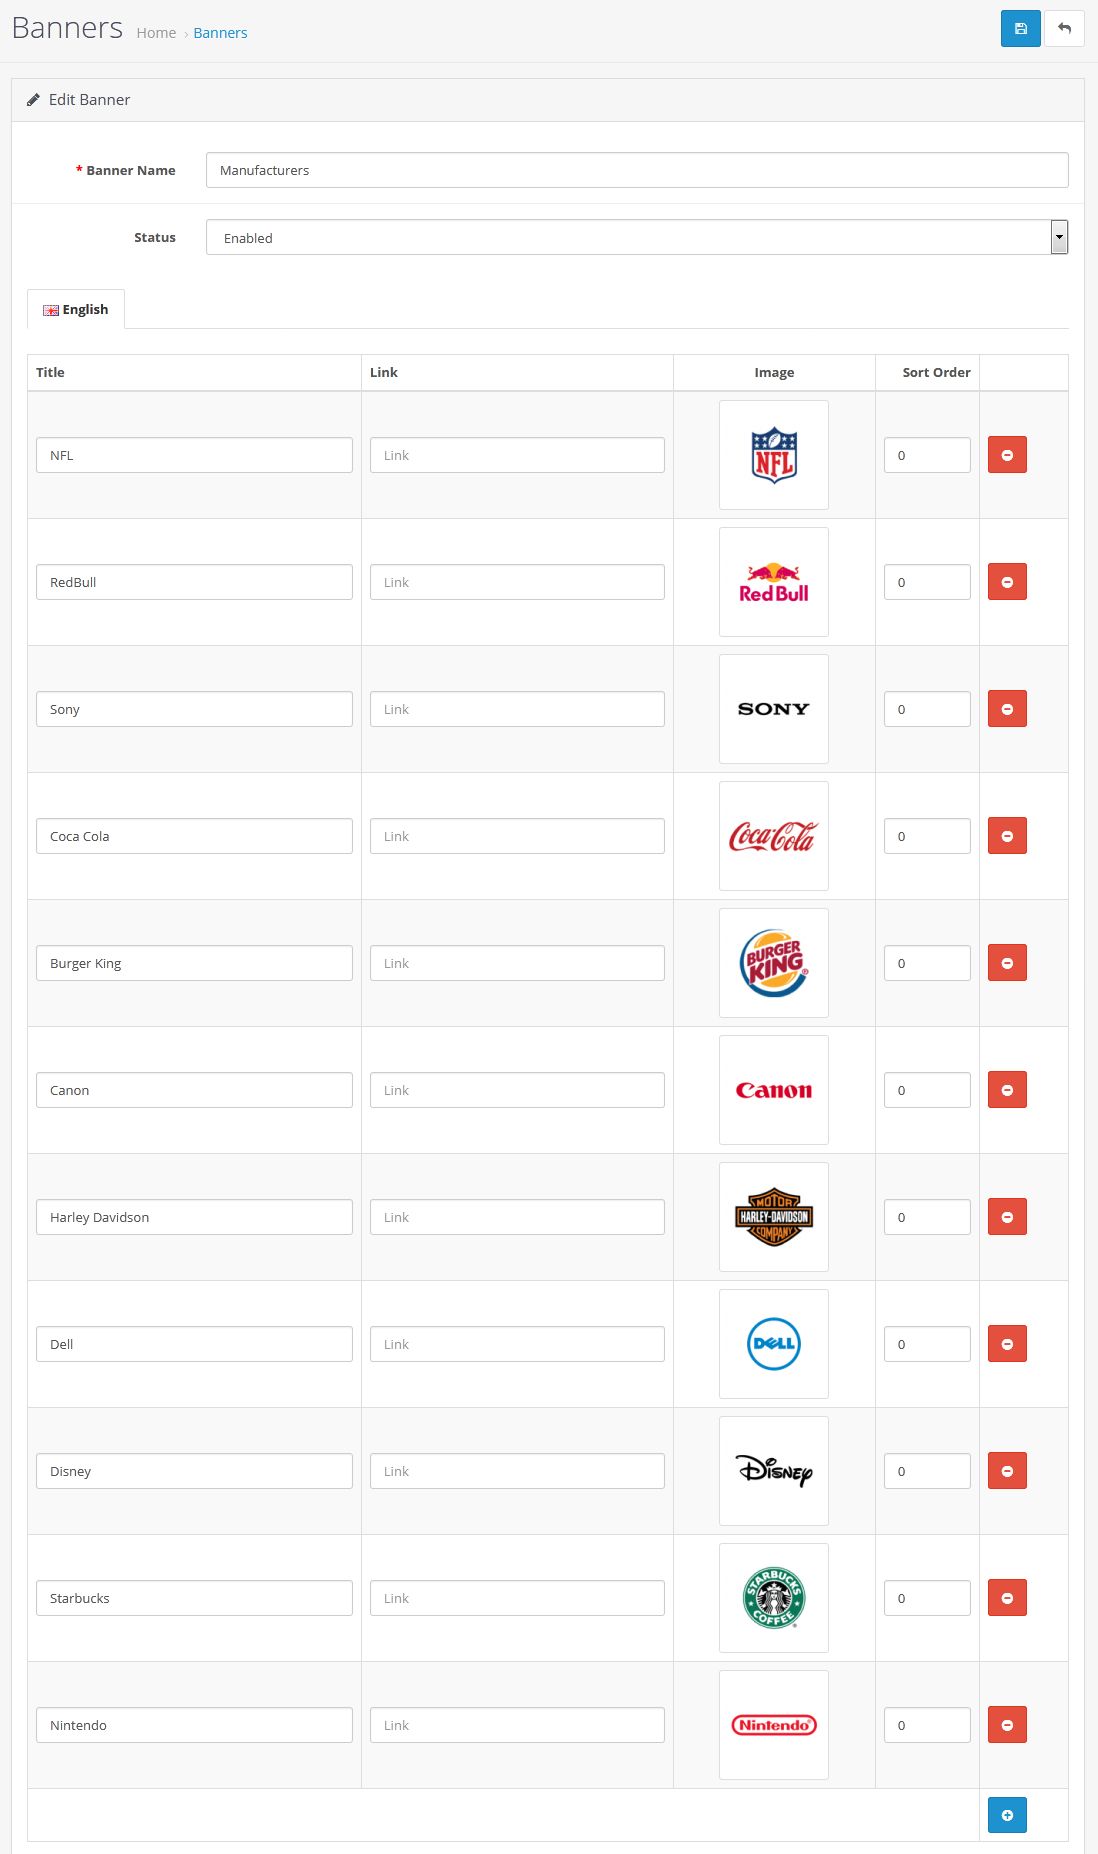
- Click Save button to save your changes.
3. To create Carousel, follow steps below:
1. Add new banner
Login your opencart admin
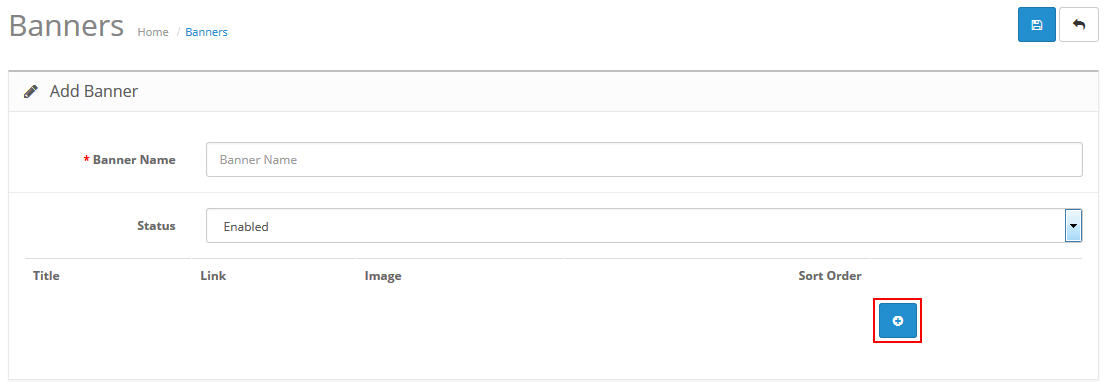
Go to Design -> Banners -> Add New
-
Type banner name, then click Add Banner
-
Type title, link, upload image
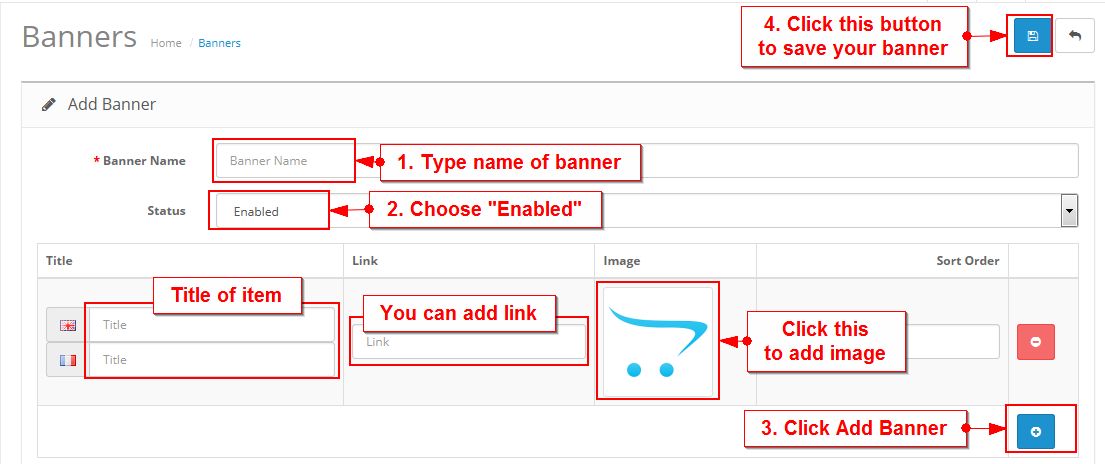
You can add many banners.
2. Create sub Carousel
Login your opencart admin
-
Go to Extensions -> Extensions -> Choose the extension type -> Modules -> Carousel
-
We got :
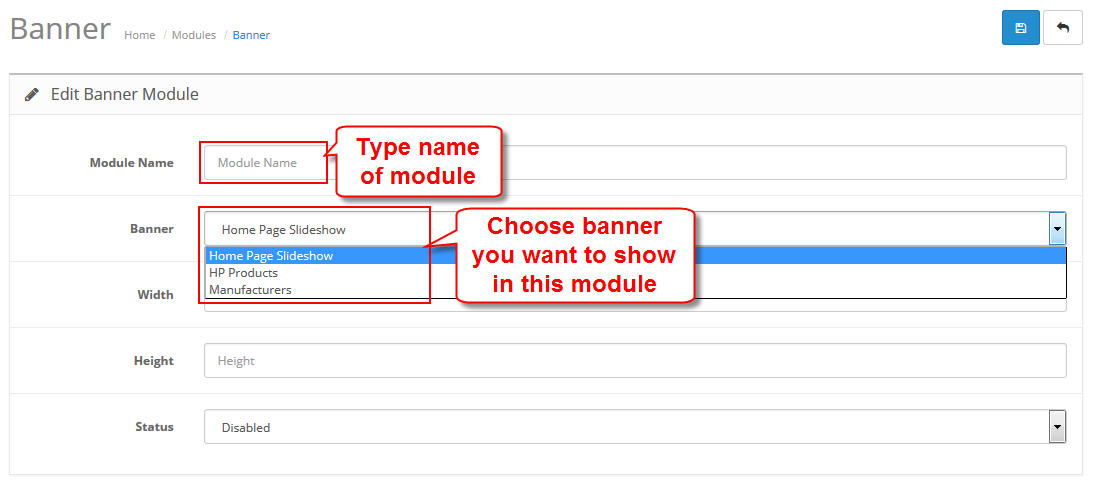
Configure some parameters as below:
Module Name - Input name of sub Carousel.
Banner - Choose banner you've created which you want to show.
-
Status - Set Enabled to use this sub module.
-
Width, Height - Item size will be displayed.
- Click Save button to save your changes.
=> To customize this module, please modify this file : catalog\view\theme\your_theme\template\extension\module\carousel.twig
Translation
1. Translate module title name or text in the php file
OpenCart uses a language fallback to english by default. If you want to add support for your language, you will simply need to make a copy of the language file and put it into your language folder. You can simply follow these steps.
-
First locate the language file that comes with the mod. The language files should be found at:
- admin/language/en-gb/[custom_folder]/[custom_file].php
- catalog/language/en-gb/[custom_folder]/[custom_file].php
-
Make a copy of the folder en-gb and rename it to language you want to translate. In folder you've made ([your_language]), rename en-gb.php to [your_language]. The result should look something like this:
- admin/language/[your_language]/[custom_folder]/[custom_file].php
- catalog/language/[your_language]/[custom_folder]/[custom_file].php
-
Now, you should access every file in these two folders and translate the English text to your preference. A single English language entry looks like this:
$_['text_link_button'] = 'Read more';You will need to translate the right-side only of the file. For example, if we were to translate this to french it would become: ( Do the same with other languages. )
$_['heading_title'] = 'Lire la suite';Note: Some language entries contain special HTML or wildcard characters like <strong>http://</strong>,
%s,<b></b>and others. Don't need to change these special words and translate only the text within these entries.
2. Translate title other modules
-
Login your opencart admin
Go to PlazaThemes Dashboard -> Modules
Find modules you want to config -> Edit -> Config according to you.
-
At Module Title : At your language, enter title of module
-
At Module Description : Choose your language, enter a short description of the product under the heading title
-
Click Save to save your change
Example: Translate title " Our Products" at #Junno 1 (Shoes) to the French language
-
Login your opencart admin
-
Go to PlazaThemes Dashboard -> Modules -> Plaza Products - Our Products 1
-
At Module Title : Choose tab 'French', enter title of module
-
At Module Description : Choose tab 'French', enter a short description of the product under the heading title
-
Click Save to save your change
Theme Support
Support Working time: Monday - Friday
Estimated ticket and answers review time: 1-3 business days.
We have hundreds of questions and provide answers asap, but this can take up to 3 days after your submitted request. Please be patient and wait for answer.
Contact us whenever you need: PlazaThemes Support